FUEL INJECTION SYSTEM
8-37
EAS30610
DIAGNOSTIC MODE
Setting the diagnostic mode
1. Turn the main switch to “OFF”.
2. Disconnect the wire harness coupler from the fuel pump.
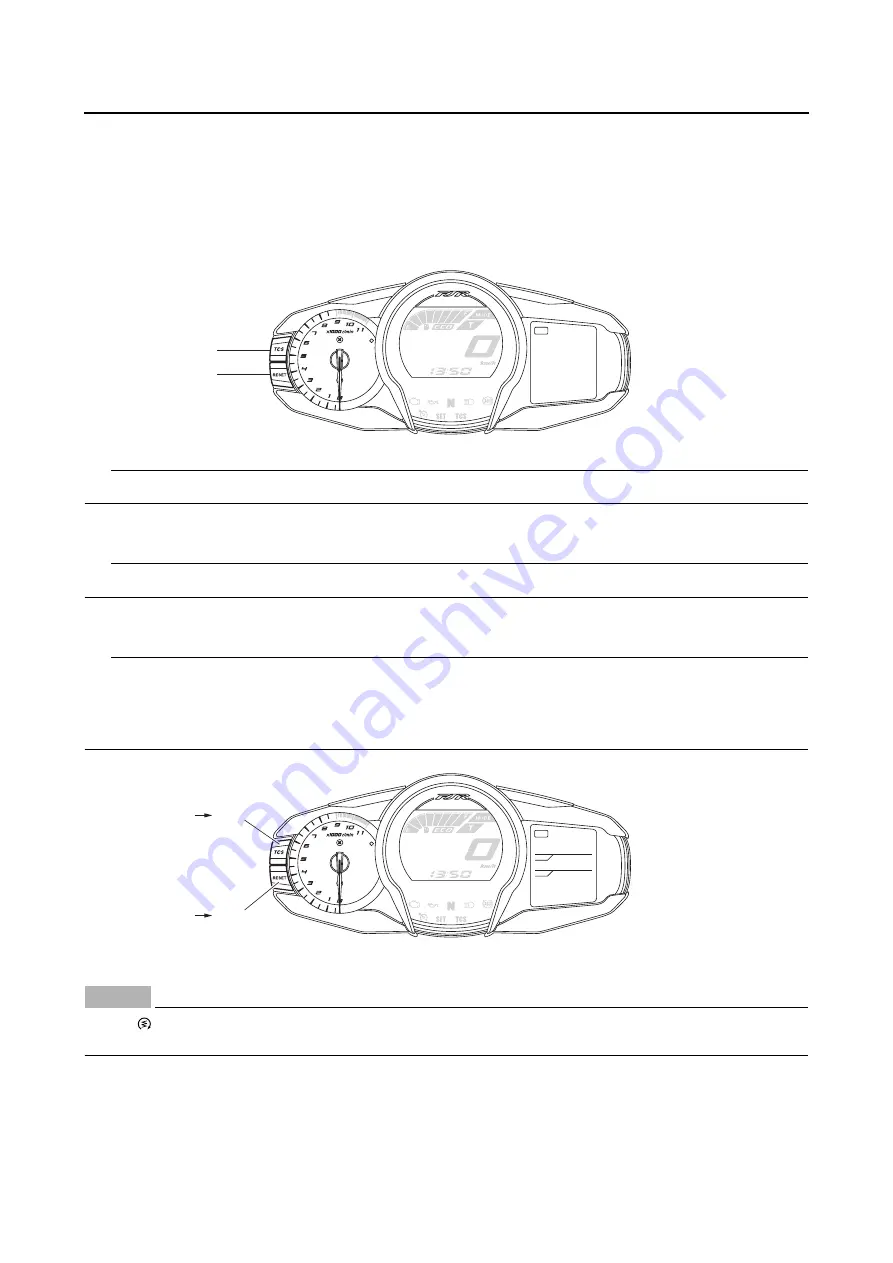
3. Simultaneously press and hold the “TCS” button “1” and “RESET” button “2”, turn the main switch
to “ON”, and continue to press the buttons for 8 seconds or more.
TIP
All displays on the multi-function meter right display disappear and “DIAG” appears.
4. Simultaneously press the “TCS” button and “RESET” button for 2 seconds or more to set the diag-
nostic mode.
TIP
Diagnostic code number “01” appears on the multi-function meter right display.
5. Select the diagnostic code number corresponding to the fault code number by pressing the “TCS”
button and “RESET” button.
TIP
• To decrease the selected diagnostic code number, press the “RESET” button. Press the “RESET”
button for 1 second or more to automatically decrease the diagnostic code numbers.
• To increase the selected diagnostic code number, press the “TCS” button. Press the “TCS” button for
1 second or more to automatically increase the diagnostic code numbers.
6. Shift the transmission into gear and extend the sidestand.
NOTICE
ECA1MC1027
If the “
” side of the start/engine stop switch is pushed without performing step 6, the starter
motor gears or other parts may be damaged.
7. Check the operation of the sensor or actuator.
• Sensor operation
The data representing the operating conditions of the sensor appears on the multi-function meter
right display.
DIAG
1
2
01
15
DIAG
DIAG
DATA
“
01” “83”
“
83” “01”
Summary of Contents for FJR1300A(D)
Page 1: ...2013 SERVICE MANUAL FJR1300A D 1MC 28197 E0 ...
Page 6: ......
Page 8: ......
Page 70: ...SPECIAL TOOLS 1 61 ...
Page 101: ...LUBRICATION POINTS AND LUBRICANT TYPES 2 30 ...
Page 104: ...LUBRICATION SYSTEM CHART AND DIAGRAMS 2 33 EAS20410 LUBRICATION DIAGRAMS 5 6 7 1 2 3 4 ...
Page 106: ...LUBRICATION SYSTEM CHART AND DIAGRAMS 2 35 1 3 2 ...
Page 107: ...LUBRICATION SYSTEM CHART AND DIAGRAMS 2 36 1 Main axle 2 Drive axle 3 Oil delivery pipe 1 ...
Page 108: ...LUBRICATION SYSTEM CHART AND DIAGRAMS 2 37 6 5 4 3 2 1 ...
Page 110: ...LUBRICATION SYSTEM CHART AND DIAGRAMS 2 39 1 2 3 4 5 6 7 8 9 ...
Page 112: ...LUBRICATION SYSTEM CHART AND DIAGRAMS 2 41 4 5 3 2 1 9 8 6 7 ...
Page 116: ...COOLING SYSTEM DIAGRAMS 2 45 7 1 2 3 4 5 5 8 9 6 8 9 10 11 12 ...
Page 124: ...CABLE ROUTING 2 53 Horn and radiator left side view A B 1 1 2 3 4 5 5 6 C 7 7 8 ...
Page 132: ...CABLE ROUTING 2 61 Rear fender top view 1 2 3 B C A B ...
Page 138: ...CABLE ROUTING 2 67 ...
Page 141: ......
Page 377: ...MIDDLE GEAR 5 76 Middle driven pinion gear shim Thickness mm 0 10 0 15 0 20 0 30 0 40 0 50 ...
Page 428: ...WATER PUMP 6 15 ...
Page 455: ...IGNITION SYSTEM 8 6 ...
Page 461: ...ELECTRIC STARTING SYSTEM 8 12 ...
Page 465: ...CHARGING SYSTEM 8 16 ...
Page 477: ...SIGNALING SYSTEM 8 28 ...
Page 533: ...FUEL INJECTION SYSTEM 8 84 ...
Page 551: ...CRUISE CONTROL SYSTEM 8 102 ...
Page 555: ...FUEL PUMP SYSTEM 8 106 ...
Page 563: ...ACCESSORY BOX SYSTEM 8 114 ...
Page 573: ...IMMOBILIZER SYSTEM 8 124 ...
Page 577: ...ABS ANTI LOCK BRAKE SYSTEM 8 128 ...
Page 616: ...ELECTRICAL COMPONENTS 8 167 7 1 3 2 18 21 20 19 9 11 12 13 14 15 16 17 6 8 4 5 10 ...
Page 658: ......
Page 659: ......
Page 660: ......


