4
Replacement
4-26
6
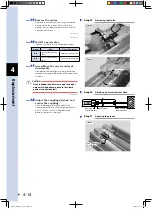
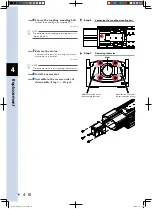
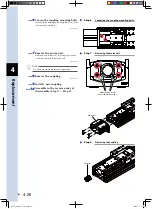
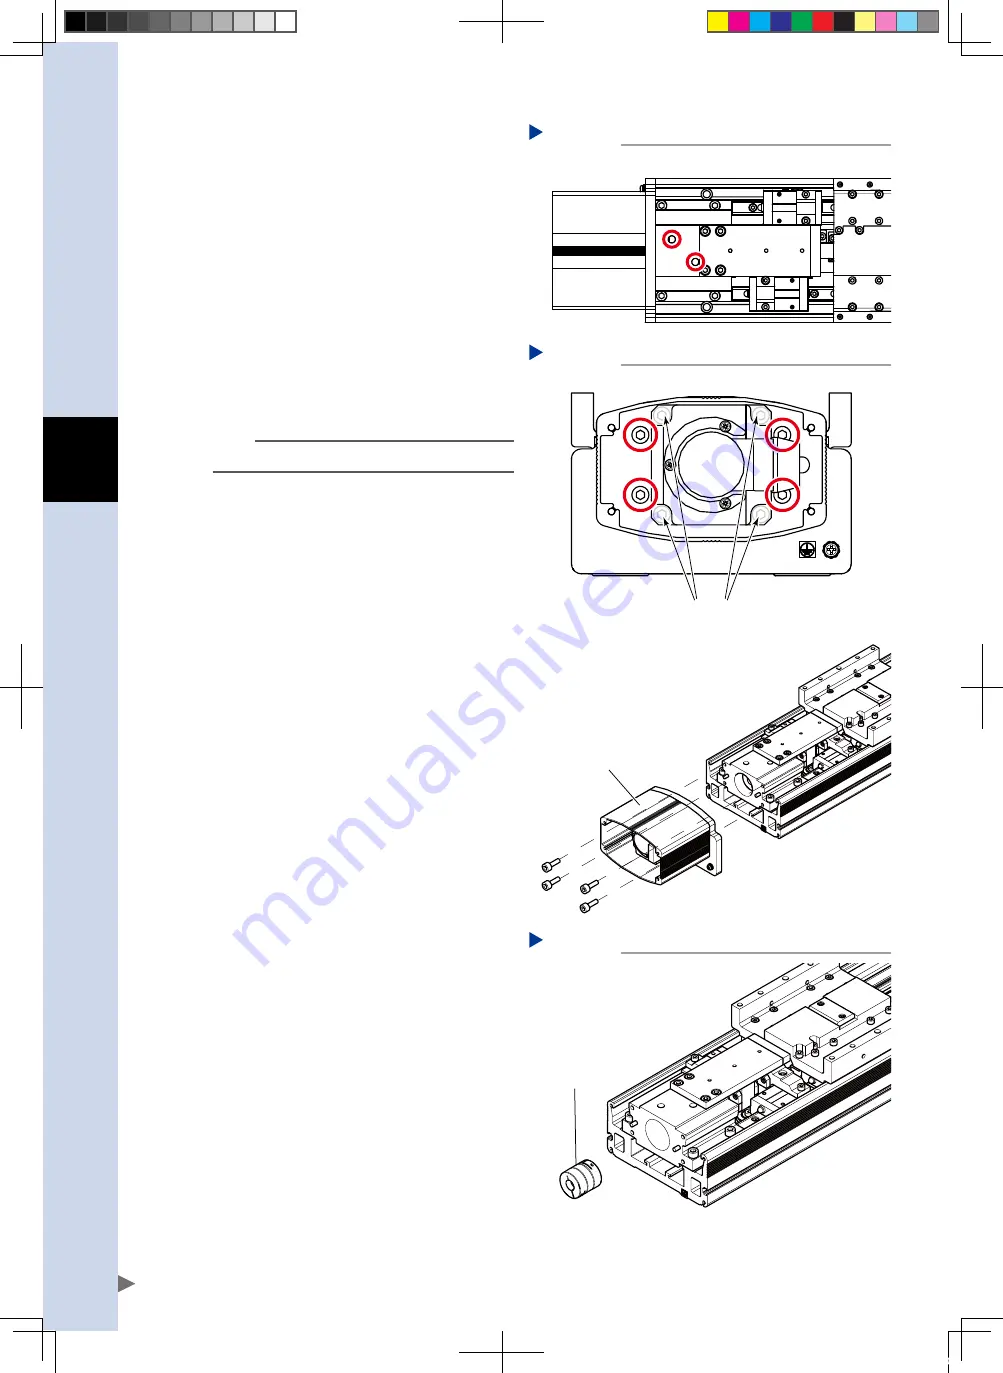
Loosen the coupling mounting bolts.
Loosen the coupling mounting bolts (2). (Do
not remove the bolts.)
53409-AN-00
Loosening the coupling mounting bolts
Step 6
7
Remove the motor unit.
Remove the screws (4) securing the motor
unit and remove the motor unit.
Removing the motor unit
Step 7
Motor securing screws
(Do not remove the screws.)
Motor unit
53405-AN-00
n
NOTE
Do not remove the motor securing screws.
8
Remove the coupling.
53406-AN-00
9
Install a new coupling.
0
Assemble in the reverse order of
disassembly (Step 8
→
Step 4).
Removing the coupling
Step 8
Coupling
FLIP-X_maint_E_V1.50.indb 26
18/05/15 15:01
Summary of Contents for FLIP-X Series
Page 2: ...FLIP X_maint_E_V1 50 indb 2 18 05 15 15 00...
Page 40: ...FLIP X_maint_E_V1 50 indb 2 18 05 15 15 01...
Page 41: ...Chapter 1 Overview Contents 1 Overview 1 1 FLIP X_maint_E_V1 50 indb 1 18 05 15 15 01...
Page 42: ...FLIP X_maint_E_V1 50 indb 2 18 05 15 15 01...
Page 44: ...FLIP X_maint_E_V1 50 indb 2 18 05 15 15 01...
Page 46: ...FLIP X_maint_E_V1 50 indb 2 18 05 15 15 01...
Page 60: ...FLIP X_maint_E_V1 50 indb 2 18 05 15 15 01...
Page 72: ...FLIP X_maint_E_V1 50 indb 12 18 05 15 15 01...
Page 74: ...FLIP X_maint_E_V1 50 indb 2 18 05 15 15 01...
Page 104: ...FLIP X_maint_E_V1 50 indb 2 18 05 15 15 01...

