4
Replacement
4-13
q
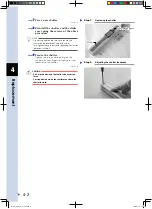
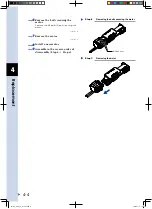
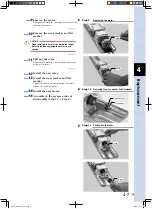
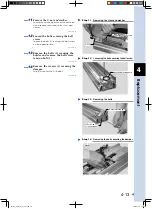
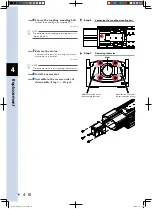
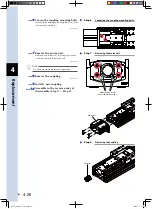
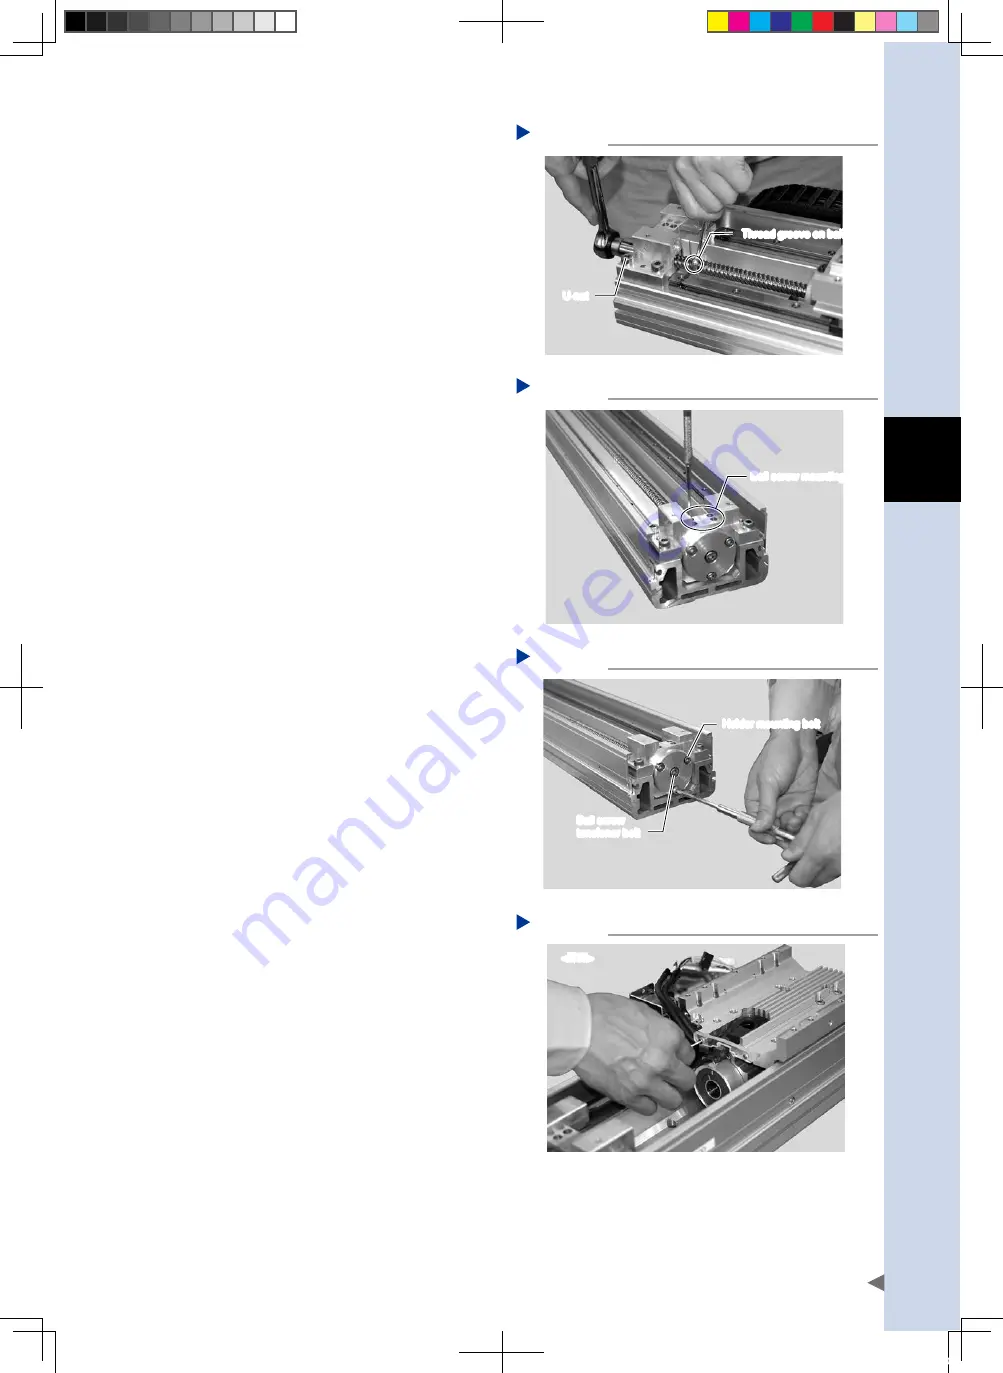
Remove the U-nut and washer.
Secure the notched portion of the ball screw
with a spanner and remove the U-nut and
washer.
Removing the U-nut and washer
Step 11
Thread groove on ball screw
U-nut
53406-AA-00
w
Loosen the bolts securing the ball
screw.
Loosen the bolts (4) securing the ball screw
on the opposite side.
Loosening the bolts securing the ball screw
Step 12
Ball screw mounting bolts
53407-AA-00
e
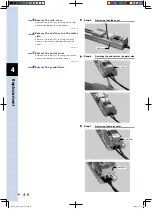
Remove the bolts (3) securing the
holder and remove the ball screw
tension bolt (1).
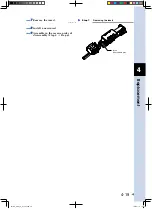
Removing the bolts
Step 13
Holder mounting bolt
Ball screw
tensioner bolt
53408-AA-00
r
Remove the screws (2) securing the
damper.
Skip this Step for the N18 robot.
Removing the bolts securing the damper
Step 14
<N15>
53409-AA-00
FLIP-X_maint_E_V1.50.indb 13
18/05/15 15:01
Summary of Contents for FLIP-X Series
Page 2: ...FLIP X_maint_E_V1 50 indb 2 18 05 15 15 00...
Page 40: ...FLIP X_maint_E_V1 50 indb 2 18 05 15 15 01...
Page 41: ...Chapter 1 Overview Contents 1 Overview 1 1 FLIP X_maint_E_V1 50 indb 1 18 05 15 15 01...
Page 42: ...FLIP X_maint_E_V1 50 indb 2 18 05 15 15 01...
Page 44: ...FLIP X_maint_E_V1 50 indb 2 18 05 15 15 01...
Page 46: ...FLIP X_maint_E_V1 50 indb 2 18 05 15 15 01...
Page 60: ...FLIP X_maint_E_V1 50 indb 2 18 05 15 15 01...
Page 72: ...FLIP X_maint_E_V1 50 indb 12 18 05 15 15 01...
Page 74: ...FLIP X_maint_E_V1 50 indb 2 18 05 15 15 01...
Page 104: ...FLIP X_maint_E_V1 50 indb 2 18 05 15 15 01...

