background image

Operation and handling requirements

60

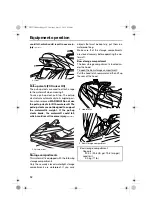
fuel filler cap and the hood are securely
closed before using the watercraft.

(11) Securely install the seats in their original

positions.

EJU40291

Engine oil requirements

EJU41513

Engine oil

NOTICE

ECJ00282

Use only 4-stroke engine oil. Usage of 2-
stroke engine oil could result in severe en-
gine damage.

TIP:

When the engine is operated at high speeds,
some engine oil may be consumed. Be sure
to check the engine oil level.

Checking the engine oil level

WARNING

EWJ00341

Engine oil is extremely hot immediately af-
ter the engine is turned off. Coming in con-
tact with or getting any engine oil on your
clothes could result in burns.

NOTICE

ECJ01002

Make sure that debris and water do not
enter the oil filler hole. Debris and water in
the engine oil can cause serious engine
damage.

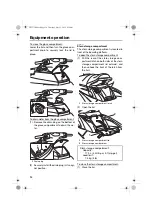
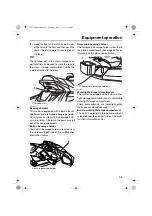
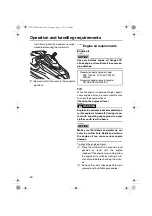
To check the engine oil level:
(1) Place the watercraft in a precisely level

position on land with the engine
stopped. If the engine was running, allow
the engine oil to settle by waiting 5 min-
utes or more before checking the oil lev-
el.

(2) Remove the seats. (See page 49 for seat

removal and installation procedures.)

Recommended engine oil type:

SAE 10W-30, 10W-40, 20W-40, 
20W-50

Recommended engine oil grade:

API SE,SF,SG,SH,SJ,SL

UF2T75E0.book  Page 60  Thursday, May 21, 2015  9:30 AM

Summary of Contents for FX HO 2016

Page 1: ...Read this manual carefully before operating this watercraft OWNER S OPERATOR S MANUAL 2016 WaveRunner FX HO FX Cruiser HO F2T F8199 75 E0 UF2T75E0 book Page 1 Thursday May 21 2015 9 30 AM...

Page 2: ...Read this manual carefully before operating this watercraft This manual should stay with the WaveRunner if it is sold UF2T75E0 book Page 1 Thursday May 21 2015 9 30 AM...

Page 3: ...B D B E B E B F B F G G G H H H Engine Type PWC engine Combustion cycle 4 stroke Fuel Type Petrol ESSENTIAL REQUIREMENTS IDENTIFICATION OF ENGINE COVERED BY THIS DECLARATION OF CONFORMITY Name of eng...

Page 4: ...potential personal injury haz ards Obey all safety messages that follow this symbol to avoid possible injury or death WARNING EWJ00072 A WARNING indicates a hazardous situa tion which if not avoided...

Page 5: ...witch 28 Throttle lever 29 RiDE lever 29 Steering system 29 Adjustable tilt steering system 30 Cooling water pilot outlet 31 Water separator 31 Watercraft operation 32 Watercraft operation functions 3...

Page 6: ...nd docking the watercraft 86 Operating in weeded areas 86 After removing the watercraft from the water 87 Care and storage 88 Post operation care 88 Flushing the cooling water passages 88 Cleaning the...

Page 7: ...dures and page 55 for information on the removable watertight storage compartment MODEL FB1800 R FX HO FB1800A R FX Cruiser HO EJU36551 Craft Identification Number CIN The CIN is stamped on a plate at...

Page 8: ...formation is given on the build er s plate affixed on the craft A full explana tion of this information is given in the relevant sections of this manual Design category of this personal water craft C...

Page 9: ...ave height is the mean height of the highest one third of the waves which approximately corresponds to the wave height estimated by an experienced observer However some waves will be dou ble this heig...

Page 10: ...t labels 4 EJU30453 Important labels Read the following labels before using this watercraft If have any questions consult a Yamaha dealer 13 1 11 7 6 10 2 8 4 12 9 5 3 14 UF2T75E0 book Page 4 Thursday...

Page 11: ...ral and important labels 5 EJU35914 Warning labels If any of these labels are damaged or missing contact a Yamaha dealer for replacements F1B U41B1 21 1 2 UF2T75E0 book Page 5 Thursday May 21 2015 9 3...

Page 12: ...General and important labels 6 F1B U41B1 31 F2S U41B1 30 F0M U41B2 11 3 4 UF2T75E0 book Page 6 Thursday May 21 2015 9 30 AM...

Page 13: ...General and important labels 7 F1S U415B 11 F1B U415B 11 F1S U41E1 11 F2S U41E1 10 F1S U41E1 11 F2S U41E1 10 5 6 7 UF2T75E0 book Page 7 Thursday May 21 2015 9 30 AM...

Page 14: ...General and important labels 8 F0V U41DB 12 GP8 U416H 01 8 9 UF2T75E0 book Page 8 Thursday May 21 2015 9 30 AM...

Page 15: ...General and important labels 9 EJU36262 Other labels F1B U41F5 21 F1S U41E1 11 F2S U41E1 10 10 11 12 UF2T75E0 book Page 9 Thursday May 21 2015 9 30 AM...

Page 16: ...he following label indicates the correct direction to upright a capsized watercraft The following CE marking is located on the back of the remote control transmitter F1G U418F 00 13 UF2T75E0 book Page...

Page 17: ...have read this own er s operator s manual the Riding Practice Guide the Riding Instruction card and all labels EJU30742 Limitations on who may operate the watercraft Yamaha recommends a minimum opera...

Page 18: ...e it hard for oth ers to avoid you or understand where you are going Avoid areas with submerged objects or shallow water Do not release the throttle lever when trying to steer away from objects you ne...

Page 19: ...falling into the water or being near the jet thrust nozzle Normal swimwear does not adequately protect against forceful water entry into the rectum or vagina All riders must wear a wetsuit bottom or c...

Page 20: ...peti tion follow the helmet requirements of the sanctioning organization Never operate the watercraft after consum ing alcohol or taking other drugs For reasons of safety and proper care of the waterc...

Page 21: ...rules and be sure to check behind you before making a turn or slowing down See Safe boating rules on page 19 EJU30841 Recommended equipment The following items should be carried on board your watercra...

Page 22: ...e This model is equipped with the Yamaha Engine Management System YEMS that includes an off throttle steering OTS sys tem It will activate at planing speeds should you attempt to steer the watercraft...

Page 23: ...clothing or PFD straps can become entan gled in moving parts resulting in severe in jury or drowning Never insert any object into the jet thrust nozzle while the engine is running Severe injury or de...

Page 24: ...a bright ly colored one so boat operators can see the person being pulled The wakeboarder or water skier should wear protective clothing Severe internal in juries can occur if water is forced into bod...

Page 25: ...f a standard ski rope away from any potential hazard The operators of boats and other water craft may not be aware that you are pulling a wakeboarder or water skier Together with the spotter pay atten...

Page 26: ...se is unavoidable ride slowly and obey all laws Proper maintenance is necessary to ensure that the exhaust emission and sound levels of your watercraft will continue to be within reg ulated limits You...

Page 27: ...s a wake Bow The front end of the watercraft Stern The rear end of the watercraft Starboard The right side of the watercraft when facing forward Port The left side of the watercraft when facing forwar...

Page 28: ...2 3 4 5 6 1 1 Fuel filler cap page 58 2 Hood 3 Handlebar 4 Rear seat page 49 5 Front seat page 49 6 Footwell 7 Bow eye page 51 8 Hull 9 Cooling water pilot outlet page 31 10 Pull up cleat FX Cruiser...

Page 29: ...storage compartment page 54 4 Cleat page 51 5 Handgrip page 50 6 Reboarding step page 50 7 Stern drain plug page 62 8 Reverse gate page 32 9 Jet thrust nozzle 10 Ride plate 11 Stern eye page 51 12 Spe...

Page 30: ...switch page 28 10 Engine shut off cord lanyard page 28 11 VOLT HOUR button page 40 12 SPEED RPM button page 40 13 MODE RESET button page 40 14 START STOP button page 40 15 Cruise assist up switch pag...

Page 31: ...Air filter case 3 Water separator page 31 4 Fuel tank 5 Battery page 68 6 Electrical box 7 Spark plug Ignition coil 8 Removable watertight storage compart ment page 55 9 Engine oil filler cap page 60...

Page 32: ...J00753 The remote control transmitter is not completely waterproof Do not sub merge the transmitter or operate it un derwater If the transmitter is submerged dry it with a soft dry cloth and then chec...

Page 33: ...r TIP The beeper sounds two times for the nor mal operation mode or three times for the Low RPM Mode See page 36 for Low RPM Mode activation procedures If the remote control transmitter is operated wh...

Page 34: ...by children or others EJU42323 Start switch NOTICE ECJ01311 Do not run the engine over 4000 r min on land Also do not run the engine for more than 15 seconds without supplying water otherwise the eng...

Page 35: ...is squeezed The throttle lever returns automatically to its fully closed idle position when released EJU43341 RiDE lever When the RiDE lever is squeezed the reverse gate lowers and the watercraft star...

Page 36: ...arply if you apply throttle while turning the handlebars The OTS sys tem does not function below planing speeds or when the engine is off Once the engine slows down the watercraft will no longer turn...

Page 37: ...t ed Water discharge may not be constant when the engine is running at idling speed If this occurs apply a little throttle to make sure that water discharges properly EJU40323 Water separator The wate...

Page 38: ...e lowers and de flects the water jet being discharged from the jet thrust nozzle so that the watercraft moves in reverse or is in neutral When the throttle le ver is squeezed the reverse gate rises an...

Page 39: ...d 1 Release the RiDE lever 2 Squeeze the throttle lever The reverse gate will rise completely the engine speed will increase the watercraft will start moving forward and the F for ward shift indicator...

Page 40: ...61 Electric trim system The electric trim up switch and electric trim down switch are located at the left handlebar grip and are operated to change the vertical angle of the jet thrust nozzle which ad...

Page 41: ...gate is in the neutral posi tion lightly squeeze the throttle lever so that the watercraft moves forward 2 Push the electric trim up switch or elec tric trim down switch to select the de sired trim an...

Page 42: ...e 40 for in formation on the multifunction information center TIP If the remote control transmitter is operated while the multifunction information center is in the standby state the center performs t...

Page 43: ...ctivation of the no wake mode will be con firmed by the number of beeps when the NO WAKE MODE switch is pushed and by the digital speedometer display of the multi function information center See page...

Page 44: ...ion information center TIP The beeps and the blinking digital speedom eter display also indicate the activation of the no wake mode See page 37 for information on the no wake mode To activate the crui...

Page 45: ...set engine speed will change However the adjustment is limited to a maximum of five increments above or below the initial cruise assist set ting To deactivate the cruise assist Relax your grip on the...

Page 46: ...5 sec onds after the engine stops the center will turn off and enter a standby state When the engine is started again the displays return to their state before the center turned off and then the cente...

Page 47: ...the ta chometer Push the SPEED RPM button for at least 1 second after the multifunction information center is activated When the meter switches to the analog speedometer function the SPEED indicator...

Page 48: ...s selected the SPEED indicator light blinks once then comes on To switch the digital speedometer display units Push the VOLT HOUR button for at least 1 second within 10 seconds after the multi functio...

Page 49: ...f the battery voltage has dropped significant ly LO is displayed on the voltmeter If the battery voltage has risen significantly HI is displayed If LO or HI is displayed imme diately return to shore a...

Page 50: ...he oil pressure drops significantly the oil pressure warning indicator and the WARN ING indicator light blink and the buzzer sounds intermittently At the same time the engine speed is limited If the o...

Page 51: ...speeds could result in severe en gine damage ECJ00042 TIP Push any of the operation buttons for the multifunction information center to stop the buzzer EJU42281 Check engine warning If a sensor malfun...

Page 52: ...f the digital speedometer values are shown in miles gallons degrees Fahrenheit EJU43180 Shift indicator This indicator shows the reverse gate shift positions F forward N neutral and R reverse See page...

Page 53: ...tton for less than 1 sec ond The display mode changes in the follow ing order Average speed This display shows the average speed in kilo meters per hour AV KMH or miles per hour AV MPH since the measu...

Page 54: ...nts are reset automatically when the displays go off 25 seconds after the engine stops To start the measurements Push the START STOP button for less than 1 second The beeper sounds once and the measur...

Page 55: ...up and then lift up the rear of the seat 2 Pull the seat rearward and remove it To install the rear seat 1 Insert the projections on the front of the seat into the stays on the deck 2 Push the rear of...

Page 56: ...ot use the handgrip to lift the watercraft The handgrip is not designed to support the watercraft s weight If the handgrip breaks the watercraft could fall which could result in severe injury EWJ00022...

Page 57: ...3 Bow eye The bow eye is used to attach a rope to the watercraft when transporting mooring or towing it in an emergency See page 106 for information on towing the watercraft EJU34882 Stern eyes The st...

Page 58: ...22 EJU42291 Storage compartments This watercraft is equipped with the following storage compartments Only the securely closed watertight storage compartments are waterproof If you carry objects that m...

Page 59: ...ngine compartment 2 Securely install the drain plug in its origi nal position EJU35164 Glove compartment The glove compartment is located in front of the seat To open the glove compartment Turn the gl...

Page 60: ...mpartment is located in front of the boarding platform To open the stern storage compartment 1 Pull the rear of the stern storage com partment latch on both sides of the stern storage compartment lid...

Page 61: ...older The built in beverage holder is located near the starboard right side of the multifunction information center Removable beverage holder The removable beverage holder is located in the glove comp...

Page 62: ...age 49 for seat removal and installation proce dures 2 Loosen the cap and remove it To close the removable watertight storage compartment 1 Securely install the cap by tightening it until it stops 2 S...

Page 63: ...nhook the band and remove the fire ex tinguisher cover 3 Place the fire extinguisher in the holder and then place the cover over the fire ex tinguisher 4 Securely fasten the cover and the fire ex ting...

Page 64: ...ng ethanol and that containing methanol Gasohol containing ethanol can be used if ethanol content does not exceed 10 and the fuel meets the minimum octane ratings E 85 is a fuel blend containing 85 et...

Page 65: ...k Do not leave the watercraft with a full tank in direct sunlight 8 Wipe up any spilled fuel immediately with a dry cloth 9 Securely install the fuel filler cap by tight ening it until it clicks 10 Pu...

Page 66: ...y af ter the engine is turned off Coming in con tact with or getting any engine oil on your clothes could result in burns NOTICE ECJ01002 Make sure that debris and water do not enter the oil filler ho...

Page 67: ...oil filler cap and re move it 7 Slowly add engine oil TIP The difference between the minimum and maximum level marks on the dipstick is equal to approximately 1 L 1 06 US qt 0 88 Imp qt of engine oil...

Page 68: ...lowing water to enter the engine compartment Check the O rings on the stern drain plugs and make sure that the plugs are tightened securely before launching the water craft Otherwise water may flood t...

Page 69: ...perate for a short time after the engine stops EJU42432 Transporting on a trailer When transporting the watercraft on a trailer secure the tie downs to the trailer through the bow eye and stern eyes N...

Page 70: ...onent life To perform the engine break in 1 Check the engine oil level See page 60 for information on checking the engine oil level 2 Launch the watercraft and start the en gine See page 77 for inform...

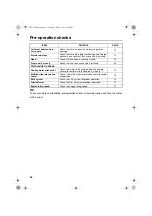
Page 71: ...tions and electrolyte level 68 Steering system Check the steering system for proper operation 69 Adjustable tilt steering sys tem Check the adjustable tilt steering system for proper operation and che...

Page 72: ...securely closed 73 Front and rear seats Check that the seats are securely installed 49 POST LAUNCH CHECKS Cooling water pilot outlet Check that water is discharged from the cooling water pilot outlet...

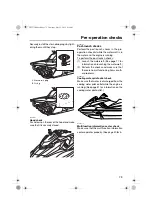
Page 73: ...ak Ventilate the engine compartment Leave the engine compartment open for a few minutes to allow any fuel vapors to escape Make sure that there is no damage inside the engine compartment EJU34215 Fuel...

Page 74: ...il level EJU32456 Bilge water check Make sure that no bilge water has collected in the engine compartment If bilge water has collected in the engine compartment drain it See page 62 for information on...

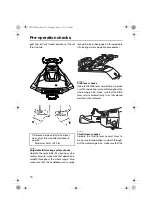
Page 75: ...curely held in place EJU32614 Steering system checks Turn the handlebars to the right and left sev eral times to make sure that operation is smooth and unrestricted throughout the whole range and that...

Page 76: ...m operation procedures EJU43212 RiDE lever checks Operate the RiDE lever several times to make sure that operation is smooth throughout the whole range Also make sure that the RiDE lever returns autom...

Page 77: ...the engine over 4000 r min on land Also do not run the engine for more than 15 seconds without supplying water otherwise the engine could overheat Check the start switch the engine stop switch and th...

Page 78: ...Safety equipment check Check that safety equipment meeting the ap plicable regulations is on board EJU32353 Hull and deck check Check the hull and deck for damage or other problem EJU32657 Jet intake...

Page 79: ...h the watercraft See page 77 for information on launching the watercraft 2 Perform the checks and make sure that there are no malfunctioning items or oth er problems EJU40553 Cooling water pilot outle...

Page 80: ...e watercraft moves or does not move according to the displayed shift indica tor See page 32 for shift system operation procedures WARNING To avoid colli sions operate at safe speeds and keep a safe di...

Page 81: ...age 34 for electric trim system operation procedures EJU40172 Engine idling speed check Start the engine and warm it up Use the ta chometer in the multifunction information center to make sure that th...

Page 82: ...an understanding of the watercraft and its oper ation Remember This watercraft is designed to carry the operator and up to 2 passengers Never exceed the maximum load limit or al low more than 3 person...

Page 83: ...WARNING EWJ01531 Do not apply throttle when anyone is at the rear of the watercraft Turn the engine off or keep it at idle Water and debris exiting the jet thrust nozzle can cause severe in jury To st...

Page 84: ...you to hit an obstacle you are attempting to avoid A collision could result in severe injury or death EWJ00602 EJU32873 Leaving the watercraft If leaving the watercraft remove the clip from the engine...

Page 85: ...the combination of handlebar position and the amount of throttle Water sucked in through the intake grate is pressurized by the impeller in the jet pump As the pressurized water is expelled from the p...

Page 86: ...ou attempt to steer the watercraft after releasing the throttle lever see condition C above The OTS system assists in turning by con tinuing to supply some thrust while the water craft is decelerating...

Page 87: ...wing down in case you need engine power to steer away from a boat or other obstacle that comes into your path To avoid rear end collisions while oper ating the watercraft check behind you before using...

Page 88: ...and suffer from ex posure increasing the risk of injury and drowning Board the watercraft in water free from weeds and debris and at least 60 cm 2 ft deep from the bottom of the watercraft NOTICE Neve...

Page 89: ...of being near the jet thrust nozzle Do not start the engine until the passen gers are seated with their feet on the floor of the footwell and are securely holding on to the person in front of them or...

Page 90: ...the engine shut off switch 8 Look in all directions start the engine and then start off slowly EJU33083 Starting off WARNING EWJ00712 To avoid collisions Scan constantly for people objects and other...

Page 91: ...off switch 3 Push the watercraft away from the dock grip the handlebars with both hands and place both feet on the floor of the foot well 4 Look in all directions start the engine and then start off...

Page 92: ...in water that is less than 60 cm 2 ft deep from the bottom of the watercraft otherwise pebbles or sand could be sucked into the jet intake causing impeller damage and engine overheating ECJ00473 4 Af...

Page 93: ...ving the watercraft from the water promptly discharge the re maining water from the cooling water pas sages To discharge water from the cooling water passages 1 Make sure that the area around the wa t...

Page 94: ...ng water passages to prevent them from clogging with salt sand or dirt 1 Place the watercraft in a horizontal posi tion 2 Remove the seats and removable water tight storage compartment See page 49 for...

Page 95: ...t ment with a small amount of water NOTICE Do not use high pressure water when rinsing the engine or en gine compartment as severe engine damage could result ECJ00572 3 Drain the water from the engine...

Page 96: ...that the breather hose is not clogged or damaged Checking the electrolyte level Make sure that the electrolyte level is be tween the maximum and minimum level marks If the electrolyte level is low ad...

Page 97: ...attery 1 Place the battery in the battery compart ment and hook the battery bands onto the holders 2 Connect the positive battery lead red to the positive battery terminal NOTICE Reversal of the batte...

Page 98: ...fuel tank with fresh gasoline and add fuel stabilizer and conditioner to the fuel tank ac cording to the manufacturer s instruction be fore starting the engine 2 Clean the watercraft See page 89 for i...

Page 99: ...repair of the emission control devices and system may be performed by any marine SI engine repair establishment or individual War ranty repair however must be performed at an authorized Yamaha marine...

Page 100: ...s original po sition and then push it down 2 Install the engine cover screws and then tighten them to the specified torque 3 Securely install the seats in their original positions 1 Engine cover Tight...

Page 101: ...ck O rings for cracks and deformation Fuel tank Check installation and straps Water inlet strainer Check for clogs and dam age Cooling water hos es Check for damage and leakage and check clamps Engine...

Page 102: ...t vacuum bilge Check hoses for clogs and damage check clamps and clean bilge strainer Electric bilge pump Check operation check hoses for damage check clamps and clean bilge pump strainer Stern drain...

Page 103: ...on your clothes could result in burns NOTICE ECJ00992 Do not run the engine with too much or not enough oil in the engine otherwise the en gine could be damaged It is recommended to have a Yamaha deal...

Page 104: ...em Wet sump Cooling system Water Starting system Electric Ignition system T C I Spark plug NGK LFR6A Spark plug gap 0 8 0 9 mm 0 031 0 035 in Battery capacity 12 V 19 Ah Charging system Flywheel magne...

Page 105: ...r terminal con nections Tighten as required 89 Terminal corroded Clean or replace 89 Starter motor Faulty Have serviced by Yamaha dealer Engine does not start Starter motor turns over Throttle lever S...

Page 106: ...rviced by Yamaha dealer Cracked torn or damaged Have serviced by Yamaha dealer Electrical wir ing Loose connection Have serviced by Yamaha dealer Fuel injec tion system Faulty or clogged in jectors Ha...

Page 107: ...dd oil 44 Spark plug Fouled or defective Have serviced by Yamaha dealer Incorrect heat range Have serviced by Yamaha dealer Gap incorrect Have serviced by Yamaha dealer Spark plug cap Not connected or...

Page 108: ...e engine will overheat and may seize NOTICE If weeds or debris gets caught in the jet intake do not operate the water craft above trolling speed until they have been removed ECJ00654 If there is any s...

Page 109: ...the ball joint 4 Raise the reverse gate to the forward po sition TIP While the shift rod is disconnected the re verse gate will not move to the neutral po sition or reverse position even if the RiDE l...

Page 110: ...tion on starting the engine EJU43482 Replacing the fuses If a fuse is blown replace it with the proper fuse To replace a fuse 1 Remove the seats and removable water tight storage compartment See page...

Page 111: ...spare fuse of the proper amperage WARNING Do not use fuses of a different amperage than recommended Substitution with a fuse that has an improper rating can cause extensive electrical system damage an...

Page 112: ...boat and the wa tercraft 1 Securely attach the towline to the bow eye of the watercraft being towed 2 Sit astride the seat and hold on to the handlebars in order to balance the water craft NOTICE The...

Page 113: ...from the engine compartment See page 62 for informa tion on draining the bilge water 3 Have the watercraft serviced by a Yamaha dealer as soon as possible NOTICE Be sure to have a Yamaha dealer inspe...

Page 114: ...check 67 Engine cover removing and installing 93 Engine idling speed check 75 Engine oil 60 Engine oil and oil filter 97 Engine oil level check 68 Engine oil requirements 60 Engine overheat warning 44...

Page 115: ...ote control transmitter 26 Remote control transmitter check 71 RiDE lever 29 RiDE lever checks 70 Riding position 77 Rustproofing 92 S Safe boating rules 19 Safety equipment check 72 Seats 49 Shift in...

Page 116: ...Index 110 Y Yamaha Security System 27 Yamaha Security System settings 27 UF2T75E0 book Page 110 Thursday May 21 2015 9 30 AM...

Page 117: ...UF2T75E0 book Page 111 Thursday May 21 2015 9 30 AM...

Page 118: ...Printed in U S A May 2015 0 4 1 CR UF2T75E0 book Page 1 Thursday May 21 2015 9 30 AM...

Reviews: