background image

9-2

9

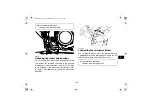
abrasives which may mar the paint or protec-
tive finish. When finished cleaning, start the
engine and let it idle for several minutes.

EBU27262

Storage

Short-term

Always store your ATV in a cool, dry place and, if
necessary, protect it against dust with a porous
cover. 

NOTICE:

 Storing the ATV in a poorly ven-

tilated room or covering it with a tarp while it is
still wet, will allow water and humidity to seep
in and cause rust. To prevent corrosion, avoid
damp cellars, stables (because of the presence
of ammonia) and areas where strong chemi-
cals are stored.

 [ECB00722]

Long-term

Before storing your ATV for several months:

1. Follow all the instructions in the “Cleaning”

section of this chapter.

2. Fill up the fuel tank and add fuel stabilizer (if

available) to prevent the fuel from deteriorat-
ing.

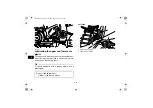
3. Perform the following steps to protect the cyl-

inder, piston rings, etc. from corrosion.

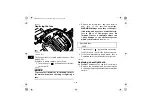
a. Remove the spark plug cap and spark

plug.

b. Pour a teaspoonful of engine oil into the

spark plug bore.

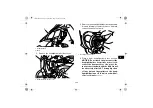
c. Install the spark plug cap onto the spark

plug, and then place the spark plug on the
cylinder head so that the electrodes are
grounded. (This will limit sparking during
the next step.)

d. Turn the engine over several times with

the starter. (This will coat the cylinder wall
with oil.)

e. Remove the spark plug cap from the spark

plug, and then install the spark plug and
the spark plug cap.

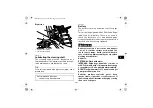
4. Lubricate all control cables and the pivoting

points of all levers and pedals.

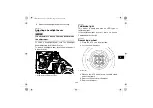
5. Check and, if necessary, correct the tire air

pressure, and then block up the ATV so that
all of its wheels are off the ground. Alterna-

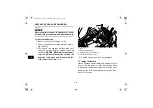
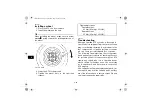
Specified amount:

7.5 ml of stabilizer to each liter of fuel (or 1 
oz of stabilizer to each gallon of fuel)

U1TD62E0.book  Page 2  Monday, May 18, 2015  9:20 AM

Summary of Contents for FZ45YSXG

Page 1: ...ANUAL DEL PROPIETARIO 1TD F8199 62 READ THIS MANUAL CAREFULLY It contains important safety information LIRE ATTENTIVEMENT CE MANUEL Il comprend d importantes informations de sécurité LEA ESTE MANUAL ATENTAMENTE Contiene indicaciones importantes acerca de la seguridad ...

Page 2: ...DIC183 Original instructions Notice originale Manual original PRINTED IN USA 2015 05 0 3 1 CR E F S ...

Page 3: ...CAREFULLY It contains important safety information WARNING OWNER S MANUAL YFZ45YSXG YFZ45YSSG This ATV should not be ridden by anyone under 16 years of age 1TD F8199 62 E0 U1TD62E0 book Page 1 Monday May 18 2015 9 20 AM ...

Page 4: ...ovenlaan 101 1119 NC Schiphol Rijk The Netherlands Signature Akihiro Tsuzuki Date of Issue to which this declaration applies conforms to the essential health and safety requirements of Directive 2006 42 EC To effect correct application of the essential health and safety requirements stated in the Directives of EEC the following standards and or technical specifications were consulted Title and or ...

Page 5: ...s important safety information It provides information about special tech niques and skills necessary to ride the ATV It also includes basic maintenance and inspection proce dures If you have any questions regarding the operation or maintenance of your ATV please consult a Yamaha dealer AN IMPORTANT SAFETY MESSAGE Read this manual completely before operating your ATV Make sure you understand all i...

Page 6: ...e safety alert symbol It is used to alert you to potential per sonal injury hazards Obey all safety messages that follow this sym bol to avoid possible injury or death A WARNING indicates a hazardous situation which if not avoided could result in death or serious injury A NOTICE indicates special precautions that must be taken to avoid damage to the vehicle or other property A TIP provides key inf...

Page 7: ...d or motorway Please check your local riding laws and regulations before operating this ATV EBU17411 YFZ45YSXG YFZ45YSSG OWNER S MANUAL 2015 by Yamaha Motor Co Ltd 1st edition April 2015 All rights reserved Any reprinting or unauthorized use without the written permission of Yamaha Motor Co Ltd is expressly prohibited Printed in U S A U1TD62E0 book Page 1 Monday May 18 2015 9 20 AM ...

Page 8: ...6 Brake pedal 4 6 Parking brake lever 4 7 Shift pedal 4 8 Fuel tank cap 4 8 Fuel 4 9 Seat 4 10 Adjusting the front shock absorber assemblies 4 11 Adjusting the rear shock absorber assembly 4 16 Handlebar position 4 24 PRE OPERATION CHECKS 5 1 Fuel 5 4 Engine oil 5 4 Coolant 5 4 Front and rear brakes 5 4 Throttle lever 5 5 Drive chain 5 5 Tires 5 5 Chassis fasteners 5 7 Instruments lights and switc...

Page 9: ...l filter element 8 14 Coolant 8 20 Cleaning the air filter element 8 21 Cleaning the spark arrester 8 25 Adjusting the throttle lever free play 8 27 Valve clearance 8 28 Brakes 8 28 Checking the front and rear brake pads 8 28 Checking the brake fluid level 8 29 Changing the brake fluid 8 31 Checking the front brake lever free play 8 31 Checking the brake pedal height 8 32 Adjusting the parking bra...

Page 10: ...t bulb 8 45 Adjusting a headlight beam 8 48 Tail brake light 8 48 Removing a wheel 8 48 Installing a wheel 8 49 Troubleshooting 8 49 Troubleshooting charts 8 51 CLEANING AND STORAGE 9 1 Cleaning 9 1 Storage 9 2 SPECIFICATIONS 10 1 CONSUMER INFORMATION 11 1 Identification numbers 11 1 INDEX 12 1 U1TD62E0 book Page 3 Monday May 18 2015 9 20 AM ...

Page 11: ...bels on your ATV These labels contain important information for safe and proper operation Never remove any labels from your ATV If a label becomes difficult to read or comes off request a re placement label from your Yamaha dealer For Europe 8 7 1 2 5 4 3 7 6 U1TD62E0 book Page 1 Monday May 18 2015 9 20 AM ...

Page 12: ...1 2 1 1P0 F816R 00 YAMAHA 1HP F811R 00 YAMAHA 1 2 3 U1TD62E0 book Page 2 Monday May 18 2015 9 20 AM ...

Page 13: ...indice d octane RON de min 97 Utilizzare benzina PREMIUM super senza piombo con almeno 97 ottani RON Gebruik loodvrije SUPERBENZINE met een octaangetal RON van minstens 97 Utilize gasolina sem chumbo com índice de octano mínimode 97 RON Använd blyfri PREMIUMBENSIN av 97 oktan RON eller mer 3C2 F816P 00 YAMAHA 35 0 kPa 0 35 kgf cm 5 0 psi 35 0 kPa 0 35 kgf cm 5 0 psi 1TD F816M M0 4 6 5 U1TD62E0 boo...

Page 14: ...1 4 1 1HP F2259 21 YAMAHA MOTOR CO LTD 2500 SHINGAI IWATA JAPAN YFZ450R 30 0 kW 184 kg 2015 1TD F155A 20 7 8 U1TD62E0 book Page 4 Monday May 18 2015 9 20 AM ...

Page 15: ...e from 12 years old Operation of this ATV by children under the age of 12 increases the risk of severe injury or death Adult supervision required for children under age 16 Use from 16 years old Operating this ATV if you are under the age of 16 increases your chance of severe injury or death NEVER use on paved roads NEVER carry passengers NEVER use with drugs or alcohol NEVER store fuel or flammabl...

Page 16: ... loss of control Adjust the tire pressure Improper tire pressure can cause loss of control Loss of control can result in severe injury or death This pictogram shows the loading limits and or maximum load capacity for this ATV Follow all load limits and other loading guidelines in this manual Load may include the driver passenger human protective gear accessories goods luggage and all other load re...

Page 17: ...1 7 1 YAMAHA MOTOR CO LTD 2500 SHINGAI IWATA JAPAN kW kg 1 2 3 4 1 2 3 4 Year of construction Model Name Max Power Mass In Running Order U1TD62E0 book Page 7 Monday May 18 2015 9 20 AM ...

Page 18: ...1 8 1 For Oceania 4 6 1 2 6 5 3 U1TD62E0 book Page 8 Monday May 18 2015 9 20 AM ...

Page 19: ...1 9 1 4XE F1568 10 YAMAHA 1P0 F816L 00 YAMAHA 1 2 U1TD62E0 book Page 9 Monday May 18 2015 9 20 AM ...

Page 20: ...g 220 lbs Includes weight of operator cargo and accessories Improper tire pressure or overloading can cause loss of control Loss of control can result in severe injury or death 5 0 psi 5 0 psi 4 6 psi 4 6 psi 1TD F816M 00 WARNING NEVER ride as a passenger Passengers can cause a loss of control resulting in SEVERE INJURY or DEATH 3C2 F151H 00 YAMAHA Use 97 octane 1TD F415E 30 PREMIUM unleaded gasol...

Page 21: ...hild under 16 years old should never oper ate an ATV with engine size greater than 90 cc Never allow a child under age 16 to operate an ATV without adult supervision and never allow continued use of an ATV by a child if he or she does not have the abilities to operate it safely Never carry a passenger on an ATV This vehicle is intended for off road use only Do not operate on any paved surfaces suc...

Page 22: ...at faster speeds and never turn at excessive speeds Never operate the ATV on hills too steep for the ATV or for your abilities Practice on smaller hills before attempting larger hills Always follow proper procedures for climbing hills as described in this manual Check the ter rain carefully before you start up any hill Never climb hills with excessively slippery or loose surfaces Shift your weight...

Page 23: ...very cautious in order to reduce the chance of skidding or sliding out of control Never operate an ATV in fast flowing water or in water deeper than that recommended in this manual Remember that wet brakes may have reduced stopping ability Test your brakes after leaving water If necessary apply them several times to let friction dry out the linings Always use the size and type of tires specified i...

Page 24: ... and ride gently back to camp or other known location where you can receive medical at tention If necessary contact your riding party or local authorities to let them know where you are and what has happened In the event of a breakdown 1 If your vehicle will not restart or is not in safe operating condition turn off the main switch and engine stop switch If the breakdown oc curs at twilight or nig...

Page 25: ...d others at greater risk of serious injury or death You are responsible for injuries re lated to changes in the vehicle Keep the following guidelines in mind as well as those provided un der Loading when mounting accessories Never install accessories that would impair the performance of your ATV Carefully inspect the accessory before using it to make sure that it does not in any way reduce ground ...

Page 26: ...so deadly levels of carbon monoxide can linger for hours or days in en closed or poorly ventilated areas If you experi ence any symptoms of carbon monoxide poisoning leave the area immediately get fresh air and SEEK MEDICAL TREATMENT Do not run engine indoors Even if you try to ventilate engine exhaust with fans or open windows and doors carbon monoxide can rapidly reach dangerous levels Do not ru...

Page 27: ...embly compression damping force adjusting screw for slow compression damping 3 Front shock absorber assembly spring preload adjusting nut 4 Engine oil tank filler cap 5 Rear brake fluid reservoir 6 Battery 7 Shift pedal 8 Coolant reservoir 9 Front shock absorber assembly rebound damping force adjusting screw 7 8 9 5 3 1 6 4 2 U1TD62E0 book Page 1 Monday May 18 2015 9 20 AM ...

Page 28: ...g bolt for fast compression damping 5 Rear shock absorber assembly compression damping force adjusting screw for slow compression damping 6 Fuel tank cap 7 Oil filter element 8 Brake pedal 9 Rear brake light switch 10 Rear shock absorber assembly rebound damping force adjusting screw 7 8 9 1 2 3 4 5 10 6 1 Clutch lever 2 Parking brake lever 3 Handlebar switches 4 Main switch 5 Front brake fluid re...

Page 29: ... follows on All electrical systems are supplied with power The headlights and taillight come on when the light switch is on and the engine can be started The key cannot be removed off All electrical systems are off The key can be re moved 1 Main switch OFF ON 1 U1TD62E0 book Page 1 Monday May 18 2015 9 20 AM ...

Page 30: ...e warning light should come on for a few seconds and then go off If the warning light does not come on initially when the key is turned to on or if the warning light remains on have a Yamaha dealer check the vehicle NOTICE ECB00011 The engine may overheat if the ATV is over loaded In this case reduce the load to spec ification Start the engine after making sure that the warning light is out Contin...

Page 31: ...g light comes on or flashes when an electrical circuit monitoring the engine is not work ing correctly When this occurs have a Yamaha dealer check the self diagnosis system The electrical circuit of the warning light can be checked by turning the key to on The warning light should come on for a few seconds and then go off If the warning light does not come on initially when the key is turned to on...

Page 32: ...or an extended period of time oth erwise the battery may discharge to the point that the starter motor will not operate properly If this should happen remove the battery and recharge it See page 8 42 EBU18283 Throttle lever Once the engine is running pushing the throttle le ver will increase the engine speed Regulate the speed of the ATV by varying the throttle position Because the throttle is spr...

Page 33: ...adjusted to 2 0 4 0 mm 0 08 0 16 in See page 8 27 WARNING Im proper adjustment of the speed limiter and throttle could cause throttle cable damage or improper throttle operation You could lose control resulting in an accident EWB00242 3 Tighten the locknut EBU18383 Clutch lever The clutch lever is located on the left handlebar and the ignition circuit cut off system is incorpo rated in the clutch ...

Page 34: ...grip hold the brake lever away from the handlebar so it does not contact the adjusting bolt loosen the locknut turn the ad justing bolt and then tighten the locknut EBU18433 Brake pedal The brake pedal is located on the right side of the ATV To apply the rear brake push down on the brake pedal 1 Clutch lever 1 Brake lever 2 Locknut 3 Brake lever position adjusting bolt 4 Distance between brake lev...

Page 35: ...specially on a slope To apply the parking brake move the parking brake lever in direction a To release the parking brake move the parking brake lever in direction b 1 Brake pedal 1 1 Parking brake lever locked position 1 Parking brake lever unlocked position U1TD62E0 book Page 7 Monday May 18 2015 9 20 AM ...

Page 36: ... you ride the ATV without re leasing the parking brake You could lose braking performance which could cause an accident You could also wear out the brakes prematurely EBU18531 Shift pedal This ATV is equipped with a constant mesh 5 speed transmission The shift pedal is located on the left side of the engine and is used in combina tion with the clutch when shifting EBU18721 Fuel tank cap Remove the...

Page 37: ...e smoking or while in the vicinity of sparks open flames or other sources of ignition such as the pilot lights of water heat ers and clothes dryers 2 Do not overfill the fuel tank When refueling be sure to insert the pump nozzle into the fuel tank filler hole Stop filling when the fuel reaches the bottom of the filler tube Because fuel expands when it heats up heat from the engine or the sun can c...

Page 38: ...ed gasoline The use of leaded gasoline will cause severe damage to internal engine parts such as the valves and piston rings as well as to the exhaust system Your Yamaha engine has been designed to use premium unleaded gasoline with a research oc tane number of 97 or higher If knocking or ping ing occurs use a gasoline of a different brand Use of unleaded fuel will extend spark plug life and reduc...

Page 39: ...nt shock absorber as semblies These shock absorber assemblies are equipped with a spring preload adjusting nut a rebound damping force adjusting screw with a compres sion damping force adjusting bolt for fast com pression damping and a compression damping force adjusting screw for slow compression damping 1 Seat lock lever 1 1 Projection 2 Seat holder 1 2 U1TD62E0 book Page 11 Monday May 18 2015 9...

Page 40: ...mber of clicks or turns of a damping force adjusting mechanism may not ex actly match the following specifications due to small differences in production the actual number of clicks or turns always represents the entire ad justing range To obtain a precise adjustment it would be advisable to check the number of clicks or turns of each damping force adjusting mecha nism and to modify the specificat...

Page 41: ...ch complete turn of the adjusting nut distance A is changed by 1 5 mm 0 06 in 3 Tighten the locknut to the specified torque NOTICE Always tighten the locknut against the adjusting nut and then tighten it to the specified torque ECB00082 Spring preload setting Minimum soft Distance A 302 5 mm 11 91 in Standard Distance A 293 0 mm 11 54 in Maximum hard Distance A 282 5 mm 11 12 in 1 Distance A Tight...

Page 42: ...he compression damping force and thereby harden the compression damping turn the compression damping force adjusting bolt in direction a To decrease the compression damp ing force and thereby soften the compression damping turn the adjusting bolt in direction b 1 Rebound damping force adjusting screw a b 1 Rebound damping setting Minimum soft 30 click s in direction b Standard 16 click s in direct...

Page 43: ...pres sion damping turn the adjusting screw in direction b 1 Compression damping force adjusting bolt for fast compression damping Compression damping setting for fast com pression damping Minimum soft 2 turn s out from the fully turned in posi tion Standard 1 turn s out from the fully turned in posi tion Maximum hard Adjusting bolt fully turned in a b 1 1 Compression damping force adjusting screw ...

Page 44: ...30142 Adjusting the rear shock absorber as sembly This shock absorber assembly is equipped with a spring preload adjusting nut a rebound damping force adjusting screw a compression damping force adjusting bolt for fast compression damp ing and a compression damping force adjusting screw for slow compression damping WARNING EWB02681 Suspension components become hot during operation Never touch the ...

Page 45: ...he entire ad justing range To obtain a precise adjustment it would be advisable to check the number of clicks or turns of each damping force adjusting mecha nism and to modify the specifications as neces sary Spring preload 1 Remove the cowling See page 8 10 2 Remove the clip from the hose holder re move the bolt and then move the blow by gas chamber away from the vehicle 3 Loosen the clamp screw ...

Page 46: ...re moving the bolts and collars 5 Remove the bolts and then remove the air fil ter case by disconnecting it from the air in take duct 1 Clamp screw 1 1 Bolt 2 Collar 3 Air filter case holding plate 1 1 2 3 U1TD62E0 book Page 18 Monday May 18 2015 9 20 AM ...

Page 47: ...oosen the locknut 9 Turn the spring preload adjusting nut in direc tion a to increase the spring preload and thereby harden the suspension and in direc tion b to decrease the spring preload and thereby soften the suspension 1 Air filter case 2 Bolt 1 Coupler 1 2 2 1 1 Clamp screw 2 Air intake duct 1 2 U1TD62E0 book Page 19 Monday May 18 2015 9 20 AM ...

Page 48: ...te turn of the adjusting nut distance A is changed by 1 5 mm 0 06 in 10 Tighten the locknut to the specified torque NOTICE Always tighten the locknut against the adjusting nut and then tighten it to the specified torque ECB00082 1 Locknut 2 Spring preload adjusting nut 3 Special wrench 2 1 3 a b Spring preload setting Minimum soft Distance A 286 5 mm 11 28 in Standard Distance A 278 0 mm 10 94 in ...

Page 49: ...ied torque 15 Install the air filter case holding plate by in stalling the bolts and collars and then tighten the bolts to the specified torque 16 Install the blow by gas chamber by installing the bolt tighten the bolt to the specified torque and then install the clip to the hose holder 17 Install the cowling Rebound damping force Turn the rebound damping force adjusting screw in direction a to in...

Page 50: ...sion damping force adjusting bolt in direction a To decrease the compression damp ing force and thereby soften the compression damping turn the adjusting bolt in direction b 1 Rebound damping force adjusting screw Rebound damping setting Minimum soft 30 click s in direction b Standard 15 click s in direction b Maximum hard 1 click s in direction b With the adjusting screw fully turned in di rectio...

Page 51: ...mping setting for fast com pression damping Minimum soft 2 turn s out from the fully turned in posi tion Standard 1 turn s out from the fully turned in posi tion Maximum hard Adjusting bolt fully turned in 1 Compression damping force adjusting screw for slow compression damping Compression damping setting for slow com pression damping Minimum soft 20 click s in direction b Standard 8 click s in di...

Page 52: ...y cause the unit to explode due to ex cessive gas pressure Do not deform or damage the cylinder in any way Cylinder damage will result in poor damping performance Do not dispose of a damaged or worn out shock absorber assembly yourself Take the shock absorber assembly to a Yamaha deal er for any service EBU29403 Handlebar position The handlebar can be adjusted to one of two po sitions to suit the ...

Page 53: ... by the procedures provided in this manual have the vehicle inspected by a Yamaha dealer Before using this vehicle check the following points ITEM ROUTINE PAGE Fuel Check fuel level in fuel tank and add recommended fuel if neces sary Check fuel line for leakage Correct if necessary 4 9 5 4 Engine oil Check oil level in engine oil tank and add recommended oil to specified level if necessary Check A...

Page 54: ...ation and correct if necessary Lubricate cable if necessary Check lever free play and adjust if necessary 8 34 Throttle lever Make sure that operation is smooth Lubricate cable and lever housing if necessary Check lever free play and adjust if necessary 5 5 8 27 Control cables Make sure that operation is smooth Lubricate if necessary 8 38 Drive chain Check chain slack and adjust if necessary Check...

Page 55: ...ate lever pivoting points if necessary 8 39 Chassis fasteners Make sure that all nuts bolts and screws are properly tightened 5 7 Instruments lights and switches Check operation and correct if necessary 5 8 ITEM ROUTINE PAGE U1TD62E0 book Page 3 Monday May 18 2015 9 20 AM ...

Page 56: ... free play have a Yamaha dealer check the brake system Check for correct brake pedal height See page 8 32 If the pedal height is incorrect have a Yamaha dealer adjust it Check the operation of the lever and pedal They should move smoothly and there should be a firm feeling when the brakes are applied If not have a Yamaha dealer check the brake sys tem Brake fluid level Check the brake fluid level ...

Page 57: ... and adjust the drive chain as necessary See page 8 35 EBU19815 Tires Check tire pressure regularly to make sure it is at the recommended specifications Also check for wear and damage Tire pressure Use the low pressure tire gauge to check and ad just tire pressures when the tires are cold Tire pressures must be equal on both sides WARNING Operation of this vehicle with im proper tire pressure may ...

Page 58: ...n the tire groove decreases to 3 mm 0 12 in due to wear replace the tire Recommended tire pressure Front 35 0 kPa 0 350 kgf cm 5 0 psi Rear 35 0 kPa 0 350 kgf cm 5 0 psi Minimum tire pressure Front 32 0 kPa 0 320 kgf cm 4 6 psi Rear 32 0 kPa 0 320 kgf cm 4 6 psi Maximum tire seating pressure Front 250 kPa 2 5 kgf cm 36 psi Rear 250 kPa 2 5 kgf cm 36 psi 1 Low pressure tire gauge 1 U1TD62E0 book Pa...

Page 59: ...ket tires and rims The tires and rims that came with your ATV were designed to match the performance capabilities and to provide the best combination of handling braking and comfort Other tires rims sizes and combinations may not be appropriate EBU19841 Chassis fasteners Make sure that all nuts bolts and screws are properly tightened 1 Tire wear limit Front Manufacturer model MAXXIS MS21 Size AT21...

Page 60: ...5 8 5 EBU19851 Instruments lights and switches Check that all instruments lights and switches are working properly Correct if necessary U1TD62E0 book Page 8 Monday May 18 2015 9 20 AM ...

Page 61: ...on for a few seconds then go off Coolant temperature warning light Fuel level warning light Engine trouble warning light NOTICE ECB00825 If a warning light does not go off see page 4 2 for the corresponding warning light circuit check To avoid possible damage do not oper ate the ATV if a warning light stays on 3 Shift the transmission into neutral The neutral indicator light should come on if it d...

Page 62: ...d transmission The transmission allows you to control the amount of power you have available at a given speed or for starting accelerating climbing hills etc To shift into neutral release the throttle lever ap ply the clutch and then repeatedly depress the shift pedal until it stops When it stops it will be in first gear Raise the ped al slightly to reach the neutral position and then release the ...

Page 63: ...hen shifting to the next higher gear EBU20652 To decelerate When slowing down or stopping release the throttle and apply the brakes smoothly and evenly As you slow down shift to a lower gear Be sure that the engine has sufficiently slowed before en gaging a lower gear Improper use of the brakes or shifting can cause the tires to lose traction reduc ing control and increasing the possibility of an ...

Page 64: ...essive load on it for the first 320 km 200 mi or 20 hours The various parts in the engine wear and polish themselves to the correct operating clear ances During this period prolonged full throttle operation or any condition that might result in en gine overheating must be avoided 0 160 km 0 100 mi or 0 10 hours Avoid prolonged operation above 1 2 throttle Vary the speed of the ATV regularly Do not...

Page 65: ...k the front and rear wheels with rocks or other objects Never park the ATV on hills that are too steep to walk up easily 1 Bring the ATV to a stop by applying the brakes 2 With the brake pedal applied shift into first gear and then stop the engine 3 Apply the parking brake EBU20911 Accessories and loading EBU20922 Genuine Yamaha Accessories Choosing accessories for your ATV is an impor tant decisi...

Page 66: ...put you and others at greater risk of serious injury or death You are responsible for injuries re lated to changes in the vehicle Keep the following in mind when considering an accessory or operating an ATV which has acces sories Accessories should be rigidly and securely mounted An accessory which can shift position or come off while you are riding could affect your ability to control the ATV Do ...

Page 67: ...he front carrier at the front of the rear carrier and center it Tie down cargo securely to the carriers Make sure cargo in the trailer cannot move around A shifting load can cause an accident Make sure the load does not interfere with con trols or your ability to see where you are going Ride more slowly than you would without a load The more weight you carry the slower you should go Although condi...

Page 68: ...7 1 7 EBU21142 RIDING YOUR ATV U1TD62E0 book Page 1 Monday May 18 2015 9 20 AM ...

Page 69: ...tion on pages 2 1 2 6 Also read all warn ing and notice labels on your ATV RIDE WITH CARE AND GOOD JUDGMENT Get training if you are inexperienced WARNING EWB01382 Do not operate this ATV or allow anyone else to operate it without proper instruction The risk of an accident is greatly increased if the operator does not know how to operate the ATV properly in different situations and on different typ...

Page 70: ...TVs that are not recommended for their age can lead to severe injury or death of the child This ATV is designed to carry the operator only passengers prohibited The long seat is to allow the operator to shift posi tion as needed during operation It is not for carry ing passengers WARNING Never carry a passenger Carrying a passenger on this ATV greatly reduces your ability to balance and control th...

Page 71: ... or injury Eye protection such as a face shield or goggles may reduce the risk of foreign material getting in your eyes and help prevent loss of vision WARNING Operating without eye protection can result in an accident and increases your chances of a severe injury in the event of an accident EWB02612 Do not operate after or while consuming alco hol or drugs The operator s performance capability is...

Page 72: ...experienced with this model the throttle lever housing is equipped with a speed limiter The speed limiter keeps the throttle from fully opening even when the throttle lever is pushed to the maximum Turning in the adjusting screw limits the maximum engine power available and decreases the maximum speed of the ATV Turning in the adjusting screw decreases top speed and turning it out increases top sp...

Page 73: ... mon sense and good judgment Use extra caution when riding the ATV with addi tional loads such as accessories or cargo The ATV s handling may be adversely affected Re duce your speed when adding additional loads During operation Always keep your feet on the footrests during op eration otherwise they may contact the rear wheels WARNING Removing even one hand or foot can reduce your ability to contr...

Page 74: ... which in some situations could lead to an acci dent EWB01492 Exhaust system WARNING EWB01502 Dry grass or brush or other combustible ma terial accumulated around the engine area could catch fire Do not operate idle or park the ATV in dry grass or other dry ground cov er Keep the engine area free of dry grass brush or other combustible material Someone touching the exhaust system dur ing or after ...

Page 75: ... are not likely to touch it BE CAREFUL WHERE YOU RIDE This ATV is designed for use on unpaved surfaces only WARNING Paved surfaces may seriously affect handling and control of the ATV and may cause the ATV to go out of control Always avoid paved surfaces including sidewalks driveways parking lots and streets EWB01512 While riding on unpaved public streets or roads may be legal in your area such op...

Page 76: ...ther hidden hazards which may cause the ATV to upset WARNING The ATV could go out of control if you do not have enough time to react to hidden rocks bumps or holes Go slowly and be extra care ful when operating on unfamiliar terrain Al ways be alert to changing terrain conditions when operating the ATV EWB01532 Do not operate on rough slippery or loose terrain until you have learned and practiced ...

Page 77: ...n flag on the ATV DO NOT use the flag pole bracket as a trailer hitch WARNING You could collide with another vehicle if operating in areas where you cannot easily be seen Mount a cau tion flag on the ATV to make you more visible Watch carefully for other vehicles EWB01552 Do not ride in areas posted no trespassing Do not ride on private property without getting permission U1TD62E0 book Page 10 Mon...

Page 78: ...fting or if the shift pedal is not released before applying the throttle the front wheels may lift off the ground resulting in a loss of directional con trol EWB02632 NOTICE Do not shift gears without releasing the throttle Damage to the engine or drive train may occur ECB01072 Use this same procedure as you move into the higher gears Be sure to coordinate the use of the throttle and shift pedal p...

Page 79: ...te your desired direc tion and lean your upper body into the turn Use the throttle to maintain an even speed through the turn This maneuver will let the wheel on the inside of the turn slip slightly allowing the ATV to make the turn properly This procedure should be practiced at slow speed many times in a large unpaved area with no obsta cles If an incorrect technique is used your ATV may continue...

Page 80: ...s Owner s Manual Never operate the ATV on hills too steep for the ATV or for your abilities The ATV can overturn more easily on extremely steep hills than on level surfaces or small hills Always check the terrain carefully before you start up any hill Never climb hills with exces sively slippery or loose surfaces Shift your weight forward Never open the throttle suddenly or make sudden gear change...

Page 81: ...any hill In all cases avoid inclines with slippery or loose surfaces or obstacles that might cause you to lose control To climb a hill you need traction momentum and steady throttle Travel fast enough to maintain mo mentum but not so fast that you cannot react to changes in the terrain as you climb U1TD62E0 book Page 14 Monday May 18 2015 9 20 AM ...

Page 82: ...he hill If your ATV has stalled or stopped and you believe you can continue up the hill restart carefully to make sure you do not lift the front wheels which could cause you to lose control If you are unable to continue up the hill dismount the ATV on the uphill side Physically turn the ATV around and then descend the hill If you start to roll backwards DO NOT apply the rear brake and apply the fr...

Page 83: ... cause the ATV to lean sharply to one side Go straight down the hill where possi ble Improper braking can cause the wheels on the uphill side to come off the ground or cause loss of traction Gradually apply only the rear brake when going downhill When riding your ATV downhill shift your weight as far to the rear and uphill side of the ATV as pos sible Move back on the seat and sit with your arms s...

Page 84: ...ly slippery or loose surfaces Avoid crossing the side of a steep hill Shift your weight to the uphill side of the ATV Never attempt to turn the ATV around on any hill until you have mastered the turning tech nique as described in the Owner s Manual on level ground Be very careful when turning on any hill Traversing a sloping surface on your ATV requires you to properly position your weight to main...

Page 85: ...ALLOW WATER WARNING EWB01642 Operating this vehicle through deep or fast flowing water can lead to loss of control or an overturn To reduce your risk of drowning or other injuries use care when crossing through water Never operate this ATV water deeper than the depth specified in your Owner s Man ual as tires may float increasing the risk of an overturn The ATV can be used to cross slow moving sha...

Page 86: ...G Wet brakes may have reduced stopping ability which could cause loss of control EWB02622 After riding your ATV in water be sure to drain the trapped water by removing the check hose at the bottom of the air filter case NOTICE Undrained water can cause damage or improper opera tion ECB00842 Wash the ATV in fresh water if it has been operat ed in salt water or muddy conditions U1TD62E0 book Page 19...

Page 87: ...rests at all times Avoid jumping the ATV as loss of control and damage to the ATV may result SLIDING AND SKIDDING WARNING EWB01663 Skidding or sliding improperly may cause you to lose control of this ATV You may also regain traction unexpectedly which may cause the ATV to overturn Learn to safely control skidding or sliding by practicing at low speeds and on level smooth terrain On extremely slipp...

Page 88: ...recommended until you have corrected the slide With practice over a period of time skill at con trolled sliding can be developed The terrain should be chosen carefully before attempting such maneuvers since both stability and control are reduced Bear in mind that sliding maneuvers should always be avoided on extremely slippery surfaces such as ice since all control may be lost WHAT TO DO IF This s...

Page 89: ...orward speed If not stop dismount on the uphill side of the ATV and physically turn the ATV around If the ATV starts to slip backwards DO NOT USE THE REAR BRAKE the ATV may tip over on top of you Dismount the ATV on the uphill side See page 7 13 If your ATV is traversing a sloping surface Be sure to ride with your weight positioned to wards the uphill side of the ATV to maintain proper balance If ...

Page 90: ...urn off the engine when performing mainte nance unless otherwise specified A running engine has moving parts that can catch on body parts or clothing and electri cal parts that can cause shocks or fires Running the engine while servicing can lead to eye injury burns fire or carbon monoxide poisoning possibly leading to death See page 2 6 for more information about carbon monoxide WARNING EWB02691 ...

Page 91: ...luded in this manual and the tools provided in the owner s tool kit are intended to assist you in the performance of pre ventive maintenance and minor repairs However additional tools such as a torque wrench may be necessary to perform certain maintenance work correctly TIP If you do not have the tools or experience required for a particular job have a Yamaha dealer perform it for you 1 Owner s ma...

Page 92: ... should be performed by a Yamaha dealer as they require special tools data and technical skills NO ITEM CHECK OR MAINTENANCE JOB INITIAL EVERY Whichev er comes first month 1 3 6 6 12 km mi 320 200 1300 800 2500 1600 2500 1600 5000 3200 hours 20 80 160 160 320 1 Fuel line Check fuel hoses for cracks or other damage and replace if necessary Replace Every 5 years 2 Spark plug Check condition and clea...

Page 93: ...park arrester Clean 7 Air induction sys tem Check the air cut off valve reed valve and hose for damage Replace any damaged parts if necessary NO ITEM CHECK OR MAINTENANCE JOB INITIAL EVERY Whichev er comes first month 1 3 6 6 12 km mi 320 200 1300 800 2500 1600 2500 1600 5000 3200 hours 20 80 160 160 320 U1TD62E0 book Page 4 Monday May 18 2015 9 20 AM ...

Page 94: ...kills NO ITEM CHECK OR MAINTENANCE JOB INITIAL EVERY Whichev er comes first month 1 3 6 6 12 km mi 320 200 1300 800 2500 1600 2500 1600 5000 3200 hours 20 80 160 160 320 1 Air filter element Clean and replace if necessary Every 20 40 hours more often in wet or dusty areas 2 Clutch Check operation and adjust if necessary 3 Front brake Check operation and correct if necessary Check fluid level and A...

Page 95: ...heck for looseness or damage and replace if necessary 11 Swingarm pivots Check operation and for excessive play and re place bearings if necessary Lubricate with lithium soap based grease 12 Upper and lower arm pivots Lubricate with lithium soap based grease 13 Drive chain Check chain slack and adjust if necessary Check rear wheel alignment and correct if neces sary Clean and lubricate NO ITEM CHE...

Page 96: ...aft Lubricate with lithium soap based grease 19 Steering system Check operation and repair or replace if dam aged Check toe in and adjust if necessary 20 Engine oil Change Check ATV for oil leakage and correct if neces sary 21 Engine oil filter ele ment Replace 22 Cooling system Check coolant level and ATV for coolant leakage and correct if necessary Replace coolant Every 2 years NO ITEM CHECK OR ...

Page 97: ...ders and calipers and change the brake fluid 23 Moving parts and cables Lubricate 24 Throttle lever Check operation Check throttle lever free play and adjust if neces sary Lubricate cable and lever housing 25 Front and rear brake switches Check operation and correct if necessary 26 Lights and switches Check operation and correct if necessary Adjust headlight beams NO ITEM CHECK OR MAINTENANCE JOB ...

Page 98: ...8 9 8 Replace the brake hoses every four years and if cracked or damaged U1TD62E0 book Page 9 Monday May 18 2015 9 20 AM ...

Page 99: ...each time a cowling or panel needs to be removed and installed EBU29596 Panel A To remove the panel 1 Remove the seat See page 4 10 2 Remove the fuel tank cap by turning it coun terclockwise See page 4 8 NOTICE Make sure that no foreign material enters the fuel tank ECB01052 3 Loosen the quick fasteners 1 Panel A 2 Panel B 3 Cowling 1 2 3 1 Panel C 1 U1TD62E0 book Page 10 Monday May 18 2015 9 20 A...

Page 100: ...p by turning it coun terclockwise 2 Place the panel in the original position and then install the quick fasteners NOTICE When installing the panel be sure not to pinch the cables or wires ECB00382 3 Tighten the quick fasteners 4 Install the fuel tank cap by turning it clock wise 5 Install the seat 1 Quick fastener 1 Quick fastener 1 1 1 U1TD62E0 book Page 11 Monday May 18 2015 9 20 AM ...

Page 101: ...ull the panel off To install a panel 1 Place the panel in the original position 2 Install panel A Cowling To remove the cowling 1 Remove panels A B and C 2 Loosen the quick fasteners and then take the cowling off U1TD62E0 book Page 12 Monday May 18 2015 9 20 AM ...

Page 102: ...brica tion chart In addition the condition of the spark plug can reveal the condition of the engine The porcelain insulator around the center elec trode of the spark plug should be a medium to light tan the ideal color when the vehicle is ridden normally If the spark plug shows a distinctly dif ferent color the engine could be operating im properly Do not attempt to diagnose such problems yourself...

Page 103: ...s possible EBU2949A Engine oil and oil filter element The engine oil level should be checked before each ride In addition the oil must be changed and the oil filter element replaced at the intervals spec ified in the periodic maintenance and lubrication chart To check the engine oil level 1 Place the ATV on a level surface 2 Start the engine warm it up until the engine oil has reached a normal tem...

Page 104: ... it in and then remove it again to check the oil level TIP The engine oil should be between the minimum and maximum level marks 5 If the engine oil is at or below the minimum level mark add sufficient oil of the recom mended type through the engine oil tank filler hole to raise it to the correct level NOTICE Be sure the engine oil is at the correct lev el otherwise engine damage may result ECB0085...

Page 105: ...ed other wise oil may seep out when the engine is running ECB00363 To change the engine oil with or without oil fil ter element replacement 1 Place the ATV on a level surface 2 Remove the engine guard by removing the bolts 3 Start the engine warm it up for several min utes and then turn it off 4 Place an oil pan under the engine to collect the used oil 5 Remove the engine oil tank filler cap and t...

Page 106: ... TIP Skip steps 7 10 if the oil filter element is not being replaced 7 Remove the oil filter element cover by remov ing the bolts 1 Engine oil tank drain bolt 2 Gasket 1 2 1 Crankcase engine oil drain bolt 2 Gasket 1 2 U1TD62E0 book Page 17 Monday May 18 2015 9 20 AM ...

Page 107: ...ings are properly seated 10 Install the oil filter element cover by installing the bolts and then tighten them to the speci fied torque 1 Oil filter element cover 2 Bolt 1 2 1 Oil filter element 2 O ring Tightening torque Oil filter element cover bolt 10 Nm 1 0 m kgf 7 2 ft lbf 1 2 2 U1TD62E0 book Page 18 Monday May 18 2015 9 20 AM ...

Page 108: ...el specification of CD or oils of a higher quality than specified In addition do not use oils labeled ENERGY CONSERV ING II or higher Make sure that no foreign material enters the crankcase 13 Start the engine and then let it idle for several minutes while checking it for oil leakage If oil is leaking immediately turn the engine off and check for the cause 14 Turn the engine off and then check the...

Page 109: ...amaha dealer change the coolant WARNING Never attempt to remove the radiator cap when the engine is hot EWB02671 EBU27945 To check the coolant level 1 Place the ATV on a level surface TIP The coolant level must be checked on a cold en gine since the level varies with engine tempera ture 2 Check the coolant level in the coolant reser voir TIP The coolant should be between the minimum and maximum le...

Page 110: ...ble otherwise the effectiveness of the coolant will be reduced ECB01012 TIP The radiator fan is automatically switched on or off according to the coolant temperature in the radiator If the engine overheats see page 8 52 for fur ther instructions EBU26808 Cleaning the air filter element The air filter element should be cleaned at the in tervals specified in the periodic maintenance and lubrication ...

Page 111: ...e air filter case cover by unhooking the holders 4 Fully loosen the wing bolt 5 Remove the air filter element together with the wing bolt and washer 1 Air filter case check hose 1 1 Air filter case cover 2 Air filter case cover holder 1 2 U1TD62E0 book Page 22 Monday May 18 2015 9 20 AM ...

Page 112: ...ean the sponge material Never use low flash point sol vents or gasoline to clean the sponge ma terial because the engine could catch fire or explode EWB01942 9 Squeeze the excess solvent out of the sponge material and let it dry NOTICE Do not twist the sponge material when squeezing it ECB00442 1 Air filter element 2 Washer 3 Wing bolt 3 2 1 1 Sponge material 2 Air filter element frame 1 2 U1TD62E...

Page 113: ...Pull the sponge material over the air filter ele ment frame 13 Apply all purpose grease to the air filter ele ment seat 14 Install the washer onto the air filter element frame and then insert the wing bolt into the hole in the air filter element frame NOTICE Be sure to install the washer with its curved side facing outward as shown ECB00454 1 Air filter element seat 1 U1TD62E0 book Page 24 Monday ...

Page 114: ...se 17 Install the seat TIP The air filter element should be cleaned every 20 40 hours It should be cleaned and lubricated more often if the ATV is operated in extremely dusty areas Each time the air filter element main tenance is performed check the air inlet of the air filter case for obstructions Check the air filter case rubber joint to the throttle body and the rub ber joint manifold fittings ...

Page 115: ... muffler 3 Tap the tailpipe lightly and then use a wire brush to remove any carbon deposits from the spark arrester portion of the tailpipe and inside of the tailpipe housing 1 Tailpipe cover 2 Bolt 2 1 2 1 Bolt 2 Retainer 3 Tailpipe 4 Gasket 1 2 3 4 1 U1TD62E0 book Page 26 Monday May 18 2015 9 20 AM ...

Page 116: ...ust system cool prior to touching exhaust components EBU29703 Adjusting the throttle lever free play The throttle lever free play should be checked and if necessary adjusted at the intervals specified in the periodic maintenance and lubrication chart The throttle lever free play should measure 2 0 4 0 mm 0 08 0 16 in as shown Periodically check the throttle lever free play and if necessary adjust ...

Page 117: ...of brake components requires pro fessional knowledge Brake service should be performed by a Yamaha dealer WARNING EWB02572 Operating with improperly serviced or adjust ed brakes could lead to a loss in braking ability and an accident EBU24131 Checking the front and rear brake pads The front and rear brake pads must be checked for wear at the intervals specified in the periodic maintenance and lubr...

Page 118: ...ithout having to disassemble the brake To check the brake pad wear check the wear indica tor grooves If a brake pad has worn to the point that the wear indicator grooves have almost dis appeared have a Yamaha dealer replace the brake pads as a set EBU29502 Checking the brake fluid level Before riding check that the brake fluid is above the minimum level mark Check the brake fluid lev el with the t...

Page 119: ...ystem reducing braking perfor mance Clean the filler cap before removing Use only DOT 4 brake fluid from a sealed contain er Use only the specified brake fluid otherwise the rubber seals may deteriorate causing leakage Refill with the same type of brake fluid Add ing a brake fluid other than DOT 4 may result in a harmful chemical reaction 1 Minimum level mark 1 Minimum level mark 1 1 Specified bra...

Page 120: ...ler check the cause be fore further riding EBU24293 Changing the brake fluid Have a Yamaha dealer change the brake fluid at the intervals specified in the periodic maintenance and lubrication chart In addition have the oil seals of the master cylinders and calipers as well as the brake hoses replaced at the intervals listed below or whenever they are damaged or leaking Oil seals Replace every two ...

Page 121: ... brake free play The parking brake free play must be checked and if necessary adjusted at the intervals specified in the periodic maintenance and lubrication chart Cable length A should measure 47 51 mm 1 85 2 01 in Adjust the parking brake free play as follows 1 Release the parking brake by moving the parking brake lever to the right 2 Fully loosen the locknut and the adjusting bolt at the rear b...

Page 122: ... lock nut ECB00522 WARNING EWB02091 Operating with improperly serviced or adjust ed brakes could cause the brakes to malfunc tion resulting in reduced braking performance This could increase the chance of a collision or accident After adjusting the parking brake free play block the rear of the ATV off the ground and spin the rear wheels Check to make sure there is no brake drag If brake drag is no...

Page 123: ...ntenance and lubrication chart The clutch lever free play should measure 8 0 13 0 mm 0 31 0 51 in as shown If the free play is incorrect adjust it as follows 1 To increase the clutch lever free play turn the clutch lever free play adjusting nut at the clutch lever in direction a and to decrease it turn the nut in direction b If the specified free play cannot be obtained proceed with the following ...

Page 124: ...ch mechanism EBU26865 Drive chain slack The drive chain slack should be checked before each ride and adjusted if necessary To check the drive chain slack 1 Place the ATV on a level surface TIP When checking and adjusting the drive chain slack there should be no weight on the ATV and all tires must be touching the ground 2 Move the ATV back and forth to locate the tightest portion of the drive chai...

Page 125: ...wn TIP A rod can be obtained at a Yamaha dealer to make this adjustment 4 Shift the transmission into neutral 5 To tighten the drive chain push the ATV backward To loosen the drive chain push the ATV forward NOTICE Improper drive chain slack will overload the engine as well as other vital parts of the ATV and can lead to drive chain slippage or breakage To 1 Drive chain slack 1 1 Rear wheel axle p...

Page 126: ...n chart otherwise it will quickly wear out especially when riding in dusty or wet areas Service the drive chain as follows NOTICE ECB00562 The drive chain must be lubricated after wash ing the ATV or riding in the rain or wet areas 1 Clean the drive chain with kerosene and a small soft brush NOTICE To prevent dam aging the O rings do not clean the drive chain with steam cleaners high pressure wash...

Page 127: ...s not move smoothly have a Yamaha dealer check or replace it WARNING EWB02582 Inspect cables frequently and replace if damaged Corrosion can result when the ca ble sheaths become damaged and cables can also become frayed or kinked which could restrict the operation of controls and lead to an accident or injury Always make sure all control cables work smoothly before you begin riding in cold weathe...

Page 128: ...ift pedal The operation of the shift pedal should be checked before each ride If operation is not smooth have a Yamaha dealer check the vehicle EBU28872 Checking and lubricating the brake pedal The operation of the brake pedal should be checked before each ride and the pedal pivot should be lubricated if necessary Recommended lubricants Brake lever Silicone grease Clutch lever Lithium soap based g...

Page 129: ...b or if a wheel does not turn smooth ly have a Yamaha dealer check the wheel hub bearings EBU24996 Lubricating the swingarm pivots The swingarm pivots must be lubricated by a Yamaha dealer at the intervals specified in the pe riodic maintenance and lubrication chart Recommended lubricant Lithium soap based grease Recommended lubricant Lithium soap based grease U1TD62E0 book Page 40 Monday May 18 2...

Page 130: ...icat ed at the intervals specified in the periodic main tenance and lubrication chart TIP For parts equipped with a grease nipple use a grease gun Left side Recommended lubricant Lithium soap based grease 1 Upper grease nipple 2 Lower grease nipple 2 1 2 U1TD62E0 book Page 41 Monday May 18 2015 9 20 AM ...

Page 131: ...ING EWB02161 Battery electrolyte is poisonous and danger ous as it contains sulfuric acid which can cause severe burns Avoid contact with skin eyes or clothing Always shield your eyes when working near batteries Antidote EXTERNAL Flush with water INTERNAL Drink large quantities of water or milk Follow with milk of magnesia beaten egg or vegetable oil Call a physician immediately EYES Flush with wa...

Page 132: ...CE When removing the bat tery the main switch must be off and the negative lead must be disconnected be fore the positive lead ECB01002 4 Pull the battery out of its compartment To charge the battery Have a Yamaha dealer charge the battery as soon as possible if it seems to have discharged Keep in mind that the battery tends to discharge more quickly if the ATV is equipped with optional elec trica...

Page 133: ...ICE ECB00941 Always keep the battery charged Storing a discharged battery can cause permanent bat tery damage To install the battery TIP Be sure the battery is fully charged 1 Place the battery in its compartment 2 Connect the positive battery lead first then connect the negative battery lead by installing their bolt NOTICE When installing the bat tery the main switch must be off and the positive ...

Page 134: ... and never use a substitute ob ject in place of the proper fuse An improper fuse or a substitute object can cause damage to the electrical system which could lead to a fire EWB02173 3 Turn the key to on and turn on the elec trical circuits to check if the devices operate 4 If the fuse immediately blows again have a Yamaha dealer check the electrical system EBU30871 Replacing a headlight bulb If a ...

Page 135: ... glass part of the headlight bulb to keep it free from oil oth erwise the transparency of the glass the luminosity of the bulb and the bulb life will be adversely affected Thoroughly clean off any dirt and fingerprints on the head light bulb using a cloth moistened with al cohol or thinner ECB00652 1 Headlight unit 2 Bolt 1 Headlight bulb holder cover 1 2 1 1 Headlight bulb holder 1 U1TD62E0 book ...

Page 136: ...holder cover TIP When installing the headlight bulb holder cover make sure the TOP mark faces upwards 7 Place the headlight unit in the original posi tion and then install the bolt 1 Do not touch the glass part of the bulb 1 Headlight bulb holder cover 2 TOP mark 1 2 U1TD62E0 book Page 47 Monday May 18 2015 9 20 AM ...

Page 137: ...usting bolt in direction b EBU26921 Tail brake light This model is equipped with an LED type of tail brake light If the tail brake light does not come on have a Yamaha dealer check it EBU25652 Removing a wheel 1 Place the ATV on a level surface 2 Loosen the wheel nuts 3 Elevate the ATV and place a suitable stand under the frame 4 Remove the nuts from the wheel 5 Remove the wheel 1 Headlight beam a...

Page 138: ... for exam ple can cause poor starting and loss of power The following troubleshooting charts represent quick and easy procedures for checking these vi tal systems yourself However should your ATV require any repair take it to a Yamaha dealer whose skilled technicians have the necessary tools experience and know how to service the ATV properly Use only genuine Yamaha replacement parts Im itation pa...

Page 139: ...ing the fuel system Fuel can ignite or explode causing severe inju ry or property damage Make sure there are no open flames or sparks in the area including pi lot lights from water heaters or furnaces U1TD62E0 book Page 50 Monday May 18 2015 9 20 AM ...

Page 140: ...ve the spark plug and check the electrodes 3 Ignition Wipe off with a dry cloth and correct the spark plug gap or replace the spark plug Have a Yamaha dealer check the ATV The engine does not start Check the compression Dry Wet Operate the electric starter Have a Yamaha dealer check the ATV The engine does not start Check the ignition Operate the electric starter 2 Battery The engine turns over qu...

Page 141: ...er can be temporarily used instead provided that it is changed to the recommended coolant as soon as possible Wait until the engine has cooled Check the coolant level in the reservoir and radiator The coolant level is OK The coolant level is low Check the cooling system for leakage Have a Yamaha dealer check and repair the cooling system Add coolant See TIP Start the engine If the engine overheats...

Page 142: ...akes several times at slow speeds to let friction dry out the linings EWB02312 NOTICE Excessive wa ter pressure may cause water seepage and deterioration of wheel bearings brakes transmission seals and electrical devices Many expensive repair bills have resulted from improper high pressure de tergent applications such as those avail able in coin operated car washers ECB00712 4 Once most of the dir...

Page 143: ... fuel from deteriorat ing 3 Perform the following steps to protect the cyl inder piston rings etc from corrosion a Remove the spark plug cap and spark plug b Pour a teaspoonful of engine oil into the spark plug bore c Install the spark plug cap onto the spark plug and then place the spark plug on the cylinder head so that the electrodes are grounded This will limit sparking during the next step d ...

Page 144: ...e from entering it 7 Remove the battery and fully charge it Store it in a cool dry place and charge it once a month Do not store the battery in an exces sively cold or warm place less than 0 C 30 F or more than 30 C 90 F For more infor mation on storing the battery see page 8 42 TIP Make any necessary repairs before storing the ATV U1TD62E0 book Page 3 Monday May 18 2015 9 20 AM ...

Page 145: ... min YFZ45YSSG_EUR FRA GBR YFZ45YSXG_EUR FRA GBR Uncertainty of measurement 3 0 dB A YFZ45YSSG_EUR FRA GBR YFZ45YSXG_EUR FRA GBR Vibration on seat EN1032 ISO5008 Will not exceed 0 5 m s YFZ45YSSG_EUR FRA GBR YFZ45YSXG_EUR FRA GBR Uncertainty of measurement 0 1 m s YFZ45YSSG_EUR FRA GBR YFZ45YSXG_EUR FRA GBR Vibration on handle EN1032 ISO5008 Will not exceed 2 5 m s YFZ45YSSG_EUR FRA GBR YFZ45YSXG_...

Page 146: ... 1 25 L 1 32 US qt 1 10 Imp qt Air filter Air filter element Wet element Fuel Recommended fuel Premium unleaded gasoline only Fuel tank capacity 10 0 L 2 64 US gal 2 20 Imp gal Fuel reserve amount 3 4 L 0 90 US gal 0 75 Imp gal Fuel injection Throttle body ID mark 1TD1 00 Spark plug s Manufacturer model NGK CR8E Spark plug gap 0 7 0 8 mm 0 028 0 031 in Clutch Clutch type Wet multiple disc Transmis...

Page 147: ...S MS21 Rear tire Type Tubeless Size AT20 x 10R9 Manufacturer model MAXXIS MS22 Loading Maximum loading limit 100 0 kg 220 lb Total weight of rider cargo accessories and tongue Tire air pressure measured on cold tires Recommended Front 35 0 kPa 0 350 kgf cm 5 0 psi Rear 35 0 kPa 0 350 kgf cm 5 0 psi Minimum Front 32 0 kPa 0 320 kgf cm 4 6 psi Rear 32 0 kPa 0 320 kgf cm 4 6 psi Front wheel Wheel typ...

Page 148: ...ingarm link suspension Spring shock absorber type Coil spring gas oil damper Wheel travel 280 mm 11 0 in Electrical system Ignition system TCI Charging system AC magneto Battery Model YTZ7S Voltage capacity 12 V 6 0 Ah Headlight Bulb type Krypton bulb Bulb voltage wattage quantity Headlight 12 V 30 0 30 0 W 2 Tail brake light LED Neutral indicator light LED Fuel level warning light LED Coolant tem...

Page 149: ...ors that influence the actual level of exposure of work force include the characteristics of the work room the other sources of noise etc i e the number of machines and other adjacent process es and the length of time for which an operator is exposed to the noise Also the permissible expo sure level can vary from country This information however will enable the user of the machine to make a better...

Page 150: ...BER MODEL LABEL INFORMATION EBU26031 Vehicle identification number The vehicle identification number is stamped into the frame TIP The vehicle identification number is used to iden tify your ATV EBU26051 Model label The model label is affixed at the location in the il lustration Record the information on this label in the space provided This information will be need ed when ordering spare parts fr...

Page 151: ...11 2 11 1 Model label 1 U1TD62E0 book Page 2 Monday May 18 2015 9 20 AM ...

Page 152: ...4 8 20 Coolant temperature warning light 4 2 Cowling and panels removing and installing 8 10 D Drive chain 5 5 Drive chain lubricating 8 37 Drive chain slack 8 35 E Engine break in 6 4 Engine oil 5 4 Engine oil and oil filter element 8 14 Engine start 6 1 Engine stop switch 4 3 Engine trouble warning light 4 3 F Fuel 4 9 5 4 Fuel level warning light 4 3 Fuel tank cap 4 8 Fuse replacing 8 45 H Hand...

Page 153: ...adjusting the rear 4 16 Spark arrester cleaning 8 25 Spark plug checking 8 13 Specifications 10 1 Speed limiter 4 5 Start switch 4 4 Steering shaft lubricating 8 42 Storage 9 2 Suspension lubricating the upper and lower arm pivots 8 41 Swingarm pivots lubricating 8 40 T Tail brake light 8 48 Throttle lever 4 4 5 5 Throttle lever free play adjusting 8 27 Tires 5 5 Troubleshooting 8 49 Troubleshooti...

Page 154: ...N APPROVED HELMET AND PROTECTIVE GEAR NEVER USE ON PAVED ROADS NEVER CARRY PASSENGERS NEVER operate without proper training or instruction at speeds too fast for your skills or the conditions on public roads a collision can occur with another vehicle with a passenger passengers affect balance and steering and increase risk of losing control LOCATE AND READ OWNER S MANUAL FOLLOW ALL INSTRUCTIONS AN...

Reviews:

Related manuals for FZ45YSXG