


E-8
DIGITAL OUT
OPTICAL
R
L
OUT
IN
AUX/MD
VIDEO SIGNAL
MONITOR
OUT
OUT
VCR
IN
VIDEO
OUT
SUBWOOFER
TV MODE
PAL
NTSC
AUTO
SPEAKERS
SEE OWNER’S M
FOR CONNECTIO
CENTER: 6
Ω
MIN./S
REAR: I2
Ω
MIN./S
CENTER
REAR R
FRONT
R
L
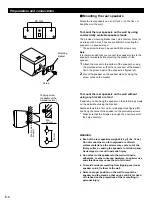
Preparations and connections
m
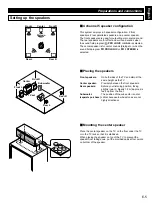
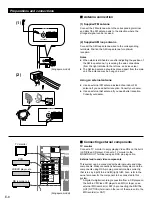
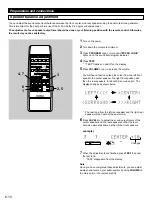
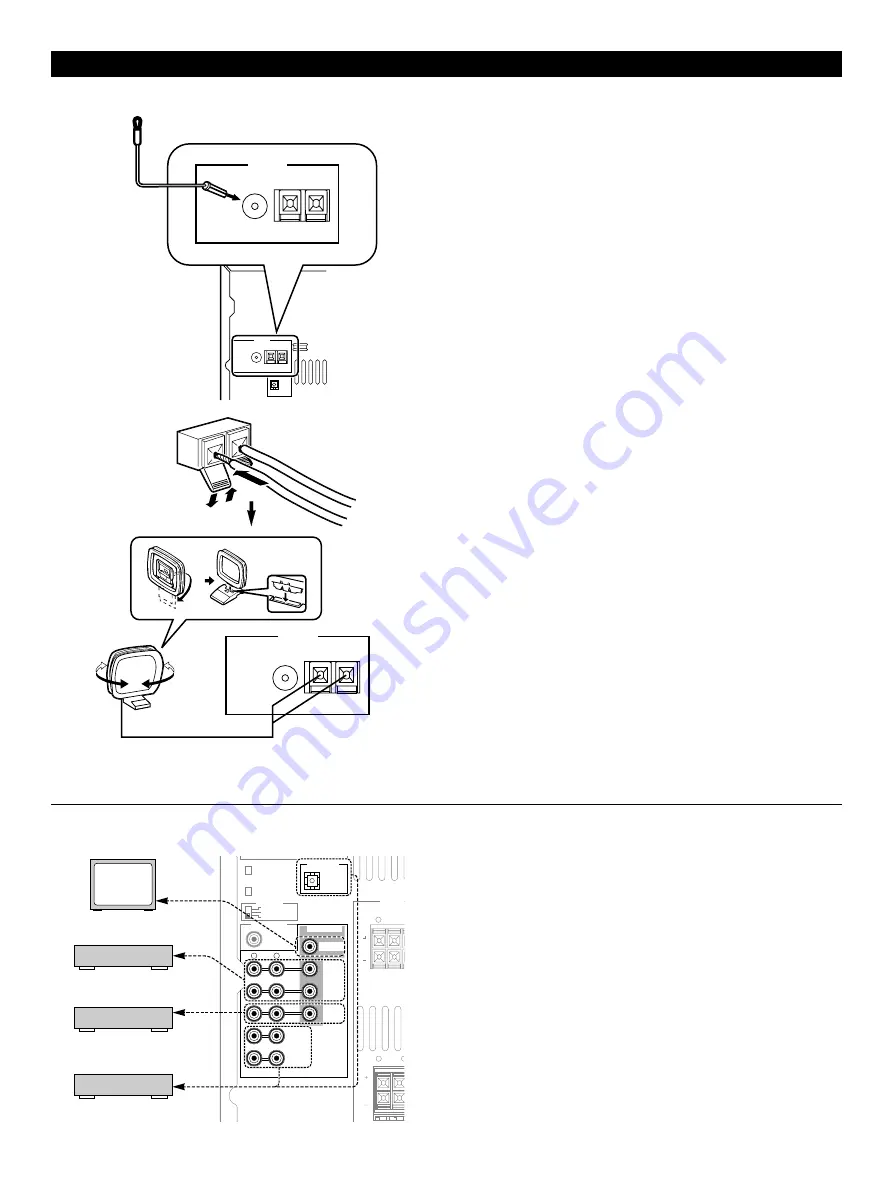
Connecting external components
TV monitor
Connect a TV monitor to enjoy playing Video CDs on the built-
in CD/Video CD player. Connect a TV monitor to the
MONITOR OUT terminal using an RCA pin plug cable.
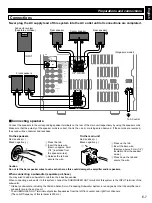
External audio and video components
This system can be connected with external audio and video
components. Make connections between this system and the
components using RCA pin plug connector cables correctly,
that is to say L (left) to L and R (right) to R. Also, refer to the
owner’s manual for the component to be connected to this
system.
* A digital-to-digital recording is possible from a CD played on
the built-in CD/Video CD player to an MD (or tape) on an
external MD recorder (or DAT) by connecting the DIGITAL
OUT (OPTICAL) terminal on the rear of the main unit to the
MD recorder (or DAT).
m
Antenna connection
(1) Supplied FM antenna
Connect the FM antenna wire to the corresponding terminal
and direct the FM antenna wire to the direction where the
strongest signal can be received.
(2) Supplied AM loop antenna
Connect the AM loop antenna wires to the corresponding
terminals. Position the AM loop antenna for optimum
reception.
Notes
●
When static is still heard even after adjusting the position of
the AM loop antenna, try reversing the wire connections
(from the right terminal to the left one, and vice versa).
●
The AM loop antenna should be placed apart from the main
unit. The antenna may be hung on a wall.
Using an external antenna
●
Use an external FM antenna instead of an indoor FM
antenna if you need better reception. Consult your dealer.
●
Use an external AM antenna if you need better reception.
Consult your dealer.
(1)
(2)
ANTENNA
75
Ω
UNBAL.
FM
GND
AM
ANTENNA
75
Ω
UNBAL.
FM
GND
AM
DIGITAL OUT
OPTICAL
ANTENNA
75
Ω
UNBAL.
FM
GND
AM
TV monitor
VCR
LD/DVD player, etc.
MD recorder, etc.
(Singapore model)
(Singapore model)
Summary of Contents for GX-700VCD
Page 52: ...V380830 ...