


GX-900
GX-900
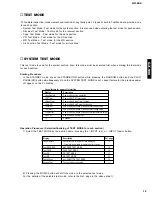
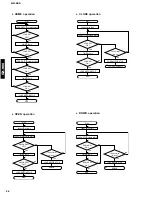
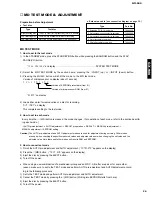
MD TEST MODE
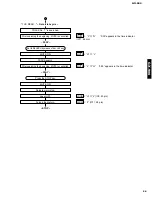
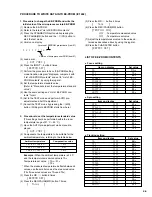
1. How to set to the test mode
1) In the STANDBY mode, press the STANDBY/ON button while pressing the RANDOM button and the PLAY/
PAUSE(CD) button.
“
<Key
Operate
” on display ............................................................... SYSTEM TEST MODE
2) Select the MD TEST MODE by the section name, pressing the
w
INPUT (up) or
q
INPUT (down) button.
3) Pressing the MUSIC button will shift the mode to the MD test mode.
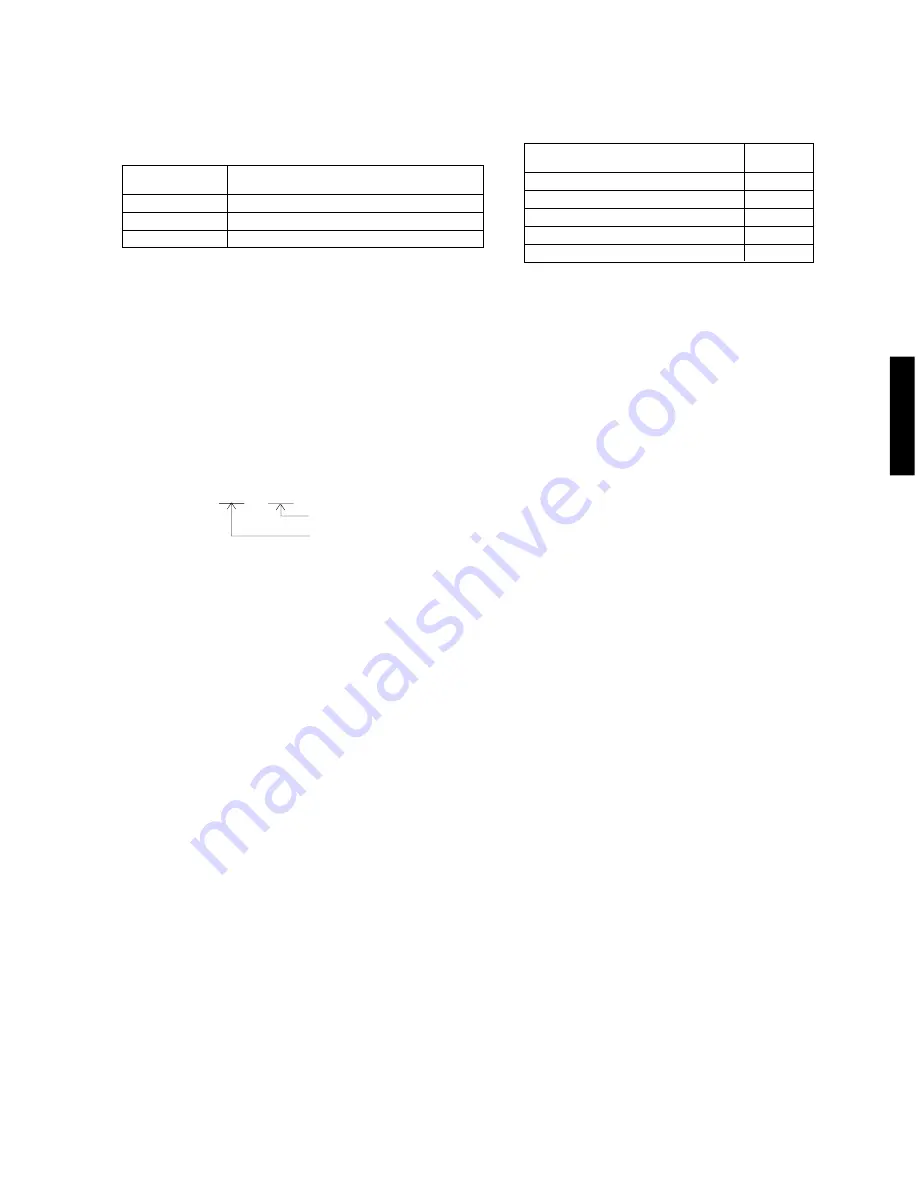
Version of microprocessor on display (about 1 second)
t
s
m
1
3
0
1
e
0
2
Version of EEPROM protect data (from 01)
Version of microprocessor ROM (from 01)
“
EJECT
” on display
4) Load either a disc for reproduction or a disc for recording.
“
AUT
YOBI
” on display
This completes setting to the test mode.
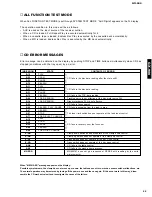
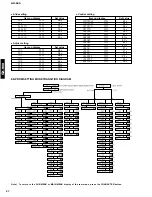
2. How to set to each mode
Every time the
r
(MD) button is pressed, the mode changes. (For operation of each mode, refer to the section describ-
ing each mode.)
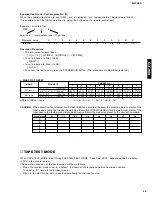
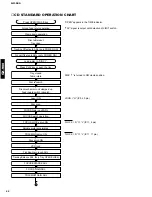
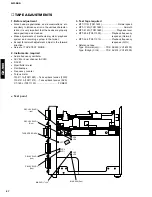
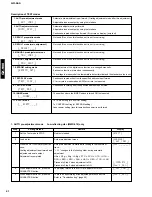
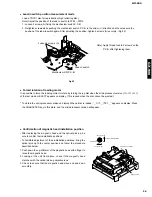
Preparation before Adjustment
●
Test disc
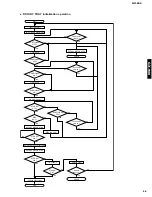
->AUTO pre-adjustment -> AUTO adjustment -> RESULT preparation -> RESULT -> MANUAL pre-adjustment ->
MANUAL adjustment -> EEPROM setting
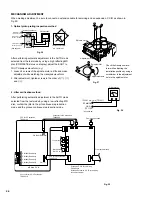
●
Extension cable (see connection diagram on page 35.)
High reflecting disc
TDYS1 (SONY) [for reproduction] (P/No. TX945850)
Low reflecting disc
Commercially available mini disc for recording
Low reflecting disc
MMD-318 [for pre-adjustment] (P/No. AAX04890)
Type
Test disc
1. Extension P.C.B. for servicing
TX946230
2. 2-pin extension connector for servicing
TX946200
3. 6-pin extension connector for servicing
TX946210
4. 5-pin flat cable for servicing
TX946190
5. 28-pin flat cable for servicing
TX946220
Type
Part No.
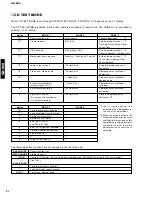
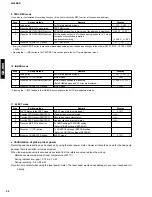
3. How to cancel test mode
Caution) The AUTO pre-adjustment and AUTO adjustment modes are used for adjustment during servicing. Other modes
are used when checking the specific measured values and adjusted values or when changing the set value and the
adjusted value. Note that use of other modes will rewrite RAM and EEPROM.
1) Finish the AUTO pre-adjustment and AUTO adjustment. ( “
COMPLETE
” appears on the display)
2) Press the
a
(MD) button. ( “
TEST
END
” appears on the display)
3) Eject the disc by pressing the EJECT button.
4) Turn off the power.
●
When using a new combination of a mechanical pickup and an MD P.C.B. after a repair or for some other
reason, make sure to set to the TEST mode and perform AUTO pre-adjustment and AUTO adjustment accord-
ing to the following procedure.
1) Set to the TEST mode and perform AUTO pre-adjustment and AUTO adjustment.
2) Cancel the TEST mode by pressing the
a
(MD) button. (Writing into EEPROM starts from here.)
3) Eject the disc by pressing the EJECT button.
4) Turn off the power.
■
MD TEST MODE & ADJUSTMENT
30
Summary of Contents for GX-900
Page 103: ...GX 900 GX 900 ...


