background image

information on storing the bat-
tery, see page 6-17.

NOTE:

Make any necessary repairs before
storing the scooter.

7

SCOOTER CARE AND STORAGE

7-4

5RW-F8199-E3.qxd  23/12/2004 09:33  Página 51

Summary of Contents for JOGR JOGRR CS50Z

Page 1: ...5RW F8199 E2 CS50Z CS50 OWNER S MANUAL 5RW F8199 E3 qxd 23 12 2004 09 33 Página 1 ...

Page 2: ...5RW F8199 E3 qxd 23 12 2004 09 33 Página 2 ...

Page 3: ...hly so as to enjoy all advantages of your CS50Z CS50 The owner s manual does not only instruct you in how to operate inspect and maintain your scooter but also in how to safeguard yourself and others from trouble and injury In addition the many tips given in this manual will help keep your scooter in the best possible condition If you have any further questions do not hesitate to contact your Yama...

Page 4: ... product design and quality Therefore while this manual contains the most current product information available at the time of printing there may be minor discrepancies between your scooter and this manual If you have any questions concerning this manual please consult your Yamaha dealer EWA12410 s s WARNING PLEASE READ THIS MANUAL CAREFULLY AND COMPLETELY BEFORE OPERATING THIS SCOOTER s s WARNING...

Page 5: ...MANUAL 2005 by YAMAHA MOTOR SPAIN S A 1st edition January 2005 All rights reserved Any reprinting or unauthorized use without the written permission of YAMAHA MOTOR SPAIN S A is expressly prohibited Printed in Spain 5RW F8199 E3 qxd 23 12 2004 09 33 Página 5 ...

Page 6: ...5RW F8199 E3 qxd 23 12 2004 09 33 Página 6 ...

Page 7: ...ilter element 6 8 Adjusting the carburetor 6 9 Adjusting the throttle cable free play 6 9 Tires 6 9 Adjusting the front brake lever free play 6 11 Adjusting the rear brake lever free play 6 11 Cheking the front brake pads and rear brake shoes 6 12 Checking the front brake fluid level 6 13 Changing the brake fluid 6 13 Checking and lubricating the cables 6 13 Checking and lubricating the throttle g...

Page 8: ...n automobile driver who did not see the scooter Making yourself conspicuous appears to be very effective in reducing the chance of this type of accident Therefore Wear a brightly colored jacket Use extra caution when appro aching and passing through intersections since intersec tions are the most likely places for scooter accidents to occur Ride where other motorists can see you Avoid riding in an...

Page 9: ...etc is effective in preventing or redu cing abrasions or lacerations Never wear loose fitting clothes otherwise they could catch on the control levers or wheels and cause injury or an accident Never touch the engine or exhaust system during or after operation They become very hot and can cause burns Always wear protective clothing that covers your legs ankles and feet Passengers should also observ...

Page 10: ...arance or cornering clearance limit suspension tra vel steering travel or control ope ration or obscure lights or reflec tors Accessories fitted to the hand lebar or the front fork area can create instability due to impro per weight distribution or aerodynamic changes If accessories are added to the handlebar or front fork area they must be as lightweight as possible and should be kept to a minimu...

Page 11: ...soap and water and change your clot hes EAU10360 Further safe riding points Be sure to signal clearly when making turns Braking can be extremely difficult on a wet road Avoid hard bra king because the scooter could slide Apply the brakes slowly when stopping on a wet surface Slow down as you approach a corner or turn Once you have completed a turn accelerate slowly Be careful when passing parked c...

Page 12: ... 2 1 Headlight page 6 16 2 Front blinker page 6 16 3 Seat page 3 6 4 Handle 5 Left rear blinker page 6 16 6 kickstarter page 3 6 7 Air filter page 6 8 8 Center stand page 6 14 1 2 3 4 5 6 8 7 5RW F8199 E3 qxd 23 12 2004 09 33 Página 12 ...

Page 13: ... 6 15 10 Right rear blinker page 6 16 11 Tail light page 6 16 12 Fuel tank page 3 4 13 Storage compartment page 3 6 14 Battery page 6 17 15 Wheel Rear page 6 15 16 Coolant reservoir page 6 7 15 10 11 12 13 14 16 9 5RW F8199 E3 qxd 23 12 2004 09 33 Página 13 ...

Page 14: ...ng light page 3 1 23 Coolant temperature warning light page 3 1 24 TRIP button page 3 2 25 Fuel gauge page 3 3 26 Front brake lever page 3 4 27 Right handlebar switch page 3 3 28 Turn signal switch page 3 3 29 Horn switch page 3 3 30 Main switch page 3 1 31 Coolant level gauge window page 6 7 k b a j d z c 40 50 30 10 20 60 70 80 0 y 17 29 28 31 30 27 26 20 21 25 23 19 20 18 24 22 5RW F8199 E3 qxd...

Page 15: ...all the way to the left 2 Push the key in from the OFF position and then turn it to LOCK while still pushing it 3 Remove the key To unlock the steering Push the key in and then turn it to OFF while still pushing it EWA10060 s s WARNING Never turn the key to OFF or LOCK while the vehicle is moving otherwise the electrical systems will be switched off which may result in loss of control or an accide...

Page 16: ...warning light may flic ker when riding on a slope or during sudden acceleration or deceleration but this is not a malfunction EAU11430 Coolant temperature warning light y This warning light comes on when the engine overheats When this occurs stop the engine immediately and allow the engine to cool ECA10020 CAUTION Do not operate the engine if it is overheated EAUM1090 Speedometer unit 1 Speedomete...

Page 17: ...e SET button to set the hours 5 Push the SET button for at least two seconds and the minutes digits will start flashing 6 Push the SET button to set the minutes 7 Push the SET button for at least two seconds to start the clock and return to the odometer trip meter mode NOTE The clock is displayed only when the key is in the f position EAU12343 Handlebar switches 1 Horn switch 2 Turn signal switch ...

Page 18: ...l this lever toward the handlebar grip EAU12950 Rear brake lever The rear brake lever is located on the left handlebar grip To apply the rear brake pull this lever toward the hand lebar grip EAU13200 Fuel and 2 stroke engine oil tank caps 1 Fuel tank cap 2 Engine oil tank cap The fuel tank cap and the 2 stroke engine oil tank cap are located under the seat See page 3 6 Fuel tank cap To remove the ...

Page 19: ...h since fuel may deteriorate painted surfa ces or plastic parts EAU13270 Your Yamaha engine has been desig ned to use regular unleaded gasoline with a research octane number of 91 or higher If knocking or pinging occurs use a gasoline of a different brand or premium unleaded fuel Use of unleaded fuel will extend spark plug life and reduce maintenance costs EAU13460 2 stroke engine oil Make sure th...

Page 20: ... the seat down and then push it down to lock it in place 2 Remove the key from the main switch if the scooter will be left unattended NOTE Make sure that the seat is properly secured before riding EAU14440 Storage compartment 1 Storage compartment EAU14510 Storage compartment There is a storage compartment under the seat See page 3 6 EWA10960 s s WARNING Do not exceed the load limit of 3 5 kg 7 4 ...

Page 21: ...ent Since the storage compart ment may get wet while the scooter is being washed wrap any articles stored in the com partment in a plastic bag Do not keep anything valuable or breakable in the storage compartment To store a helmet in the storage com partment place the helmet upside down with the front facing forward NOTE Some helmets cannot be stored in the storage compartment because of their siz...

Page 22: ...ery important in addition to a thorough visual inspection to check the follo wing points before each ride NOTE Pre operation checks should be made each time the vehicle is used Such an inspection can be accom plished in a very short time and the added safety it assures is more than worth the time involved EWA11150 s s WARNING If any item in the Pre operation check list is not working properly have...

Page 23: ...3 3 4 Check fluid level in reservoir If necessary add recommended brake fluid to specified level Check hydraulic system for leakage Check operation Rear brake Lubricate cable if necessary 3 4 6 11 6 12 Check lever free play Adjust if necessary Make sure that operation is smooth Throttle grip Check cable free play 6 9 6 14 If necessary have Yamaha dealer adjust cable free play and lubricate cable a...

Page 24: ...hten if necessary Instruments lights Check operation signals and switches Correct if necessary Check coolant level in reservoir Coolant If necessary add recommended coolant to specified level 6 6 6 7 Check cooling system for leakage PRE OPERATION CHECKS 4 3 4 5RW F8199 E3 qxd 23 12 2004 09 33 Página 24 ...

Page 25: ...etely 3 While applying the front or rear brake start the engine by pus hing the start switch or by pus hing the kickstarter lever down NOTE If the engine fails to start by pushing the start switch release the switch wait a few seconds and then try again Each starting attempt should be as short as possible to preserve the battery Do not crank the engine more than 5 seconds on any one attempt If the...

Page 26: ...wing material carefully Since the engine is brand new do not put an excessive load on it for the first 1000 km 600 mi The various parts in the engine wear and polish themsel ves to the correct operating clearan ces During this period prolonged full throttle operation or any condition that might result in engine overhea ting must be avoided EAUT1110 0 150 km 0 90 mi Avoid operation above 1 3 thrott...

Page 27: ...can become very hot park in a place where pedes trians or children are not likely to touch them Do not park on a slope or on soft ground otherwise the vehicle may overturn 5 OPERATION AND IMPORTANT RIDING POINTS 5 3 5RW F8199 E3 qxd 23 12 2004 09 33 Página 27 ...

Page 28: ... DEPENDING ON THE WEATHER TERRAIN GEO GRAPHICAL LOCATION AND INDIVI DUAL USE THE MAINTENANCE INTERVALS MAY NEED TO BE SHORTENED EWA10320 s s WARNING If you are not familiar with mainte nance work have a Yamaha dealer do it for you EWA10330 s s WARNING This scooter is designed for use on paved roads only If this scooter is operated in abnormally dusty muddy or wet conditions the air fil ter element...

Page 29: ...MAINTENANCE JOB 1 6 12 18 24 CHECK 1 Fuel line Check fuel and vacuum hoses for cracks or damage Check condition 2 Spark plug Clean and regap Replace 3 Air filter element Clean Replace 4 Front brake Check operation fluid level and vehicle for fluid leakage Replace brake pads Whenever worn to the limit 5 Rear brake Check operation and adjust brake lever free play Replace brake shoes Whenever worn to...

Page 30: ...and for oil leakage 14 Shock absorber Check operation and shock absorber for oil leakage assembly 15 Carburetor Adjust engine idling speed 16 Autolube pump Check operation Bleed if necessary 17 Cooling system Check coolant level and vehicle for coolant leakage Change Every 3 years 18 Final transmission Check vehicle for oil leakage oil Change 19 V belt Replace Every 12000 km 20 Front and rear brak...

Page 31: ...egularly check and if necessary correct the brake fluid level Every two years replace the internal components of the brake master cylinder and caliper and change the bra ke fluid Replace the brake hoses every four years and if cracked or damaged PERIODIC MAINTENANCE AND MINOR REPAIR 6 4 6 5RW F8199 E3 qxd 23 12 2004 09 33 Página 31 ...

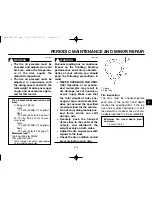
Page 32: ...yourself Instead have a Yamaha dealer check the vehicle 2 Check the spark plug for electro de erosion and excessive carbon or other deposits and replace it if necessary To install the spark plug 1 Distance between electrodes 1 Measure the spark plug gap with a wire thickness gauge and if necessary adjust the gap to spe cification 2 Clean the surface of the spark plug gasket and its mating surfa ce...

Page 33: ...nsmission oil drain bolt and then tighten it to the specified torque 6 Add the specified amount of the recommended final transmission oil and then install and tighten the oil filler cap EWA11310 s s WARNING Make sure that no foreign material enters the final trans mission case Make sure that no oil gets on the tire or wheel 7 Check the final transmission case for oil leakage If oil is leaking chec...

Page 34: ...dd coolant to the maximum level mark ECA10470 CAUTION If coolant is not available use distilled water or soft tap water instead Do not use hard water or salt water since it is harmful to the engine If water has been used instead of coolant replace it with coo lant as soon as possible other wise the engine may not be sufficiently cooled and the coo ling system will not be protec ted against frost a...

Page 35: ... Clean the air filter element with solvent and then squeeze the remaining solvent out 1 The air filter EWA10430 s s WARNING Use only a dedicated parts clea ning solvent To avoid the risk of fire or explosion do not use gasoli ne or solvents with a low flash point ECA10510 CAUTION To avoid damaging the foam mate rial handle it gently and carefully and do not twist or wring it 5 Apply oil of the rec...

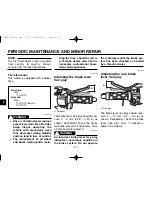
Page 36: ...le cable free play The throttle cable free play should measure 2 5 mm 0 8 0 20 in at the throttle grip Periodically check the throttle cable free play and if necessary adjust it as follows NOTE The engine idling speed must be correctly adjusted before checking and adjusting the throttle cable free play 1 Locknut 2 Adjuster 3 Free play 1 Loosen the locknut 2 To increase the throttle cable free play...

Page 37: ...d items which can shift during a ride Securely pack the heaviest items close to the center of the vehicle and distribute the weight evenly on both sides Adjust the tire air pressure with regard to the load Check the tire condition and air pressure before each ride 1 Depth 2 Side face Tire inspection The tires must be checked before each ride If the center tread depth reaches the specified limit if...

Page 38: ...r free play a Free play The brake lever free play should mea sure 2 5 mm 0 08 0 20 in as shown Periodically check the brake lever free play and if necessary have a Yamaha dealer adjust it EWA10640 s s WARNING An incorrect brake lever free play indicates a hazardous condition in the brake system Do not operate the motorcycle until the brake sys tem has been checked or repaired by a Yamaha dealer EA...

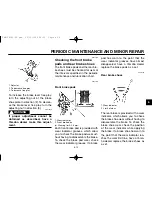
Page 39: ...ke pad is provided with wear indicator grooves which allow you to check the brake pad wear wit hout having to disassemble the brake To check the brake pad wear check the wear indicator grooves If a brake pad has worn to the point that the wear indicator grooves have almost disappeared have a Yamaha dealer replace the brake pads as a set EAU22540 Rear brake shoes 1 Wear indicator 2 Limit of wear Th...

Page 40: ...ter the master cylinder when refilling Water will significantly lower the boiling point of the fluid and may result in vapor lock Brake fluid may deteriorate pain ted surfaces or plastic parts Always clean up spilled fluid immediately As the brake pads wear it is nor mal for the brake fluid level to gradually go down However if the brake fluid level goes down suddenly have a Yamaha dealer check th...

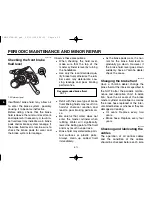
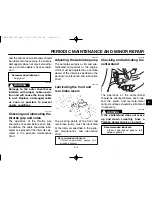
Page 41: ...he engine which must be adjusted by a Yamaha dealer at the intervals specified in the periodic maintenance and lubrication chart EAU23170 Lubricating the front and rear brake levers The pivoting points of the front and rear brake levers must be lubricated at the intervals specified in the perio dic maintenance and lubrication chart EAU23190 Checking and lubricating the centerstand The operation of...

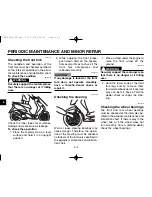
Page 42: ...t EAU23280 Checking the steering Worn or loose steering bearings may cause danger Therefore the opera tion of the steering must be checked as follows at the intervals specified in the periodic maintenance and lubrica tion chart 1 Place a stand under the engine to raise the front wheel off the ground EWA10750 s s WARNING Securely support the motorcycle so that there is no danger of it falling over ...

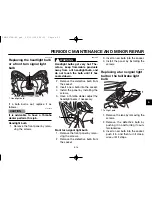
Page 43: ...ket 4 Install the panel by installing the screws 5 Have a Yamaha dealer adjust the headlight beam if necessary Front turn signal light bulb 1 Remove the front panel by remo ving the screws 2 Remove the defective bulb from the socket 3 Insert a new bulb into the socket 4 Install the panel by installing the screws EAU24281 Replacing a turn signal light bulb or the tail brake light bulb 1 Tail light ...

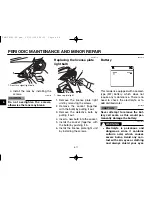
Page 44: ...he bulb by pushing it in 6 Install the license plate light unit by installing the screws EAU23370 Battery This model is equipped with a sealed type MF battery which does not require any maintenance There is no need to check the electrolyte or to add distilled water ECA10620 CAUTION Never attempt to remove the bat tery cell seals as this would per manently damage the battery EWA10760 s s WARNING El...

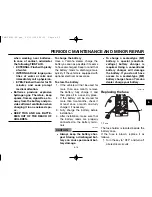
Page 45: ...more than one month remove the battery fully charge it and then place it in a cool dry place 2 If the battery will be stored for more than two months check it at least once a month and fully charge it if necessary 3 Fully charge the battery before installation 4 After installation make sure that the battery leads are properly connected to the battery termi nals ECA10630 CAUTION Always keep the bat...

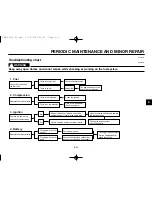
Page 46: ...e may occur during operation Any problem in the fuel compression or ignition sys tems for example can cause poor starting and loss of power The following troubleshooting chart represents a quick and easy procedu re for checking these vital systems yourself However should your scoo ter require any repair take it to a Yamaha dealer whose skilled techni cians have the necessary tools expe rience and ...

Page 47: ... and correct the spark plug gap or replace the spark plug Have a Yamaha dealer check the vehicle The engine does not start Have a Yamaha dealer check the vehicle The engine does not start Check the battery Operate the electric starter 4 Battery The engine turns over quickly The engine turns over slowly The battery is good Check the battery lead connections and charge the battery if necessary Dry W...

Page 48: ...area any longer than instructed Also tho roughly rinse the area off with water immediately dry it and then apply a corrosion protec tion spray Improper cleaning can damage windshields cowlings panels and other plastic parts Use only a soft clean cloth or spon ge with mild detergent and water to clean plastic Do not use any harsh chemical products on plastic parts Be sure to avoid using cloths or s...

Page 49: ...th 2 Use a chrome polish to shine chrome aluminum and stainless steel parts including the exhaust system Even the thermally indu ced discoloring of stainless steel exhaust systems can be removed through polishing 3 To prevent corrosion it is recom mended to apply a corrosion pro tection spray on all metal inclu ding chrome and nickel plated surfaces 4 Use spray oil as a universal clea ner to remov...

Page 50: ...to the spark plug bore c Install the spark plug cap onto the spark plug and then place the spark plug on the cylinder head so that the electrodes are grounded This will limit sparking during the next step d Turn the engine over several times with the starter This will coat the cylinder wall with oil e Remove the spark plug cap from the spark plug and then install the spark plug and the spark plug ...

Page 51: ...information on storing the bat tery see page 6 17 NOTE Make any necessary repairs before storing the scooter 7 SCOOTER CARE AND STORAGE 7 4 5RW F8199 E3 qxd 23 12 2004 09 33 Página 51 ...

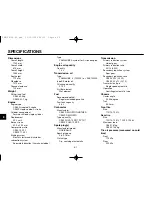
Page 52: ... 10 L Air filter element Wet element Fuel Recommended fuel Regular unleaded gasoline Fuel tank capacity 5 5 L Carburetor Manufacturer CS50 DELLORTO GURTNER CS50Z DELLORTO Type x quantity CS50 PHVA 12 ZS 1 PY 12 1 CS50Z PHVA 12 ZS 1 Spark plug s Manufacturer model NGK BR8HS Spark plug gap 0 6 0 7 mm Clutch type Dry centrifugal automatic Transmission Primary reduction system Helical gear Primary red...

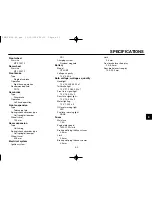
Page 53: ...I Charging system Flywheel magneto Battery Model GT4L BS Voltage capacity 12 V 4 0 Ah Bulb voltage wattage x quantity Headlight 12 V 35 W 35 0 W x 1 Tail brake light 12 V 21 0 W 5 0 W x 1 Front turn signal light 12 V 16 0 W x 2 Rear turn signal light 12 V 10 0 W x 2 Meter lighting 12 V 1 2 W x 2 Oil level warning light LED Fuel level warning light NONE Fuses Main fuse 7 5 A Engine idle speed 1800 ...

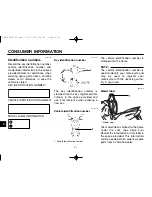
Page 54: ...ce provided and use it for reference when ordering a new key EAU26410 Vehicle identification number 1 Vehicle identification number The vehicle identification number is stamped into the frame NOTE The vehicle identification number is used to identify your motorcycle and may be used to register your motorcycle with the licensing autho rity in your area EAU26540 Model label 1 Model label The model l...

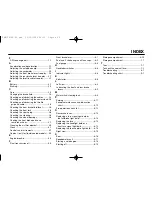
Page 55: ... 5 1 Coolant only for liquid cooled models 5 2 E Engine break in 5 2 F Final transmission oil 5 2 Front brake lever 6 1 Fuel and 2 stroke engine oil tank caps 6 2 Fuel gauge 6 5 H Handlebar switches 6 6 I Indicator lights 6 6 K Kickstarter 6 8 L Left view 6 9 Lubricating the front and rear brake levers 6 9 M Main switch steering lock 6 9 P Parking 6 11 Periodic maintenance and lubrication chart 6 ...

Page 56: ...YAMAHA MOTOR ESPAÑA S A PRINTED IN SPAIN 2005 1 Bengar Gràfiques S L E 5RW F8199 E3 qxd 23 12 2004 09 33 Página 56 ...

Reviews: