

22
En
If there is a problem with the unit, check the following list first. If you cannot resolve the problem with the suggested
solutions or if the problem is not listed below, turn off and unplug the unit, and consult the nearest authorized Yamaha dealer
or service center.
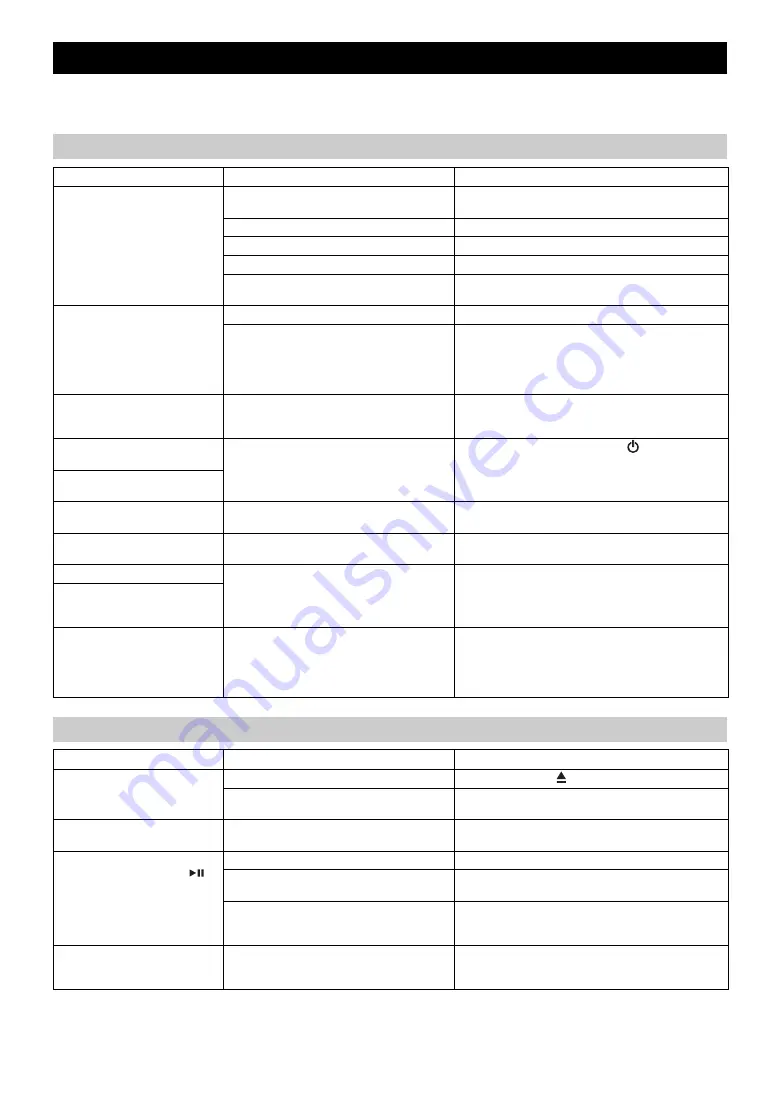
TROUBLESHOOTING
General
Problem
Cause
Solution
The speakers make no sound.
The volume might be set to the minimum level,
or muted.
Adjust the volume level.
The source may be incorrect.
Select the correct source.
The speakers may not be connected securely.
Check the connections (
Headphones are connected.
Remove the headphones.
The volume of a connected external device is not
loud enough.
Raise the volume of the external device.
Sound suddenly turns off.
The sleep timer may be set (
P. 19).
Turn the unit on and play the source again.
The auto power standby function may have
operated.
When the time specified for AUTO PWR STDBY in the
option menu has elapsed (
P. 18) or when 20 minutes
have elapsed without any operation being performed after
stopping USB device or CD playback, the unit will turn off
automatically.
Sound is cracked/distorted or
there is abnormal noise.
Input source volume is excessive, or volume of
this unit is excessive (especially Bass).
Adjust volume with VOLUME, or use the option menu
(
P. 18) to adjust the bass range. If an external device is
playing back, lower the volume of the external device.
The unit does not operate
properly.
The unit may have received a strong electrical
shock such as lightning or excessive static
electricity, or power supply may have dropped.
Restart the unit by holding down the
for about 10
seconds.
The unit turns on but
immediately shuts off.
A digital or high-frequency
equipment produces noises.
The unit may be placed too close to the digital or
high-frequency equipment.
Place the unit farther away from the equipment.
The clock setting has been
cleared.
The unit remained unpowered for about one hour. Plug the power cable into the wall outlet firmly, and set the
clock again (
Alarm does not sound.
The unit is set to ECO standby.
In the option menu, set POWER SAVING to NORMAL
(
The front panel display indicates
“ALARM not work” and can’t
set the alarm.
The unit turns off unexpectedly.
The auto power standby function may have
operated.
When the time specified for AUTO PWR STDBY in the
option menu has elapsed (
P. 18) or when 20 minutes
have elapsed without any operation being performed after
stopping USB device or CD playback, the unit will turn off
automatically.
CD playback
Problem
Cause
Solution
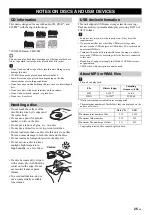
Disc cannot be inserted.
Another disc is already inserted.
Unload the disc with .
You are attempting to insert a disc that cannot be
used by this unit.
Use a disc supported by the unit (
Some button operations do not
work.
The disc loaded into the unit may not be
compatible.
Use a disc supported by the unit (
Playback does not start
immediately after pressing
(stops immediately).
The disc may be dirty.
Wipe the disc clean (
The disc loaded into the unit may not be
compatible.
Use a disc supported by the unit (
If the unit was moved from a cold to warm place,
condensation may have formed on the disc
reading lens.
Wait for an hour or two until the unit adjusts to the room
temperature, and try again.
The front panel display indicates
“no operation”, and a disc cannot
be inserted or unloaded.
The option menu is displayed. Alternatively, the
alarm is playing.
Press
OPTION
to exit the option menu. Alternatively,
press
ALARM
to stop the alarm.


