PERIODIC MAINTENANCE AND ADJUSTMENT
7-28
7
2. Remove the blown fuse, and then
install a new fuse of the specified
amperage.
WARNING! Do not
use a fuse of a higher amperage
rating than recommended to
avoid causing extensive dam-
age to the electrical system and
possibly a fire.
[EWA15131]
3. Turn the key to “ON” and turn on
the electrical circuits to check if the
devices operate.
4. If the fuse immediately blows
again, have a Yamaha dealer
check the electrical system.
EAU37671
Replacing a headlight bulb
If a headlight bulb burns out, replace it
as follows.
ECA10660
NOTICE
Do not touch the glass part of the
headlight bulb to keep it free from
oil, otherwise the transparency of
the glass, the luminosity of the bulb,
and the bulb life will be adversely af-
fected. Thoroughly clean off any dirt
and fingerprints on the headlight
bulb using a cloth moistened with
alcohol or thinner.
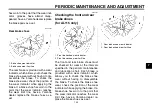
1. Remove cowling C. (See page 7-6.)
2. Remove the headlight bulb holder
by pushing it inward and turning it
counterclockwise, and then re-
move the burnt out bulb.
3. Place a new bulb into position, and
then secure it with the bulb holder.
4. Install the cowling.
5. Have a Yamaha dealer adjust the
headlight beam if necessary.
Specified fuse:
10 A
1. Do not touch the glass part of the bulb.
1. Headlight bulb holder
1. Headlight bulb
Summary of Contents for Mio Amore AL115
Page 1: ...5VV F8199 E3 AL115 S OWNER S MANUAL Read this manual carefully before operating this vehicle ...
Page 74: ......
Page 75: ......
Page 76: ...PRINTED IN THAILAND ...


