V
oice mode
Song mode
P
a
tter
n mode
Mixing mode
Mast
er mode
Utility mode
F
ile mode
P
erf
or
mance
mode
Sampling
mode 1
Sampling
mode 2
R
e
fe
rence
Creating a Voice/Performance by Using the Sampling Function
MOTIF XF Reference Manual
128
#
Tempo
Determines the Tempo of Sample playback. Setting the
Tempo changes the End Point (
8
) so that the length
between the Start Point and the End Point matches the
settings of the Meter and Measure.
Settings:
5.0 – 300.0
$
Meter
Determines the meter (time signature) of Sample playback.
Setting the Meter changes the End Point (
8
) so that the
length between the Start Point and the End Point matches
the settings of the Tempo and Measure.
Settings:
1/16 – 16/16, 1/8 – 16/8, 1/4 – 8/4
%
Measure
Determines the Sample length for playback based on
measure and beat values, an intuitive and musically useful
way to set Sample playback. Setting the Measure changes
the End Point (
8
) so that the length between the Start Point
and the End Point matches the settings of the Tempo and
Meter.
Settings:
Measure:
000 – 032
Beat:
00 – 15 (Varies depending on the Meter setting.)
n
The Measure setting here indicates the length between the
Start Point and End Point of the sample. When you wish to play
two measures beginning from the Start Point of the sample, set
the Measure parameter to “002:00.”
^
Play Mode
Determines how the Sample is played back.
Settings:
loop, one shot, reverse
loop
Sample playback begins from the Start point, continues to the Loop
point, then repeats indefinitely between the Loop point and End point.
This setting is useful for short rhythmic passages, riffs and beats that
you want to play back repeatedly and continuously.
one shot
The Sample plays back one time from Start point to End point. This
setting can be used for solos, sound effects and vocal passages that
are used once without looping.
reverse
The Sample plays back one time in reverse from End point to Start
point. This is useful for creating reversed cymbal sounds and other
special effects.
&
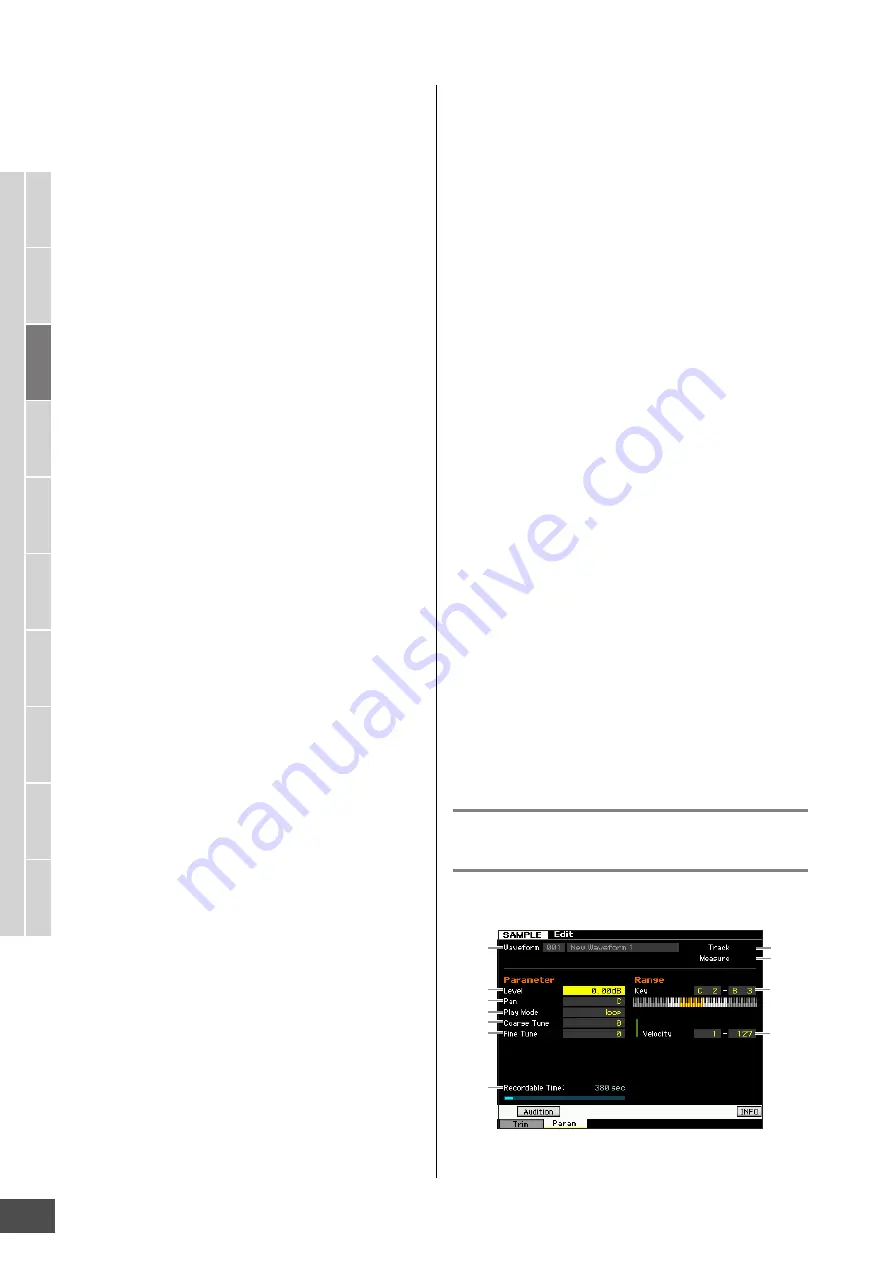
Key Range
Indicates the key range of the Key Bank to which the
selected Sample is assigned. By assigning different
Samples from a single Waveform to separate key ranges,
you can create a Voice that produces different sounds
depending on what keys you play.
Settings:
C -2 – G8
*
Velocity Range
Indicates the velocity range of the Key Bank to which the
selected Sample is assigned. By assigning different
Samples from a single Waveform to separate velocity
ranges, you can create a Voice that produces different
sounds depending on how strongly you play the keyboard.
Settings:
1 – 127
(
[SF1] Audition
You can hear the selected Sample by holding this button.
This lets you check whether the Sample has been edited
appropriately or not.
A
[SF2] LP=ST
When the menu indication here is “LP=ST,” the Start (Start
Point) and the Loop (Loop Start Point) will share the same
address, meaning that both of them will be changed
simultaneously, even if just one of them is changed.
Pressing the [SF2] button in this condition changes the
menu from “LP=ST” to “LP≠ST.” When the menu indication
here is “LP≠ST,” the Start (Start Point) and the Loop (Loop
Start Point) can be changed independently. When pressing
the [SF2] button in this condition, the address value of the
Start will be copied to the one of the Loop, with the result
that both of them share the same address value. The menu
indication also changes from “LP≠ST” to “LP=ST.”
B
[SF3] Display
Pressing the [SF3] button adjusts the zoom level so that the
entire wave, including the Start Point and End Point, is
shown on the display.
C
[SF4] Zoom Out
D
[SF5] Zoom In
Press the [SF4] and [SF5] buttons to zoom in and out of the
wave display.
E
[F1] Trim
Pressing this button returns from the previous display to the
Trim display.
F
[F2] Param (Parameter)
Pressing this button calls up the display that lets you set
the Sample-related parameters and Key Bank range.
Sample Parameter settings—[F2]
Param
This display lets you set Sample-related parameters such
as Key Range and Velocity Range.
1
2
3
6
7
4
5
8
9
)
!


