background image

10 

En

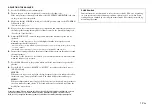
If you use the included system control cable to connect a subwoofer to a Yamaha 
component (that features a system connector jack such as a YSP series component or 
Yamaha receiver), turning on or off the power to the connected component automatically 
turns the subwoofer on or off.

Connection example

How the System Connection works

Notes

• For this feature to be available, the POWER switch on the rear panel and the STANDBY/ON 

switch on the top panel (

 page 3) must be set to ON.

• Powering on/off via the system connection takes priority over the Automatic power-switching 

function. (While the unit is turned on, the Automatic power-switching function is enabled.)

• To modify the settings of the connected components, please refer to the owner’s manual that 

came with the respective component.

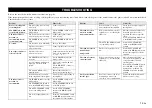
After all connections are completed, plug 
the subwoofer and other audio/video 
components into AC outlets.

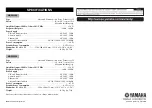
This function automatically places the subwoofer in standby mode if the subwoofer does 
not detect a signal from the amplifier for a certain period of time. The subwoofer 
automatically turns on as soon as it detects a signal from the amplifier.

The Automatic power-switching function works as follows when the AUTO STANDBY 
(HIGH/LOW/OFF) switch is set to LOW or HIGH. (Normally, set the switch to LOW.)

How the Automatic power-switching function works

*1

When the Automatic power-switching function is enabled, the subwoofer will detect a bass signal input of 
below 200Hz (such as sound effects of explosion in action movies, bass guitar or bass drum sound, etc.).

*2

This value may vary depending on the system environment. For example, it may be affected by noise 
generated from other equipment.

Note

For this feature to be available, the POWER switch on the rear panel and the STANDBY/ON 
switch on the top panel (

 page 3) must be set to ON.

Note

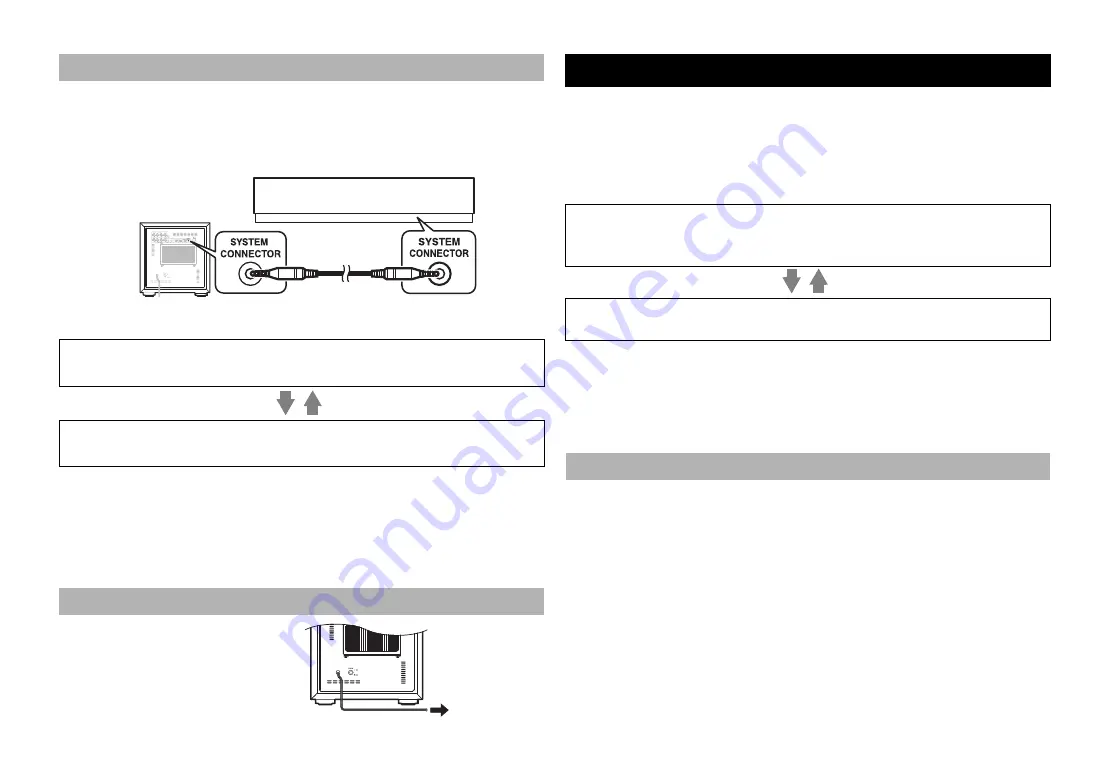
Be sure to set the POWER switch to OFF before you set the AUTO STANDBY switch.

LOW:

The Automatic power-switching function activates at a certain level of input signal. 
To enable the function, select this position.

HIGH:

If the Automatic power-switching function does not work well when the AUTO 
STANDBY switch is set to LOW, select this position. If the function still does not 
work, slightly raise the LFE LEVEL on the amplifier. 

OFF:

The Automatic power-switchingy function may unexpectedly activate due to the 
system environment, for example, if the subwoofer detects noise generated from the 
peripheral components. In this case, select this position to disable the Automatic power-
switching function, and manually turn the unit on or off by using the POWER switch.

Notes

• The subwoofer uses a small amount of power in auto-standby mode.
• If you plan not to use the subwoofer for a long period of time, set the POWER switch on the 

rear panel to OFF, or unplug the power cable from the AC outlet.

System connections

Turning on the power to the connected component will automatically turn on the subwoofer.

* The indicator lights green.

Turning off the power to the connected component will automatically turn off the subwoofer.

* The indicator turns off.

Plugging the subwoofer into an AC outlet

Subwoofer

Supplied system 
control cable

Yamaha YSP series component or receiver

To AC outlet

AUTOMATIC POWER-SWITCHING FUNCTION

The subwoofer automatically enters standby mode if it does not receive an input signal 
(*1) from the amplifier for 7 or 8 minutes (*2). 

* The indicator color changes from green to red.

When the subwoofer detects an input signal (*1) from the amplifier, the subwoofer 
automatically turns on.  

* The indicator color changes from red to green.

Setting the AUTO STANDBY switch

Summary of Contents for NS-SW300

Page 1: ...English Fran ais Deutsch Svenska Italiano Espa ol Nederlands UABH Subwoofer NS SW300 NS SW200 OWNER S MANUAL...

Page 2: ...the cart apparatus combination to avoid injury from tip over 13 Unplug this apparatus during lightning storms or when unused for long periods of time 14 Refer all servicing to qualified service perso...

Page 3: ...tial environment will not result in harmful interference with other electronic devices This equipment generates uses radio frequencies and if not installed and used according to the instructions found...

Page 4: ...personal injury and or damage to this unit Never place a fragile object near the YST port of this unit If the object falls or drops as a result of the air pressure it may cause damage to the unit and...

Page 5: ...inal which is marked with the letter L or coloured RED Make sure that neither wire is connected to the earth terminal of a three pin plug Information for Users on Collection and Disposal of Old Equipm...

Page 6: ...mholtz resonator to improve their bass reproduction However when reproducing bass that is in the frequency region of this Helmholtz resonator air moves violently in and out through the port between th...

Page 7: ...ntrol cable 5 m x 1 Since the low end frequencies of audio signals feature long wavelengths they are almost non directional to human ears The super bass range does not create a stereo image Therefore...

Page 8: ...En Check the model number of your subwoofer on the label on the rear panel CONTROLS AND THEIR FUNCTIONS 1 2 3 4 Top A B 5 6 7 8 9 C D Rear NS SW300 Front A B 5 6 7 8 C D 1 2 3 4 Front Rear Top NS SW20...

Page 9: ...tions there may be a case when better sound quality is obtained by setting this switch to the NORM normal position Select the best position by ear 9 B A S S Bass Action Selector System switch NS SW300...

Page 10: ...pin cable 1 or a commercially available Audio pin cable 2 to make the connections Connect the SUBWOOFER or LOW PASS etc terminal on the rear of the amplifier or AV receiver to the MONO INPUT2 terminal...

Page 11: ...ofer connect the amplifier to the subwoofer s INPUT3 LFE terminal This will promote higher sound quality because the signal routing in the subwoofer is shortened by bypassing the built in HIGH CUT cir...

Page 12: ...subwoofer s OUTPUT TO SPEAKERS terminals Although the subwoofer is connected between the front speakers and the amplifier the sound volume or quality will not be affected Connecting one subwoofer Con...

Page 13: ...f speaker output terminals A and B that can output sound signals simultaneously Set the amplifier so that both sets of speaker output terminals A and B will output sound signals simultaneously Then co...

Page 14: ...ill not become disarrayed and short circuited Remove about 15 mm 5 8 of insulation Remove about 10 mm 3 8 of insulation How to connect 1 Loosen the terminal s knob as shown in the figure 2 Insert the...

Page 15: ...ture to be available the POWER switch on the rear panel and the STANDBY ON switch on the top panel page 3 must be set to ON Note Be sure to set the POWER switch to OFF before you set the AUTO STANDBY...
Page 16: ...and tone balance between the subwoofer and the front speakers Follow the procedure described below If your amplifier or other component connected to the system features subwoofer settings make the app...

Page 17: ...e subwoofer and the front speakers Normally set the control to a level where you can obtain a little more bass effect than when the subwoofer is not used 7 Set the PHASE switch to the position which y...

Page 18: ...sponse graph 70 Hz REV Front speaker When combined with 20 cm 8 or 25 cm 10 acoustic suspension 2 way system front speakers 20 50 100 200 500Hz 40 50 60 70 80 90 dB NS SW300 Frequency response graph P...

Page 19: ...of the amplifier The subwoofer does not turn on automatically The POWER switch is set to the OFF position Set the POWER switch to the ON position The STANDBY ON switch is set to the STANDBY position S...

Page 20: ...eight 18 0 kg 39 7 lbs Type Advanced Yamaha Active Servo Technology II Driver 20 cm 8 cone woofer Magnetic shielding type Amplifier Output 100 Hz 5 ohms 10 THD 130 W Frequency Response 28 Hz 200 Hz Po...

Reviews: