2-9
2-8
Connecting the robot to the controller
2
Installation and connections
6.
Connecting the robot to the controller
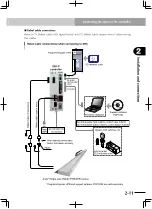
Connect the robot cables to the mating connectors on the controller as shown. For the
connectors on the controller, refer to the user's manual of the YAMAHA robot controller
being used.
w
WARNING
• Before connecting the cables, check that there are no bends or breaks in
the robot cable connector pins and that the cables are not damaged.
Bent or broken pins or cable damage may cause robot malfunctions.
• Always make sure that the power to the robot controller is off before connecting
the cables or ground wires.
c
CAUTION
•
After connecting the robot cable intermediate connectors together, fit
the connector hoods together securely.
•
Standard robot cables do not permit much movement, so attach the robot
cable securely to prevent unwanted movement of the motor power and
signal wires.
w
WARNING
• If the connectors are not securely inserted and the connector pins make
poor contact, the robot may malfunction causing hazardous situations.
Before turning on power to the robot, always make sure that each connector
is correctly and securely inserted.
• Do not place a strain or load on the connector by pulling on the robot cable
itself.
w
WARNING
Install the robot cable so that it will not interfere with the robot movement.
Do not use an area where interference might occur between the robot
cable and load attached to the tip of the robot as a work area. The robot
cable might break if it hangs up on the moving parts of the robot and cause
hazardous situations due to malfunction.
w
WARNING
Install the connected robot cable in a position where it will not interfere with
other workers or operators. People might trip over the cable and fall causing
injuries.
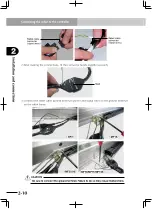
1) Connect the robot cables (motor and I/O signal wires) to the mating connectors coming
out from the robot.

