iary mixing bus. When the switch is in the center
(OFF) position, no signal is applied to the auxil-
iary bus.
NOTE: When the input signal select switch [2S] is set to
stereo mode, then the left input signal can be assigned to
odd-numbered aux busses, and the right input to even
numbered busses. With a mono signal-select setting, the
same mono signal is available to all aux busses.
NOTE: In some applications, it is preferable to have the
PRE position be Pre-Fader & Post-EQ rather than Pre-
Fader & Pre EQ. The PM4000 is equipped with internal
switches that make it easy to change the “Pre” of each
AUX send in this manner. This functional modification
can be performed on a channel-by-channel basis, and for
any or all AUX sends within each channel. Refer to the
OPTIONAL FUNCTIONS section of this manual for
additional information.
NOTE: All eight aux sends perform identical functions,
as shipped. Color coding helps associate the channel
send controls with the Aux Master LEVEL controls. If
you reset the "Pre" function for the sends of some busses,
or on some channels, it is a good idea to attach a note to
the console indicating how you have set it up.
18S. AUX ST 1
These are two pair of concentric level controls
and switches. Depending on how you set the
outer switch on the right-hand control, they can
function as either an independent pair of Aux
sends, similar to the eight individual AUX sends,
or they can function as a single stereo Aux send
with level and balance controls.
The outer PRE/OFF/POST stitch on the left-
hand control set determines whether the send is
off, derives signal before the fader and equalizer,
of after them (just as with the individual aux
sends). This function affects both “sides” of the
AUX ST 1 output, whether used for stereo or dual
mono sends.
The outer switch on the right-hand control set
determines whether AUX ST 1 functions as a
stereo send (switch set to the left “BAL PAN”
position) or as a pair of mono sends (switch set to
the right “LEVEL L—LEVEL R” position).
When the send is set for stereo mode, the inner
rotary control on the left determines the overall
LEVEL applied to the Stereo 1 L & R auxiliary
mixing buses, and the inner rotary control on the
right serves to either PAN a mono signal between
the L & R sides of that stereo pair (if the input
signal selector is in one of the mono modes) or to
BALance a stereo signal across the L & R, sides of
the pair.
When the send is set for dual mono mode, the
inner rotary control on the left sets the LEVEL
applied to the AUX ST L bus (i.e., LEVEL-L),
and the inner rotary control on the right sets the
LEVEL applied to the AUX ST R bus (i.e.,
LEVEL-R); Again, depending on the input signal
selector [2S], these two controls will be assigning
either the same mono signal or the discrete left
and right input signals to the L & R sides of this
stereo aux bus.
19S. AUX ST 2
These two pair of concentric controls and
stitches function just like AUX ST 1, but affect
the #2 auxiliary stereo bus pair.
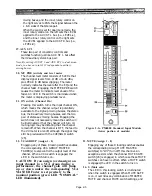
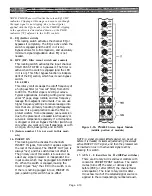
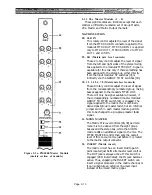
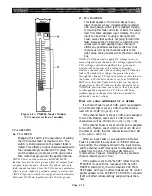
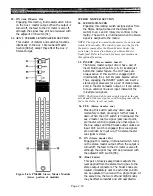
Figure 2-2c. PM4000 Stereo Input Module
(lower portion of module)
Page 2-11
Summary of Contents for PM4000
Page 1: ...PROFESSIONAL AUDIO MIXING CONSOLE PM4000 OPERATING MANUAL YAMAHA ...
Page 2: ...PM4000 OPERATING MANUAL ...
Page 7: ...Section 1 Introduction ...
Page 11: ...Section 2 Brief Operating Instruction ...
Page 47: ...Section 3 Specifications ...
Page 51: ...Dimensional Drawings PM4000 Console all versions Page 3 4 ...
Page 52: ...Page 3 5 ...
Page 53: ...Page 3 6 PM4000 Console Rear Profiles ...
Page 54: ...Module Block Diagrams See back of the manual for overall system block diagram Page 3 7 ...
Page 55: ...Page 3 8 ...
Page 56: ...Page 3 9 ...
Page 57: ...Page 3 10 ...
Page 58: ...Page 3 11 ...
Page 59: ...Page 3 12 ...
Page 60: ...Section 4 Installation Notes ...
Page 72: ...Figure 4 13 Cables For Use With Balanced Sources Page 4 12 ...
Page 79: ...SECTION 5 Gain Structure and Levels ...
Page 82: ...Figure 5 1 Dynamic Range and Headroom in Sound Systems Page 5 3 ...
Page 86: ...Section 6 Optional Functions ...
Page 106: ...Section 7 Operating Notes and Hints ...
Page 119: ...Section 8 Applications ...
Page 127: ...Section 9 Maintenance ...
Page 131: ......
Page 132: ...YAMAHA VN02300 ...

