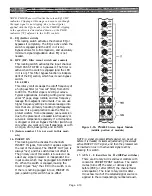
supply with an A-B powered mic, in which case you
should turn off the TB 48V Switch.
corresponding switch here is illuminated. See the
meter bridge description in Section 2.1.7 for
additional details.
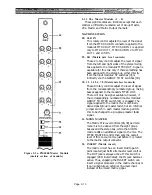
71. (TB INPUT)
This XLR-3 connector accepts a low-Z microphone
or a line level signal, depending on the settings of
the controls below it. Signal from this input is
assigned to the TB OUT connector and to the
various mixing busses by means of the assign-
ment switches in the upper portion of this module
[59], [60], [61], [62], [63] and [64].
72. +4 dB (attenuation pad)
This locking, illuminated switch inserts a 54 dB
pad after XLR talkback input. The pad decreases
the sensitivity of that input from nominal -50
dBu (for a microphone) to +4 dBu (for a line level
input). When the LED in the switch is illumi-
nated, the pad is in line, making TB in a line
input.
73. LEVEL (TB Input)
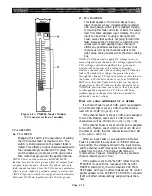
NOTE: Do not attempt to engage more than one switch
at a time in the "I" column or in the "II" column; a given
bank of meters can only be designated to monitor one set
of busses at a time.
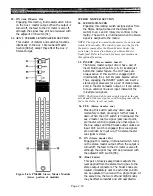
76. MUTE MASTER
Engaging any of these locking, illuminated
switches mutes (turns off) any input channel(s)
whose correspondingly numbered MUTE switch
is engaged. The group is muted when the switch
is illuminated. An input channel will not be
muted, however, if its MUTE SAFE switch is
engaged.
This rotary control adjusts the signal level after
the talkback preamplifier, thereby affecting the
sensitivity of the TB input whether it is set for a
mic or line source. This control affects the TB
level applied to any busses and to the TB OUT
connector; it does not affect the oscillator level.
74. TALKBACK ON (two-way lever switch and
LED indicator)
Pulling this switch down (toward the arm rest)
causes momentary contact; pushing it up (toward
the meter bridge) locks it on; when on, the LED
below the switch is illuminated. The switch
activates the XLR talkback input and applies
signal from that input to any assigned busses
(and to the TB OUT connector if the TB OUT
switch is also on). When the TALKBACK ON
switch is off (centered), the oscillator output is
instead routed to those busses (and to the TB
OUT connector). This switch does not affect the
OSC OUT connector.
75. METER SEL (meter select switches)
These two sets of three interlocking switches
determine the function of two correspondingly
labeled banks of VU meters on the meter bridge.
One bank of meters is labeled “I” and another is
labeled “II.” Each bank may be independently
switched to display the group (GRP), matrix
(MTRX)
or auxiliary bus (AUX) levels by pressing
the respective G, M or A switches here.
When a given meter bank has been switched, an
illuminated indicator above those meters shows
the signal being monitored, and the LED in the
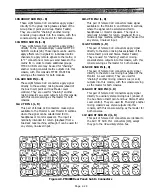
Figure 2-5c. PM4000 TB Module
(lower portion of module)
Page 2-21
Summary of Contents for PM4000
Page 1: ...PROFESSIONAL AUDIO MIXING CONSOLE PM4000 OPERATING MANUAL YAMAHA ...
Page 2: ...PM4000 OPERATING MANUAL ...
Page 7: ...Section 1 Introduction ...
Page 11: ...Section 2 Brief Operating Instruction ...
Page 47: ...Section 3 Specifications ...
Page 51: ...Dimensional Drawings PM4000 Console all versions Page 3 4 ...
Page 52: ...Page 3 5 ...
Page 53: ...Page 3 6 PM4000 Console Rear Profiles ...
Page 54: ...Module Block Diagrams See back of the manual for overall system block diagram Page 3 7 ...
Page 55: ...Page 3 8 ...
Page 56: ...Page 3 9 ...
Page 57: ...Page 3 10 ...
Page 58: ...Page 3 11 ...
Page 59: ...Page 3 12 ...
Page 60: ...Section 4 Installation Notes ...
Page 72: ...Figure 4 13 Cables For Use With Balanced Sources Page 4 12 ...
Page 79: ...SECTION 5 Gain Structure and Levels ...
Page 82: ...Figure 5 1 Dynamic Range and Headroom in Sound Systems Page 5 3 ...
Page 86: ...Section 6 Optional Functions ...
Page 106: ...Section 7 Operating Notes and Hints ...
Page 119: ...Section 8 Applications ...
Page 127: ...Section 9 Maintenance ...
Page 131: ......
Page 132: ...YAMAHA VN02300 ...


