46
Chapter 4: Auxiliaries and Effects
ProMix 01 User’s Guide
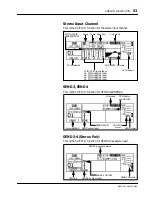
SEND3-4 Stereo Pair
SEND3 and SEND4 can be linked for use as a stereo pair. In this way
they can, essentially, be used as another pair of stereo outputs, allow-
ing for another stereo mix to be set up. This is called SEND3-4 Stereo
mode. Independent, or normal operation is called Mono mode.
In Stereo mode, the SEND3 and SEND4 LCD functions are combined
into the SEND3-4 LCD function. This LCD function can be selected
by pressing either [SEND3] or [SEND4]. When either button is
pressed, the RTN/SEND fader is automatically set to SEND3-4.
When set to Stereo, the following changes occur:
•
For individual input channels, the SEND3 and SEND4 send level
controls become a single send level control, and a SEND3-4 pan
control appears (set to center) on the SEND3-4 PAN display.
•
For stereo-pair input channels, the SEND3 and SEND4 send level
controls become single send level controls, and a SEND3-4 pan
control appears on the SEND3-4 PAN display. Odd channels are
panned hard-left (i.e. to SEND3) and even channels are panned
hard-right (i.e. to SEND4).
•
For the stereo input channel, the left signal feeds SEND3 bus and
the right signal feeds SEND4 bus. Levels are controlled together.
A balance control appears on the SEND3-4 PAN display.
•
SEND3 and SEND4 dynamics processor patches are cancelled.
•
The SEND3-4 output comp patch point is set to the SEND3 set-
ting.
•
The SEND3-4 fader level is set to the SEND3 setting.
•
SEND3-4 ON/OFF and PRE/POST are set to the SEND3 settings.
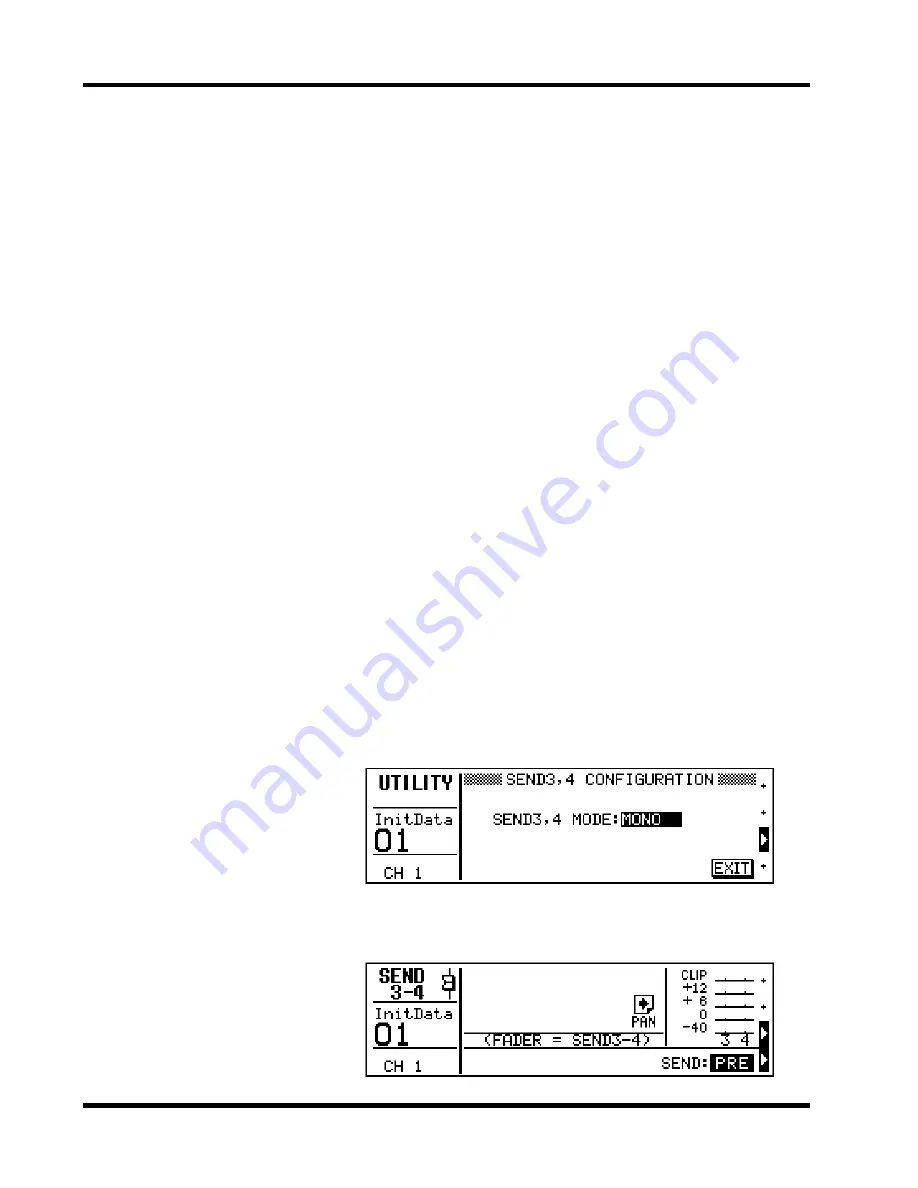
Shown below is the SEND3, 4 CONFIGURATION LCD function that
is used to select the Stereo and Mono modes.
Shown below is the SEND3-4 LCD function. The right-arrow icon
indicates that the SEND3-4 pan display is available to the right.
1. Press [UTILITY].
The UTILITY menu appears.
2. Select SEND3, 4 CONFIGU-
RATION and press [ENTER].
The SEND3, 4 CONFIGURA-
TION LCD function appears.
3. To change the mode, press
[ENTER] or use the PARAM-
ETER wheel.
4. Select the SEND3-4 MODE
parameter, then press
[ENTER] or use the PARAM-
ETER wheel to set it.
5. To exit this function and
return to the UTILITY menu,
select EXIT and press
[ENTER], or just press [UTIL-
ITY].
The UTILITY menu reappears.
Summary of Contents for Programmable Mixer 01
Page 4: ...ii ProMix 01 User s Guide...
Page 18: ...10 Chapter 1 Touring ProMix 01 ProMix 01 User s Guide...
Page 24: ...16 Chapter 2 User Interface ProMix 01 User s Guide...
Page 36: ...28 Chapter 3 Mixer Functions ProMix 01 User s Guide...
Page 68: ...60 Chapter 6 Groups and Pairs ProMix 01 User s Guide...
Page 74: ...66 Chapter 7 Scene Memories ProMix 01 User s Guide...
Page 96: ...88 Chapter 9 MIDI ProMix 01 User s Guide...
Page 102: ...94 Troubleshooting ProMix 01 User s Guide...
Page 116: ...108 Appendix ProMix 01 User s Guide...
Page 154: ...YAMAHA CORPORATION VS17170 IP 95 01 5000 AP Printed in Japan P O Box 1 Hamamatsu Japan...

