CASSETTE OPERATIONS
Although the RX21 has a considerable amount of internal storage capacity, a cassette interface has been provided
to facilitate storage on a standard cassette tape of an unlimited number of your original patterns and songs. The
RX21 cassette save
and
load operations let you save (store onto tape) and load (transfer from tape to RX21 memory)
the entire RX21 memory contents at once-all patterns and songs (except the preset patterns, which are permanently
stored in the RX21’s memory). Remember that when you perform a
load
operation the entire RX21 pattern and
song memory is rewritten, erasing any
data
it might contain (excepting, again, the preset patterns). We recommend
that you use a cassette player designed specifically for personal computer data storage. If such a cassette deck is
not available, however, use the highest quality unit at your disposal.
If loading problems are encountered, try adjusting the level control of the cassette player for optimum results. If
your cassette player has tone controls, these may need to be adjusted as well to facilitate loading of the data. In
some cases it may also be necessary to clean and demagnetize the cassette deck’s reproduction heads. Before you
begin a cassette operation, check that your cassette recorder is properly connected to the RX21 8- pin DIN CASSETTE
IN/OUT terminal (see “CONNECTIONS” diagram).
Save/Verify
The SAVE and VERIFY buttons permit access to two functions: 1) SAVE actually
stores the data in the RX21 memory onto cassette tape, and 2) VERIFY automatically
compares the data written onto the cassette with that in the RX21 memory in order
to confirm that the data has been properly saved.
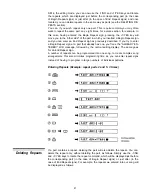
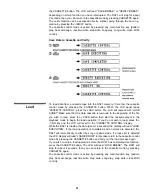
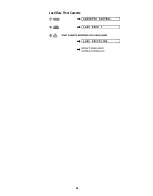
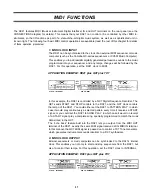
To begin any cassette operation, first enter the cassette control mode by pressing
the CASSETTE button. The LCD will read "CASSETTE CONTROL" indicating that
the cassette control mode is active. The three buttons below the CASSETTE button
now function according to the name written ABOVE them, rather than the name
written ON them. In other words:
REPEAT KEY becomes SAVE KEY
INSERT KEY becomes LOAD KEY
DELETE KEY becomes VERIFY KEY
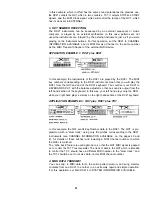
To save the RX21 memory contents, first start the cassette recorder running in the
record mode. Once the recorder is running, press the SAVE button. The LCD will
read "SAVE EXECUTING", indicating that the data is being saved. This operation
will take about 12 seconds. The LCD will then show "SAVE COMPLETED" for
about 2 seconds, followed by "CASSETTE CONTROL".
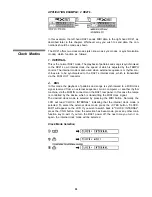
To verify that the save operation was successful, stop the cassette recorder, and
rewind it to the beginning of the file just saved (it’s good to zero the tape counter
on your cassette recorder prior to recording, so you can now simply rewind to the
zero point. Also, once you’ve done a save operation, you’ll know the characteristic
high-pitched sound of saved data, and be able to rewind to the start of the data
using a review control, if your recorder has one). Press the VERIFY button, and
start the recorder in the playback mode. The RX21 will then compare the contents
of its memory to the data saved on the tape, an operation lasting about 12 seconds.
The LCD panel will read “VERIFY EXECUTING". If no data errors are encountered,
the LCD panel will read “VERIFY OK”, followed by "CASSETTE CONTROL". The
cassette recorder can be stopped at this point.
If an error is encountered, the display will read “VERIFY ERROR". If this happens,
the RX21 will not function for about 2 seconds. You can then return to the cassette
control mode by pressing the CASSETTE button and try saving the data again.
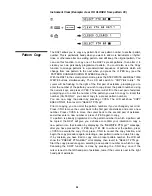
If you wish to stop an operation before the RX21 has completed a function, press
34
Summary of Contents for RX-21
Page 1: ...YAMAHA AUTHORIZED PRODUCT MANUAL DIGITAL RHYTHM PROGRAMMER ...
Page 2: ...YAMAHA DIGITAL RHYTHM PROGRAMMER OWNER S MANUAL ...
Page 4: ...CONTROL PANEL 2 ...
Page 27: ...Pattern Copy Example Copy pattern 79 to pattern 00 25 ...
Page 38: ...Load Data From Cassette 36 ...
Page 58: ...BLOCK DIAGRAM 56 ...
Page 61: ...SINCE 1887 YAMAHA NIPPON GAKKI CO LTD HAMAMATSU JAPAN OMD 136 85 11 10 0 CR Printed in Japan ...

