S03
10
DISASSEMBLY PROCEDURE
1.
Bottom Cover Assembly
(Time required: About 10 min.)
1-1
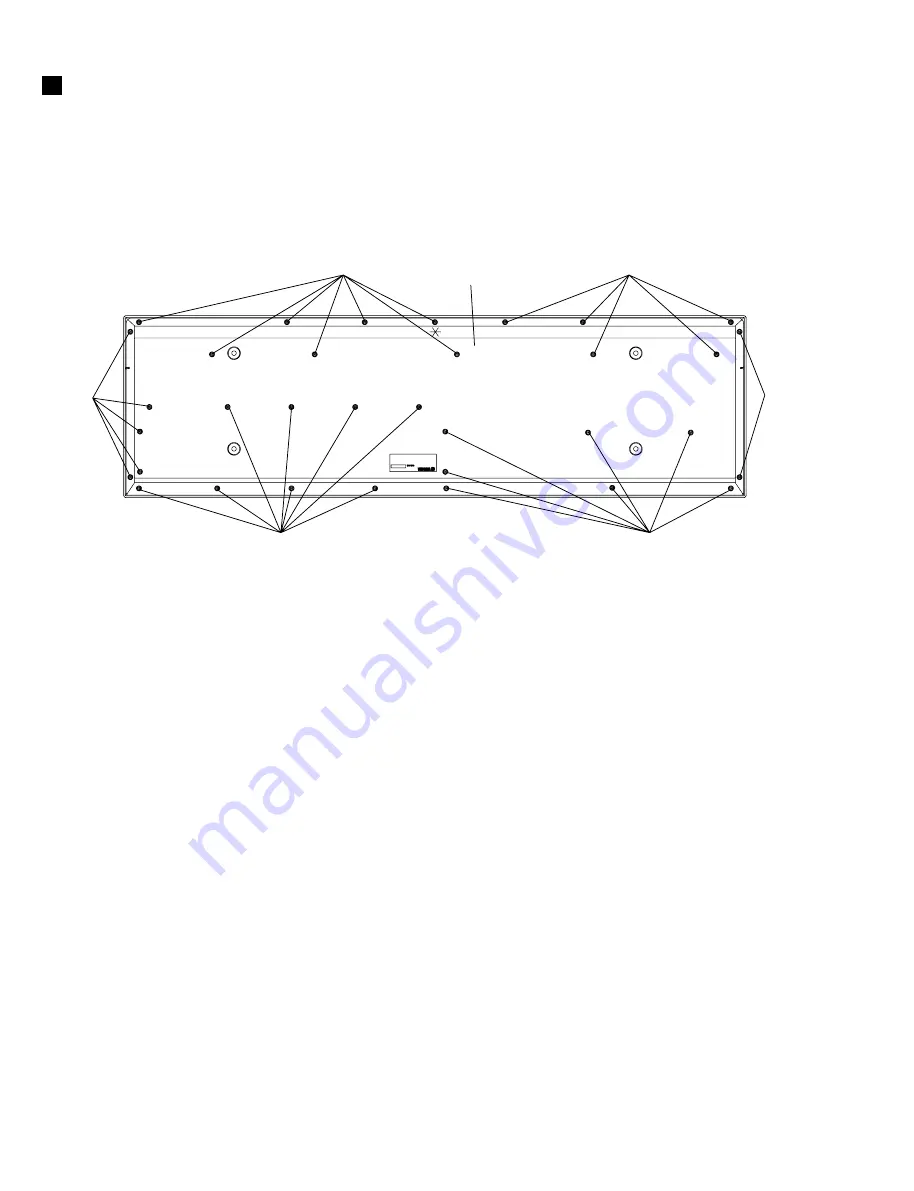
Remove the thirty-four (34) screws marked [150]. The bottom
cover assembly can then be removed. (Fig.1)
[150]
[150]
[150]
[150]
[150]
Bottom Cover Assembly
[150]
Fig.1
[150]: Bind Head Tapping Screw-B
4.0X8 MFZN2BL (EG340190)
2.
DM Circuit Board
(Time required: About 15 minutes)
2-1 Remove the bottom cover assembly. (See procedure 1.)
2-2 Remove the seven (7) screws marked [90A] and the six (6) screws
marked [90B]. The DM circuit board can then be removed.
(Fig.2, 3)
3.
Replacing the Lithium Battery
(Time required: About 10 min.)
3-1 Remove the bottom cover assembly. (See procedure 1.)
3-2 You can replace the lithium battery from the DM circuit board.
(Fig.3)
*
The lithium battery is not part of the DM circuit board. When
you replace the DM circuit board, you should remove the lithium
battery from the board, and install in the holder on the new circuit
board.
4.
SW Circuit Board
(Time required: About 15 minutes)
4-1 Remove the bottom cover assembly. (See procedure 1.)
4-2 Remove the seven (7) screws marked [50] and the screw marked
[90D]. The SW circuit board can then be removed. (Fig.2)
4-3 Pull out the function buttons from the SW circuit board.
Summary of Contents for S03 voice editor
Page 4: ...S03 4 ...
Page 23: ...S03 23 B B Pattern side Pattern side DM 2NA V583600 4 LC 2NA V626840 LC Circuit Board ...
Page 27: ...S03 27 to MKS3 CN4 to MK L G G G G H H H H MK H Circuit Board Component side 2NA VV583900 ...
Page 34: ...S03 34 ...
Page 35: ...S03 35 ...
Page 36: ...S03 36 ...
Page 37: ...S03 37 ...
Page 38: ...S03 38 ...


