6
SB168-ES and LS9 Quick Setup Guide
Step 3: LS9 Console Setup
Loading the LS9 Session File available on Yamaha Pro Audio website achieves all the
settings of the LS9.
–Download the “SB_LS932.L9A” (for LS9-32) or “SB_LS916.L9A” (for LS9-16) file from the
website to your USB key.
http://www.yamahaproaudio.com/training/self_training/
– Load the “SB_LS932.L9A” or “SB_LS916.L9A” file to your LS9.
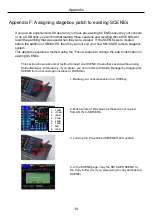
Note: Loading session file into LS9 will clear all the existing SCENEs and setup data. If you have
existing SCENEs and/or setup data on the console, please refer to Appendix F.
–Recall SCENE 001.
The SB_LS932.L9A file patches the slot inputs to the console first layer 1-32 (The XLR inputs on
the console rear are patched to the console second layer 33-64). It also assigns the HA control
information to pass out of the console to remote control the SB168-ES Head Amps.
Note: Treat SCENE 001 of this file like SCENE 000 on a mixer without SB168-ES.
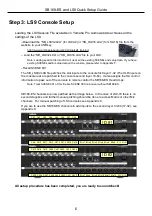
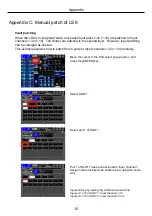
SB168-ES channels are now patched as the image below. In the case of LS9-16 there is no
second stagebox and further manual patching should be done to access Matrix or other Mix
channels. For manual patching of LS9 consoles see Appendix C.
If you are to use the SB168-ES channels to add inputs to the second layer 33-64 (17-32), see
Appendix H.
All setup procedure has been completed, you are ready to soundcheck!
ID #1
Ch1 Ch2 Ch3 Ch4 Ch5 Ch6 Ch7 Ch8
Ch9 Ch10 Ch11 Ch12 Ch13 Ch14 Ch15 Ch16
Ch17 Ch18 Ch19 Ch20 Ch21 Ch22 Ch23 Ch24
Ch25 Ch26 Ch27 Ch28 Ch29 Ch30 Ch31 Ch32
Mix1 Mix2 Mix3 Mix4 Mix5 Mix6 St L St R
Mix7 Mix8 Mix9 Mix10 Mix11 Mix12 St L St R
ID #2


