SB168-ES Owner’s Manual
6
Foreword
Thank you for choosing the Yamaha SB168-ES Stage Box. The SB168-ES is an Ether-
Sound capable stage box with 16 analog inputs and 8 analog outputs. In order to take
full advantage of the features and performance offered by the SB168-ES, be sure to
read this owner’s manual carefully before operation.
SB168-ES Features
■
Long-distance EtherSound Network Capability
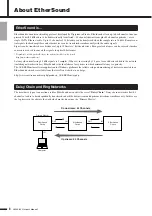
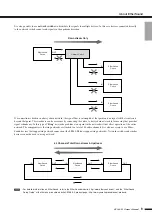
Audio can be transferred over distances up to 100 meters* between devices via standard Ethernet cables using the Ether-
Sound network protocol. The SB168-ES can be used as a general-purpose analog I/O box. Supported sampling rates are
44.1 kHz and 48 kHz (88.2 kHz and 96 kHz are not supported).
* Maximum practical distance may vary according to the cable used.
■
Remotely Controllable Internal Head Amplifiers
Internal head amplifier parameters can be remotely controlled from a compatible digital mixing console or from the AVS-
ESMonitor application running on a computer.
■
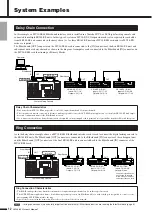
Up to Four SB168-ES Units
*
Can Be Used for Expanded I/O
Up to four SB168-ES units can be used to provide a total of 64 inputs and 32 outputs.
* The maximum number of units that can be used may depend on the digital mixing console used.
Firmware Updates
Two types of firmware are required: firmware for the SB168-ES unit itself, provided by Yamaha, and EtherSound firmware pro-
vided by AuviTran.
The SB168-ES firmware can be updated from a computer connected to the rear-panel NETWORK connector. Information
about the latest versions and firmware downloads are available at the Yamaha pro audio website SB168-ES product page:
http://www.yamahaproaudio.com/products
The EtherSound firmware can be updated from a computer connected to the EtherSound connector.
Information about the latest versions and firmware downloads are available at the AuviTran website:
http://www.auvitran.com/view.php?downloads.php
Connecting the AC Power Cable
• Before connecting the power cable, make sure that the power switches of all devices are turned OFF.
First connect the supplied power cable to the socket on the rear panel of the SB168-ES, then connect the AC plug to an appro-
priate AC power outlet (make sure the local supply voltage matches the rated AC voltage of the unit).
CAUTION


