For Service Engineer
Service Information
SI1705004E-00=SIGMA-G5SII Service Manual
20/273
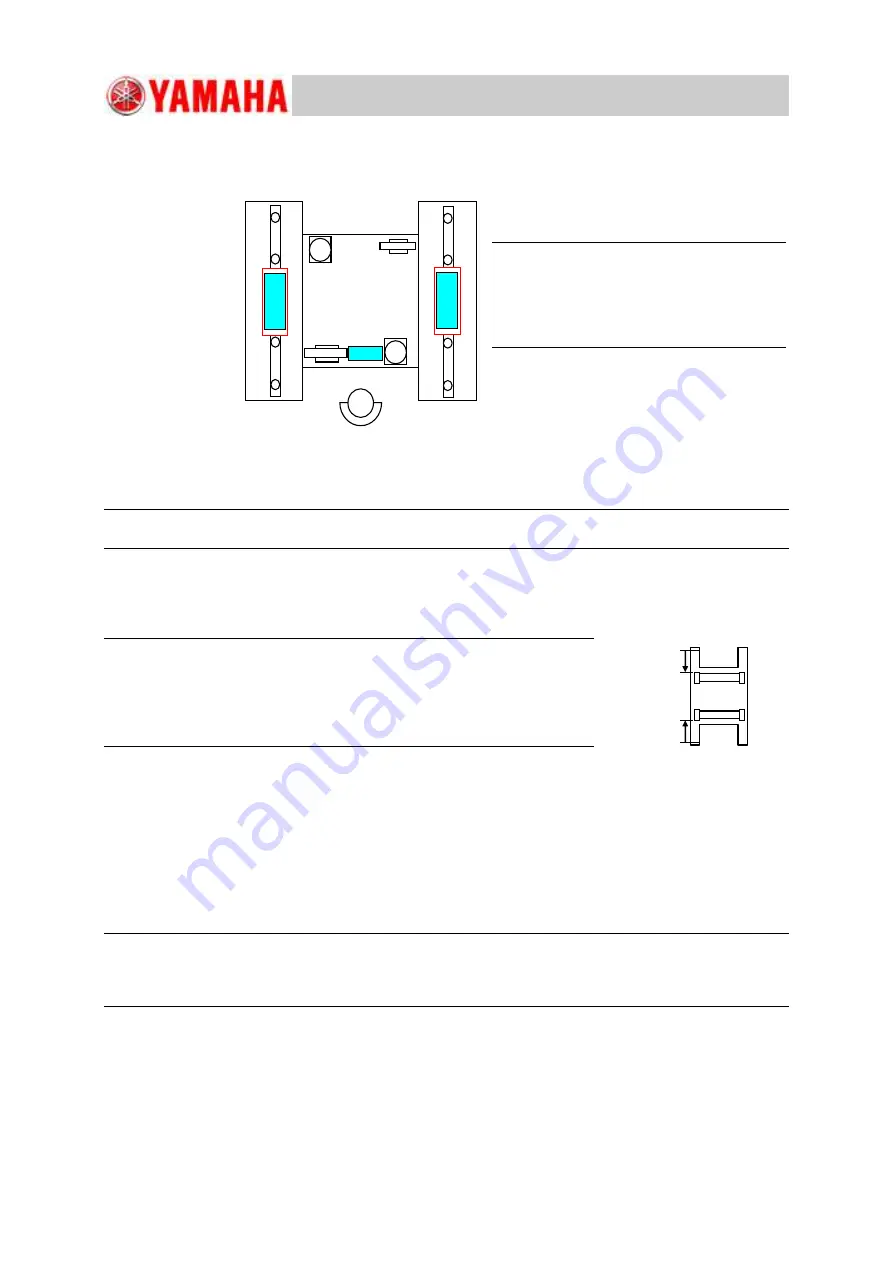
(1.2) Place the leveling instruments as shown in Fig. A14. Roughly level-adjust
(within #1 to #3 scale mark) the machine in the location close to the machine
installation place and then, place the machine temporarily.
Fig. A14
(1.3)
Using the pendulum movement, bring the machine to the installation position.
Note:
Using the "Sliding Sheet" for moving the machine close to the installation position facilitates the work.
(4)
Refer to the "Fixtures Removal Check List" adhered to the machine, and remove the
fixtures.
Note:
When the fixtures have been removed, move the Beams 1 and 2 to the
position about 450mm from the mechanical stopper. This position shall
be the basic position for the leveling adjustment. When the machine is to
be moved according to these conditions, pay particular attention to the
level vial not to drop it.
(5)
Level the machine.
(5.1)
Leveling (Refer to Fig. A16).
Direction Y: The leveling is performed using the level vials A and C.
(Standard Value: +/- one scale mark = within 2/100 mm)
Direction X : The leveling is performed using the level vial B.
(Standard Value: +/- one scale mark = within 2/100 mm)
Lock the four legs and perform the fine adjustment so that the conditions of
the level vials A, B and C, are not changed from before.
Note:
Do not adjust the level at the adjustment section using the hook spanner in the main machine frame
section (Adjustment at the above adjustment section is performed only immediately after the
assembling).
Now, the main machine installation operation is completed.
A
C
B
450 mm
450 mm
Note:
(a) The leveling instrument block jig to be
placed on the linear guide is required
(b) Confirm that the linear guide cap is
securely set (not projected).
Fig. A15


