ELEC
7-8
CHECKING THE BULBS AND BULB SOCKETS
CHECKING THE CONDITION OF THE
BULBS
The following procedure applies to all of the
bulbs.
1. Remove:
9
bulb
w
Since the headlight bulb gets extremely hot,
keep flammable products and your hands
away from the bulb until it has cooled down.
c
C
9
9
Be sure to hold the socket firmly when
removing the bulb. Never pull the lead, oth-
erwise it may be pulled out of the terminal
in the coupler.
9
9
Avoid touching the glass part of the head-
light bulb to keep it free from oil, otherwise
the transparency of the glass, the life of the
bulb, and the luminous flux will be adverse-
ly affected. If the headlight bulb gets soiled,
thoroughly clean it with a cloth moistened
with alcohol or lacquer thinner.
2. Check:
9
bulb (for continuity)
(with the pocket tester)
No continuity
→
Replace.
NOTE:
Before checking for continuity, set the pocket
tester to “0” and to the “
Ω ×
1” range.
▼▼▼▼▼▼▼▼▼▼▼▼▼▼▼▼▼▼▼▼▼▼▼▼
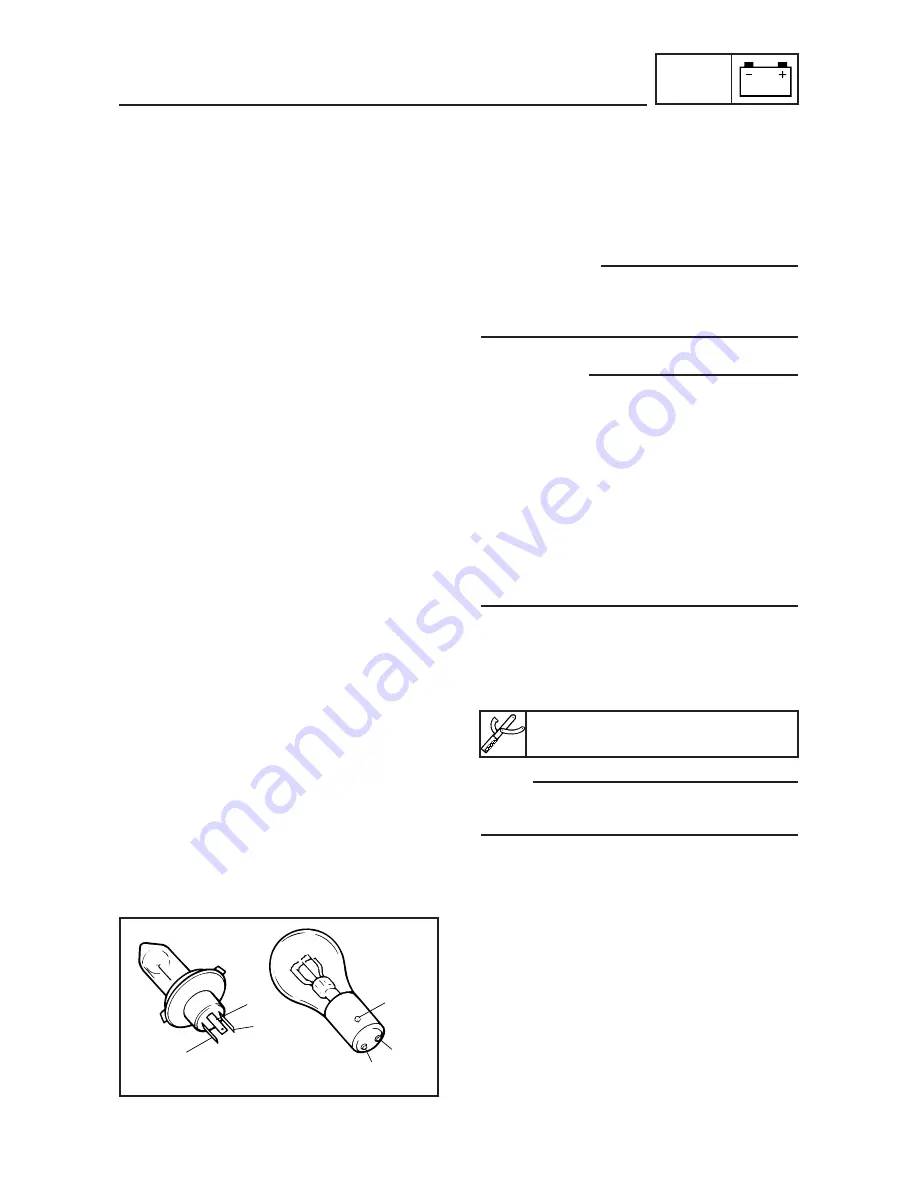
a. Connect the positive tester probe to termi-
nal
1
and the negative tester probe to ter-
minal
2
, and check for continuity.
b. Connect the positive tester probe to termi-
nal
1
and the negative tester probe to ter-
minal
3
, and check for continuity.
c. If either of the readings indicate no continu-
ity, replace the bulb.
▲▲▲▲▲▲▲▲▲▲▲▲▲▲▲▲▲▲▲▲▲▲▲▲
Pocket tester
90890-03112
1
2
3
1
2
3
3S3-F8197-E0_7 05.11.3 9:06 Page 8
Summary of Contents for Sirius T110LSE
Page 1: ...T110LE T110LSE SERVICE MANUAL 3S3 F8197 E0 ...
Page 2: ......
Page 6: ......
Page 8: ......
Page 10: ......
Page 12: ...GEN INFO ...
Page 22: ...SPEC ...
Page 99: ...ENG ...
Page 179: ...ENG 4 80 ...
Page 181: ...CARB ...
Page 261: ...ELEC ...
Page 265: ...ELEC CHECKING SWITCH CONTINUITY 7 4 ...
Page 301: ...TRBL SHTG ...
Page 303: ...TRBL SHTG TROUBLESHOOTING 8 2 COMPRESSION SYSTEM ...
Page 305: ...TRBL SHTG ...
Page 306: ......
Page 307: ...YAMAHA MOTOR CO LTD 2500 SHINGAI IWATA SHIZUOKA JAPAN ...


