ELEC
7-38
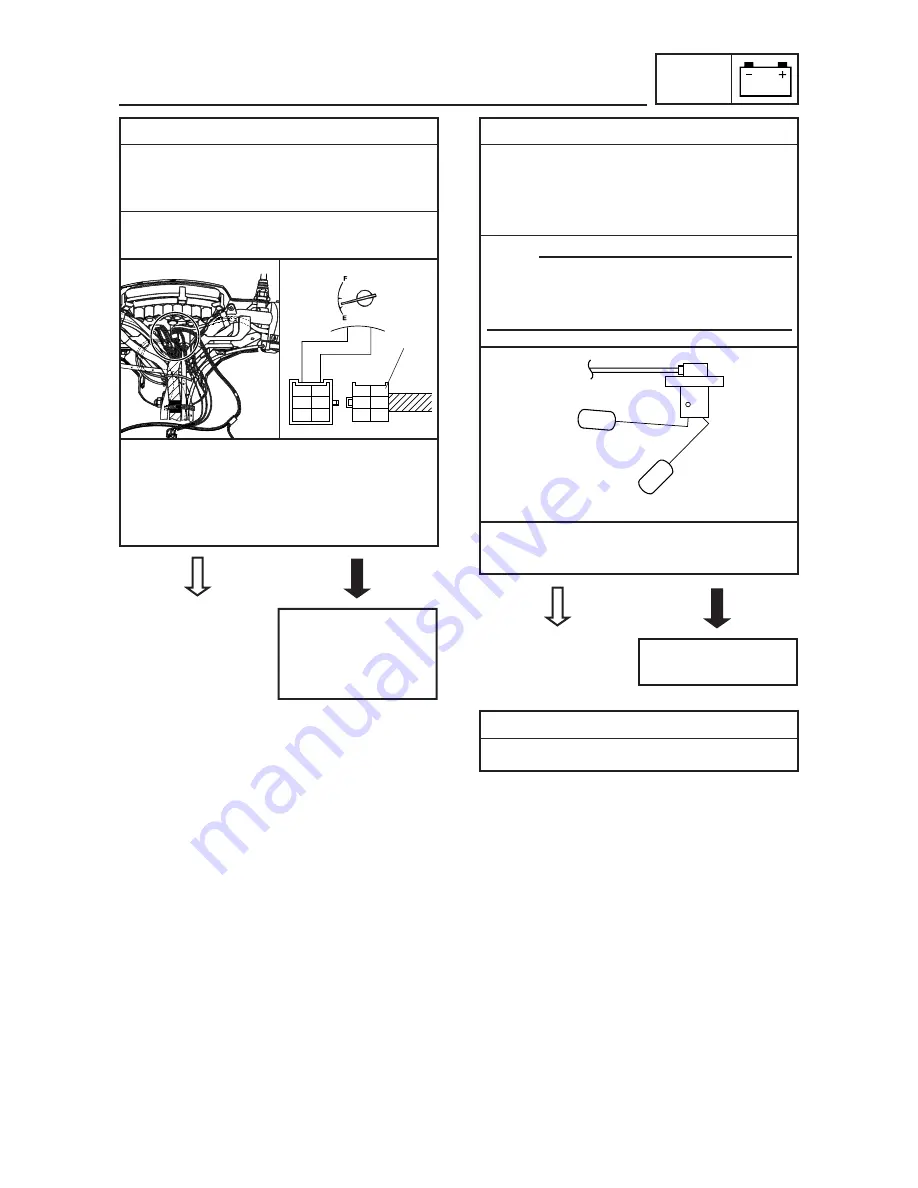
2. Voltage
9
Connect the pocket tester (DC 20 V) to the
meter assembly coupler (wire harness side)
as shown.
Positive tester probe
→
→
brown
1
1
Negative tester probe
→
→
ground
9
Set the main switch to “ON”.
9
Measure the voltage (DC 12 V) of brown
lead terminal
1
on the meter assembly cou-
pler (wire harness side).
9
Is the voltage within specification?
Br
L
Dg
G
B
Ch
Dg
B
Br
Ch
L
G
1
SIGNALING SYSTEM
YES
NO
Check the wiring
connections of the
entire signaling sys-
tem
YES
NO
Replace the fuel
level gauge.
3. Fuel level gauge
9
Set the main switch to “ON”.
9
Move the float up
1
or down
2
.
9
Check that the fuel level gauge needle
moves to “F” or “E”.
NOTE:
Before reading the fuel level gauge, leave the
float in one position (either up or down) for at
least three minutes.
9
Does the fuel level gauge needle move
appropriately?
1
2
4. Wiring
Check the entire signaling system’s wiring.
3S3-F8197-E0_7 05.11.3 9:06 Page 38
Summary of Contents for Sirius T110LSE
Page 1: ...T110LE T110LSE SERVICE MANUAL 3S3 F8197 E0 ...
Page 2: ......
Page 6: ......
Page 8: ......
Page 10: ......
Page 12: ...GEN INFO ...
Page 22: ...SPEC ...
Page 99: ...ENG ...
Page 179: ...ENG 4 80 ...
Page 181: ...CARB ...
Page 261: ...ELEC ...
Page 265: ...ELEC CHECKING SWITCH CONTINUITY 7 4 ...
Page 301: ...TRBL SHTG ...
Page 303: ...TRBL SHTG TROUBLESHOOTING 8 2 COMPRESSION SYSTEM ...
Page 305: ...TRBL SHTG ...
Page 306: ......
Page 307: ...YAMAHA MOTOR CO LTD 2500 SHINGAI IWATA SHIZUOKA JAPAN ...


