96
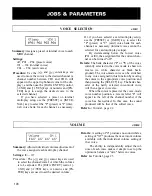
AWM WAVE SELECTION
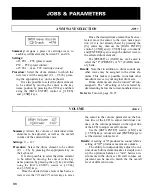
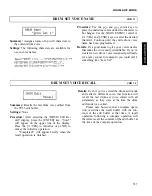
Summary: Assigns a preset or cartridge wave to
each key (drum element) between C1 and C6.
Settings:
off, P01 ... P58 (preset voices)
P59 ... P74 (preset drums)
off, C01 ... max. C99 (cartridge voices)
Procedure: Select the drum clement to which the
new wave will be assigned (C1 ... C6) by press-
ing the appropriate key on the keyboard.
It is also possible to select the drum element
to be edited by moving the cursor to the key
name position by pressing the key and then
using the [DATA ENTRY] control or [+1/YES]
and [-1/NO] keys.
Once the desired drum element has been se-
lected, move the cursor to the wave name posi-
tion (if it is not already there) by pressing the
cursor key, then use the [DATA ENTRY]
control, [-1/NO] and [+1/YES] keys, or numeric
and [ENTER] keys to assign the desired wave to
the selected drum element.
The [PRESET] or [CARD] key can be used to
select the "P" (PRESET) or "C" (CARD) mem-
ory bank.
Details: Note that in addition to drum sounds any
other waves may be assigned to the drum ele-
ments. This makes it possible to include other
non-drum waves in your original drum sets.
Drum elements can also be turned "off (un-
assigned). The "off setting can be selected by
decrementing below the lowest-numbered wave.
Refer to: Tutorial, page 18, 35.
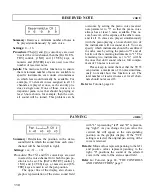
VOLUME
JOB 2
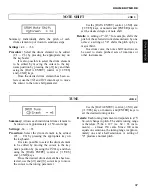
Summary: Allows the volume of individual drum
elements to be adjusted, as well as the overall
volume of the current drum voice.
Settings: 0 ... 127
Procedure: Select the drum element to be edited
(C1 ... C6) by pressing the appropriate key on
the keyboard.
It is also possible to select the drum element
to be edited by moving the cursor to the key
name position by pressing the key and then
using the [DATA ENTRY] control or [+1/YES]
and [-1/NO] keys.
Once the desired drum element has been se-
lected, use the and cursor keys to move
the cursor to the volume parameter on the bot-
tom line of the LCD to adjust individual vol-
ume, or the volume parameter on the upper line
of the LCD to adjust overall volume.
Use the [DATA ENTRY] control, [-1/NO] and
[+1/YES] keys, or numeric and [ENTER] keys to
set the desired volume level.
Details: A setting of "0" produces no sound while a
setting of "127" produces maximum volume.
The ability to independently adjust the vol-
ume of each drum element makes it simple to set
up the optimum balance or "mix" between in-
struments in the drum set. Overall volume ad-
justment can be used to match the the overall
level of different voices.
Summary of Contents for SY55
Page 1: ...YAMAHA AUTHORIZED PRODUCT MANUAL MUSIC SYNTHESIZER ...
Page 2: ...YAMAHA MUSIC SYNTHESIZER ...
Page 4: ...SY55 Music Synthesizer Operating Manual ...
Page 12: ...TUTORIALS SECTION ...
Page 42: ...TUTORIALS SY55 Voice Parameter Chart Voice Name 39 ...
Page 43: ...SY55 Voice Parameter Chart Voice Name VeloChorus 40 ...
Page 51: ...REFERENCE SECTION ...
Page 59: ...VOICE EDIT MODE 57 ...
Page 105: ...DRUM EDIT MODE 103 ...
Page 117: ...MULTI EDIT MODE 115 ...
Page 131: ...SEQUENCER MODE 129 ...
Page 145: ...UTILITY MODE 143 ...
Page 156: ...YAMAHA ...
Page 159: ...SEQUENCER REFERENCE BASIC RECORDING PROCEDURE FLOW ...
Page 161: ...YAMAHA MUSIC SYNTHESIZER MIDI DATA FORMAT ...
Page 193: ...32 ...
Page 196: ...YAMAHA YAMAHA CORPORATION P O Box1 Hamamatsu Japan Printed in Japan ...


