background image

DESCRIPTION

2-2

2

EAU10420

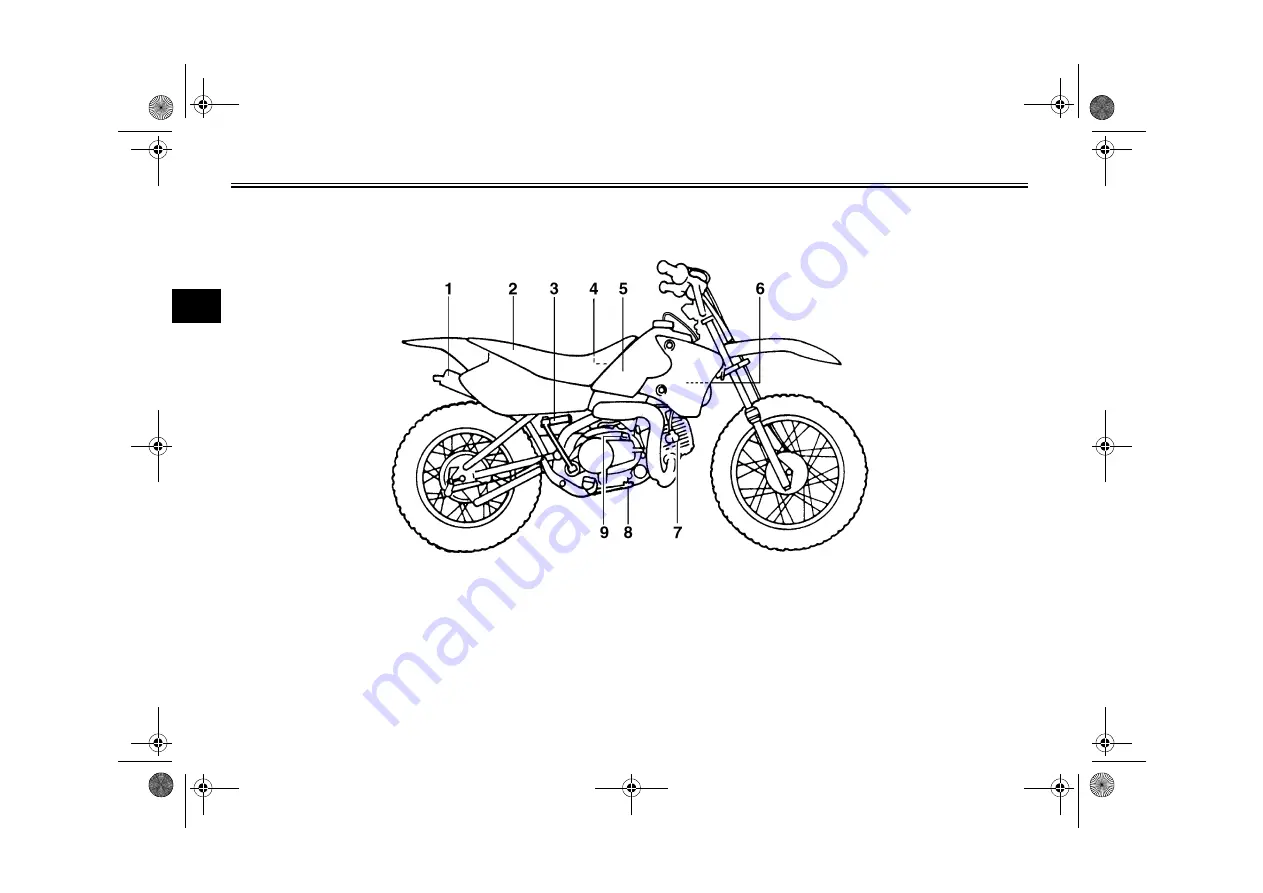
Right view

1. Spark arrester (page 6-12)
2. Seat (page 3-7)

3. Kickstarter (page 3-6)

4. Fuse [TT-R90E(W)] (page 6-26)
5. Fuel tank (page 3-3)

6. Air filter element (page 6-10)

7. Spark plug cap (page 6-7)
8. Brake pedal (page 3-2)

9. Engine oil filler cap (page 6-8)

U3P281E0.book  Page 2  Monday, April 17, 2006  11:26 AM

Summary of Contents for TT-R90

Page 1: ...3P2 28199 81 TT R90 W TT R90E W OWNER S MANUAL MANUEL DU PROPRIÉTAIRE BEDIENUNGSANLEITUNG ...

Page 2: ...PRINTED ON RECYCLED PAPER IMPRIMÉ SUR PAPIER RECYCLÉ AUF RECYCLINGPAPIER GEDRUCKT YAMAHA MOTOR CO LTD PRINTED IN JAPAN 2006 04 0 3 1 CR E F G ...

Page 3: ...OWNER S MANUAL TT R90 W TT R90E W 3P2 28199 81 E0 U3P281E0 book Page 1 Monday April 17 2006 11 26 AM ...

Page 4: ...U3P281E0 book Page 2 Monday April 17 2006 11 26 AM ...

Page 5: ... MANUAL COMPLETELY BEFORE OPERATING YOUR MOTORCYCLE MAKE SURE YOU UNDER STAND ALL INSTRUCTIONS PAY CLOSE ATTENTION TO THE WARNING AND CAUTION LABELS ON THE MOTORCYCLE NEVER OPERATE A MOTORCYCLE WITHOUT PROPER TRAINING OR INSTRUCTION WEIGHT OF THE RIDER SHOULD NOT EXCEED 40 kg 88 lb AN IMPORTANT NOTE TO PARENTS This motorcycle is not a toy Before you let your child ride this motorcycle you should u...

Page 6: ...S IN THE OWNER S MANUAL OBTAIN QUALIFIED TRAINING IN SAFE AND PROPER RIDING TECHNIQUES OBTAIN PROFESSIONAL TECHNICAL SERVICE AS INDICATED BY THE OWNER S MANUAL AND OR WHEN MADE NECESSARY BY MECHANICAL CONDITIONS U3P281E0 book Page 2 Monday April 17 2006 11 26 AM ...

Page 7: ... your motorcycle and this manual If you have any questions concerning this manual please consult your Yamaha dealer WARNING EWA10030 PLEASE READ THIS MANUAL CAREFULLY AND COMPLETELY BEFORE OPERATING THIS MOTORCYCLE The Safety Alert Symbol means ATTENTION BECOME ALERT YOUR SAFETY IS INVOLVED Failure to follow WARNING instructions could result in severe injury or death to the motorcycle operator a b...

Page 8: ...IC STREET ROAD OR HIGHWAY SUCH USE IS PROHIBITED BY LAW THIS MOTORCYCLE COMPLIES WITH ALMOST ALL STATE OFF HIGHWAY NOISE LEVEL AND SPARK ARRESTER LAWS AND REGULATIONS PLEASE CHECK YOUR LOCAL RIDING LAWS AND REGULATIONS BEFORE OPERAT ING THIS MOTORCYCLE Product and specifications are subject to change without notice U3P281E0 book Page 2 Monday April 17 2006 11 26 AM ...

Page 9: ...R S MANUAL 2006 by Yamaha Motor Co Ltd 1st edition March 2006 All rights reserved Any reprinting or unauthorized use without the written permission of Yamaha Motor Co Ltd is expressly prohibited Printed in Japan U3P281E0 book Page 3 Monday April 17 2006 11 26 AM ...

Page 10: ...he emission control system 6 3 General maintenance and lubrication chart 6 4 Removing and installing the cowling and panel 6 6 Checking the spark plug 6 7 Engine oil 6 8 Cleaning the air filter element 6 10 Cleaning the spark arrester 6 12 Adjusting the carburetor 6 13 Adjusting the engine idling speed 6 13 Adjusting the throttle cable free play 6 14 Valve clearance 6 14 Tires 6 15 Spoke wheels 6 ...

Page 11: ...eel 6 28 Troubleshooting 6 30 Troubleshooting chart TT R90 W 6 31 Troubleshooting chart TT R90E W 6 32 MOTORCYCLE CARE AND STORAGE 7 1 Care 7 1 Storage TT R90 W 7 3 Storage TT R90E W 7 4 SPECIFICATIONS 8 1 CONSUMER INFORMATION 9 1 Identification numbers 9 1 U3P281E0 book Page 2 Monday April 17 2006 11 26 AM ...

Page 12: ...the handlebar and both feet on the operator footrests during operation to maintain control of the motor cycle Never ride under the influence of alcohol or other drugs Be sure the transmission is in neu tral before starting the engine Protective apparel The majority of fatalities from motor cycle accidents are the result of head injuries The use of a safety helmet is the single most critical factor...

Page 13: ...ories Use extreme caution when selecting and installing any ac cessories Keep these guidelines in mind for mounting accessories in addition to those provided under Loading Never install accessories or that would impair the performance of your motorcycle Carefully inspect the accessory before using it to make sure that it does not in any way reduce ground clearance or cornering clearance limit susp...

Page 14: ...e and exhaust pipe s muffler s may be hot therefore park the motorcycle in a place where pedestrians or children are not likely to touch these hot areas Do not park the motorcycle on a slope or soft ground otherwise it may fall over Do not park the motorcycle near a flammable source e g a ker osene heater or near an open flame otherwise it could catch fire When transporting the motorcycle in anoth...

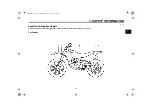
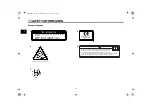
Page 15: ...ETY INFORMATION 1 4 1 EAU41370 Location of important labels Please read the following important labels carefully before operating this vehicle For Canada U3P281E0 book Page 4 Monday April 17 2006 11 26 AM ...

Page 16: ...ing control if you carry a passenger NEVER OPERATE THIS VEHICLE ON PUBLIC ROADS You can collide with another vehicle if you operate this vehicle on a public road ALWAYS WEAR AN APPROVED MOTORCYCLE HELMET eye protection and protective clothing AVERTISSEMENT 3PT 2118K B0 LIRE LE MANUEL DU PROPRIETAIRE ANSI QUE TOUTES LES ETIQUETTES AVANT D UTILISER CE VEHICULE NE JAMAIS TRANSPORTER DE PASSAGER La co...

Page 17: ...SAFETY INFORMATION 1 6 1 Except for Canada U3P281E0 book Page 6 Monday April 17 2006 11 26 AM ...

Page 18: ...tiliser ce véhicule Lesen Sie die Bedienungsanleitung bevor Sie dieses Fahrzeug fahren Antes de conducir este vehículo lea el Manual del Propietario 5PA 21568 00 TIRE INFORMATION Cold tire normal pressure should be set as follows FRONT 100kPa 1 00kgf cm2 15psi REAR 100kPa 1 00kgf cm2 15psi 3RV 21668 A0 YAMAHA MOTOR CO LTD SHIZUOKA JAPAN YAMAHA 4GB 2155A 00 U3P281E0 book Page 7 Monday April 17 2006...

Page 19: ...eft view 1 Fuel cock page 3 5 2 Starter choke lever page 3 6 3 Battery TT R90E W page 6 24 4 Engine oil drain bolt page 6 8 5 Shift pedal page 3 2 6 Throttle stop screw page 6 13 U3P281E0 book Page 1 Monday April 17 2006 11 26 AM ...

Page 20: ...ge 6 12 2 Seat page 3 7 3 Kickstarter page 3 6 4 Fuse TT R90E W page 6 26 5 Fuel tank page 3 3 6 Air filter element page 6 10 7 Spark plug cap page 6 7 8 Brake pedal page 3 2 9 Engine oil filler cap page 6 8 U3P281E0 book Page 2 Monday April 17 2006 11 26 AM ...

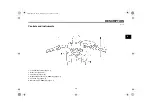
Page 21: ...struments 1 Left handlebar switch page 3 1 2 Brake lever page 3 2 3 Throttle grip page 6 14 4 Right handlebar switch TT R90E W page 3 1 5 Fuel tank cap page 3 3 6 Main switch TT R90E W page 3 1 U3P281E0 book Page 3 Monday April 17 2006 11 26 AM ...

Page 22: ...U41890 Engine stop switch TT R90 W Set this switch to before starting the engine Set this switch to to stop the engine EAU12660 Engine stop switch TT R90E W Set this switch to before starting the engine Set this switch to to stop the engine in case of an emergen cy such as when the vehicle overturns or when the throttle cable is stuck EAU12710 Start switch TT R90E W Push this switch to crank the e...

Page 23: ...al is at the bottom po sition EAU12890 Brake lever The brake lever is located at the right handlebar grip To apply the front brake pull the lever toward the handle bar grip EAU12941 Brake pedal The brake pedal is on the right side of the motorcycle To apply the rear brake press down on the brake pedal 1 Shift pedal 1 Brake lever 1 Brake pedal U3P281E0 book Page 2 Monday April 17 2006 11 26 AM ...

Page 24: ...ds Avoid spilling fuel on the hot en gine CAUTION ECA10070 Immediately wipe off spilled fuel with a clean dry soft cloth since fuel may deteriorate painted surfac es or plastic parts EAU41930 For Canada CAUTION ECA11400 Use only unleaded gasoline The use of leaded gasoline will cause severe damage to internal engine parts such as the valves and piston rings as well as to the exhaust system Your Ya...

Page 25: ...se of leaded gasoline will cause severe damage to internal engine parts such as the valves and piston rings as well as to the exhaust system Your Yamaha engine has been de signed to use regular unleaded gaso line with a research octane number of 91 or higher If knocking or pinging oc curs use a gasoline of a different brand or premium unleaded fuel Use of un leaded fuel will extend spark plug life...

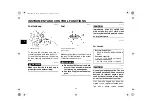
Page 26: ...k to the carburetor while filtering it al so The fuel cock has three positions OFF With the lever in this position fuel will not flow Always return the lever to this position when the engine is not running ON With the lever in this position fuel flows to the carburetor Normal riding is done with the lever in this position RES 1 Arrow mark positioned over OFF 1 Arrow mark positioned over ON 1 Arrow...

Page 27: ...ngine requires a richer air fuel mixture which is supplied by the starter choke Move the lever in direction a to turn on the starter choke Move the lever in direction b to turn off the starter choke EAU13680 Kickstarter To start the engine fold out the kick starter lever move it down lightly with your foot until the gears engage and then push it down smoothly but force fully 1 Starter choke lever ...

Page 28: ...erly se cured before riding EAU37490 Sidestand The sidestand is located on the left side of the frame Raise the sidestand or lower it with your foot while holding the vehicle upright WARNING EWA14190 The vehicle must not be ridden with the sidestand down or if the side stand cannot be properly moved up or does not stay up otherwise the sidestand could contact the ground and distract the operator r...

Page 29: ...ff system pre vents starting when the transmission is in gear Periodically check the operation of the starting circuit cut off system according to the following procedure WARNING EWA10250 If a malfunction is noted have a Yamaha dealer check the system be fore riding U3P281E0 book Page 8 Monday April 17 2006 11 26 AM ...

Page 30: ...itch may be defective The motorcycle should not be ridden until checked by a Yamaha dealer 6 Shift the transmission into the neutral position 7 Push the start switch Does the engine start The neutral switch may be defective The motorcycle should not be ridden until checked by a Yamaha dealer YES NOTE a warmed up engine NO The system is OK The motorcycle can be ridden YES NO This check is most reli...

Page 31: ...quences Therefore it is very important in addition to a thorough visual inspec tion to check the following points before each ride NOTE Pre operation checks should be made each time the vehicle is used Such an inspection can be accomplished in a very short time and the added safety it assures is more than worth the time involved WARNING EWA11150 If any item in the Pre operation check list is not w...

Page 32: ...ree play Adjust if necessary 6 17 6 18 Throttle grip Make sure that operation is smooth Check cable free play If necessary have Yamaha dealer adjust cable free play and lubricate cable and grip housing 6 14 6 21 Control cables Make sure that operation is smooth Lubricate if necessary 6 21 Drive chain Check chain slack Adjust if necessary Check chain condition Lubricate if necessary 6 18 6 20 Wheel...

Page 33: ...ration is smooth Lubricate lever pivoting point if necessary 6 22 Sidestand Make sure that operation is smooth Lubricate pivot if necessary 6 22 Chassis fasteners Make sure that all nuts bolts and screws are properly tightened Tighten if necessary Engine stop switch Check operation 3 1 ITEM CHECKS PAGE U3P281E0 book Page 3 Monday April 17 2006 11 26 AM ...

Page 34: ...ontact the ground and distract the opera tor resulting in a possible loss of control EAU41670 Starting and warming up a cold engine TT R90 W 1 Turn the fuel cock lever to ON 2 Set the engine stop switch to 3 Shift the transmission into the neu tral position WARNING EWA14410 Be sure to shift the transmis sion into neutral before starting the engine Never ride with the sidestand down 4 Turn the star...

Page 35: ...throttle See page 3 6 5 Start the engine by pushing the start switch 6 After starting the engine move the starter choke back halfway CAUTION ECA11130 For maximum engine life always warm the engine up before starting off Never accelerate hard when the engine is cold 7 When the engine is warm turn the starter choke off NOTE The engine is warm when it responds normally to the throttle with the starte...

Page 36: ...ging gears to avoid damaging the engine transmis sion and drive train which are not designed to withstand the shock of shifting when the throt tle grip is open EAU39910 To start out and accelerate 1 Close the throttle 2 Shift into first gear and release the shift pedal CAUTION ECA15460 Always close the throttle before shifting gears otherwise damage to the engine and drive train may re sult 3 Open...

Page 37: ...llowed with a substantial rest period for the engine To allow the engine to cool down from the temporary buildup of heat cruise at a lower engine speed After the first 5 hours of operation thor oughly check the motorcycle for loose parts oil leakage and any other prob lems Be sure to inspect and make ad justments thoroughly especially cable and drive chain slack and loose spokes In addition check ...

Page 38: ...ain switch and then turn the fuel cock lever to OFF WARNING EWA10310 Since the engine and exhaust system can become very hot park in a place where pedestri ans or children are not likely to touch them Do not park on a slope or on soft ground otherwise the vehicle may overturn U3P281E0 book Page 5 Monday April 17 2006 11 26 AM ...

Page 39: ...INTENANCE PROPER PERIODIC MAINTENANCE OF YOUR VEHICLE IS IMPORTANT IN ORDER TO ENJOY LONG PLEA SURABLE SERVICE ESPECIALLY IMPORTANT ARE THE MAINTE NANCE SERVICES RELATED TO EMISSIONS CONTROL THESE CONTROLS NOT ONLY FUNCTION TO ENSURE CLEANER AIR BUT ARE ALSO VITAL TO PROPER EN GINE OPERATION AND MAXIMUM PERFORMANCE IN THE FOLLOW ING PERIODIC MAINTENANCE CHARTS THE SERVICES RELATED TO EMISSIONS CON...

Page 40: ...itional tools such as a torque wrench may be necessary to perform certain maintenance work correctly NOTE If you do not have the tools or experi ence required for a particular job have a Yamaha dealer perform it for you WARNING EWA10340 Modifications not approved by Yamaha may cause loss of perfor mance excessive emissions and render the vehicle unsafe for use Consult a Yamaha dealer before at tem...

Page 41: ...0 hours 5000 km 3000 mi or 12 months or 150 hours 1 Fuel line Check fuel hoses for cracks or damage Replace if necessary 2 Spark plug Check condition Adjust gap and clean 3 Valve clearance Check and adjust valve clearance when engine is cold 4 Air filter element Clean with solvent Replace if necessary 5 Crankcase breather sys tem Check ventilation hose for cracks or damage and drain any deposits R...

Page 42: ...rake shoes if necessary 4 Wheels Check runout spoke tightness and for damage Tighten spokes if necessary 5 Tires Check tread depth and for damage Replace if necessary Check air pressure Correct if necessary 6 Wheel bearings Check bearings for smooth operation Replace if necessary 7 Swingarm pivot bearings Check bearing assemblies for looseness Moderately repack with lithium soap based grease 8 Dri...

Page 43: ...rpose grease lightly 14 Spark arrester Clean 15 Front fork Check operation and for grease leakage Replace if necessary 16 Shock absorber assem bly Check operation and for oil leakage Replace if necessary 17 Control cables Apply Yamaha chain and cable lube or engine oil 10W 30 thoroughly 18 Throttle grip housing and cable Check operation and free play Adjust the throttle cable free play if necessar...

Page 44: ...g A To remove the cowling 1 Remove the seat See page 3 7 2 Remove the bolt and then take the cowling off To install the cowling 1 Place the cowling in the original position and then install the bolt 2 Install the seat EAU19193 Panel A To remove the panel Remove the bolts and then take the panel off To install the panel Place the panel in the original position and then install the bolts 1 Panel A 2...

Page 45: ... that the porcelain insulator around the center electrode of the spark plug is a medium to light tan the ideal color when the vehicle is ridden normally NOTE If the spark plug shows a distinctly dif ferent color the engine could be oper ating improperly Do not attempt to diagnose such problems yourself In stead have a Yamaha dealer check the vehicle 2 Check the spark plug for electrode erosion and...

Page 46: ...rcycle on a level surface and hold it in an upright po sition NOTE Make sure that the motorcycle is posi tioned straight up when checking the oil level A slight tilt to the side can result in a false reading 2 Start the engine warm it up for several minutes and then turn it off 3 Wait a few minutes until the oil set tles remove the oil filler cap wipe the dipstick clean insert it back into the oil...

Page 47: ... also lubricates the clutch do not mix any chemical additives Do not use oils with a diesel speci fication of CD or oils of a high er quality than specified In addition do not use oils labeled ENERGY CONSERVING II or higher Make sure that no foreign mate rial enters the crankcase 6 Start the engine and then let it idle for several minutes while checking it for oil leakage If oil is leaking im medi...

Page 48: ...olvent and then squeeze the re maining solvent out WARNING EWA10430 Use only a dedicated parts cleaning solvent To avoid the risk of fire or explosion do not use gasoline or solvents with a low flash point CAUTION ECA10510 To avoid damaging the foam materi al handle it gently and carefully and do not twist or wring it 6 Apply oil of the recommended type to the entire surface of the sponge material...

Page 49: ... inder s may become excessively worn 8 Install the air filter case cover by in stalling the screws NOTE Make sure that the spark plug cable is routed as shown 9 Install the panel To clean the air filter check hose 1 Check the hoses at the bottom of the air filter case for accumulated dirt or water 2 If dirt or water is visible remove the hoses clean them and then reinstall them 1 Spark plug cable ...

Page 50: ...ect a well ventilated area free of combustible materials to clean the spark arrester 1 Remove the tailpipe by removing the bolt and then pulling it out of the muffler 2 Tap the tailpipe lightly and then use a wire brush to remove any carbon deposits from the spark ar rester portion of the tailpipe and in side of the tailpipe housing 3 Insert the tailpipe into the muffler and then install and tight...

Page 51: ... speed must be checked and if necessary adjusted as follows at the intervals specified in the periodic maintenance and lubrication chart NOTE A diagnostic tachometer is needed to make this adjustment 1 Attach the tachometer to the spark plug lead 2 Start the engine and warm it up for several minutes at 1000 2000 r min while occasionally revving it to 4000 5000 r min NOTE The engine is warm when it...

Page 52: ...cknut 2 To increase the throttle cable free play turn the adjusting nut in direc tion a To decrease the throttle cable free play turn the adjusting nut in direction b 3 Tighten the locknut EAU21401 Valve clearance The valve clearance changes with use resulting in improper air fuel mixture and or engine noise To prevent this from occurring the valve clearance must be adjusted by a Yamaha dealer at ...

Page 53: ...lass fragments in it or if the sidewall is cracked have a Yamaha dealer re place the tire immediately Tire information This motorcycle is equipped with spoke wheels and tube tires WARNING EWA10460 The front and rear tires should be of the same make and de sign otherwise the handling characteristics of the vehicle cannot be guaranteed After extensive tests only the tires listed below have been ap p...

Page 54: ...r the tire or wheel has been changed or replaced An unbalanced wheel can result in poor performance adverse han dling characteristics and a short ened tire life Ride at moderate speeds after changing a tire since the tire sur face must first be broken in for it to develop its optimal characteris tics EAU40431 Accessories and replacement parts WARNING EWA14481 The accessories or replacement parts y...

Page 55: ...e 5 Loosen the locknut at the brake shoe plate 6 To increase the brake lever free play turn the adjusting nut in direc tion a To decrease the brake le ver free play turn the adjusting nut in direction b 7 Tighten the locknut at the brake shoe plate and at the brake lever EAU39811 Adjusting the brake pedal free play The brake pedal free play should mea sure 10 0 20 0 mm 0 39 0 79 in at the brake pe...

Page 56: ...es as a set NOTE Be sure to measure the brake lining at the thinnest portion EAU22760 Drive chain slack The drive chain slack should be checked before each ride and adjusted if necessary EAU22771 To check the drive chain slack 1 Place the motorcycle on the side stand NOTE When checking and adjusting the drive chain slack there should be no weight on the motorcycle 2 Shift the transmission into the...

Page 57: ...ing the alignment marks on each side of the swingarm make sure that both adjusting nuts are in the same po sition for proper wheel alignment CAUTION ECA10570 Improper drive chain slack will over load the engine as well as other vital parts of the motorcycle and can lead to chain slippage or breakage To prevent this from occurring keep the drive chain slack within the specified limits 3 Tighten bot...

Page 58: ...1 The drive chain must be lubricated after washing the motorcycle and riding in the rain 1 Remove all dirt and mud from the drive chain with a brush or cloth NOTE For a thorough cleaning have a Yamaha dealer remove the drive chain and soak it in solvent 2 Spray Yamaha Chain and Cable Lube or a high quality spray type drive chain lubricant on both sides and on the middle of the chain making sure th...

Page 59: ...d ca bles as soon as possible to prevent unsafe conditions EAU23111 Checking and lubricating the throttle grip and cable The operation of the throttle grip should be checked before each ride In addi tion the cable should be lubricated at the intervals specified in the periodic maintenance chart EAU23131 Checking and lubricating the brake and shift pedals The operation of the brake and shift pedals...

Page 60: ...l to metal contact surfaces should be lubricated if necessary WARNING EWA10730 If the sidestand does not move up and down smoothly have a Yamaha dealer check or repair it EAUM1650 Lubricating the swingarm piv ots The swingarm pivots must be lubricat ed at the intervals specified in the peri odic maintenance and lubrication chart Recommended lubricant Lithium soap based grease all pur pose grease R...

Page 61: ...to check if the front fork compresses and rebounds smoothly CAUTION ECA10590 If any damage is found or the front fork does not operate smoothly have a Yamaha dealer check or re pair it EAU23280 Checking the steering Worn or loose steering bearings may cause danger Therefore the operation of the steering must be checked as fol lows at the intervals specified in the pe riodic maintenance and lubrica...

Page 62: ...heel bearings EAU34221 Battery TT R90E W The battery is located behind cowling A See page 6 6 This model is equipped with a sealed type MF battery which does not re quire any maintenance There is no need to check the electrolyte or to add distilled water WARNING EWA10760 Electrolyte is poisonous and dangerous since it contains sul furic acid which causes severe burns Avoid any contact with skin ey...

Page 63: ...o discharge more quickly if the vehicle is equipped with optional electrical accessories To store the battery 1 If the vehicle will not be used for more than one month remove the battery fully charge it and then place it in a cool dry place 2 If the battery will be stored for more than two months check it at least once a month and fully charge it if necessary 3 Fully charge the battery before in s...

Page 64: ...cycle Since this model is not equipped with a centerstand follow these precautions when removing the front and rear wheel or performing other maintenance requiring the motorcycle to stand up right Check that the motorcycle is in a stable and level position before starting any maintenance A strong wooden box can be placed under the engine for added stability To service the front wheel 1 Stabilize t...

Page 65: ...ely support the motor cycle so that there is no danger of it falling over 1 Loosen the locknut at the brake le ver and then turn the adjusting bolt fully in direction a 2 Loosen the axle nut 3 Lift the front wheel off the ground according to the procedure on page 6 26 4 Remove the axle nut and washer 5 Pull the wheel axle out and then remove the wheel 1 Locknut 2 Brake lever free play adjusting bo...

Page 66: ...age 6 17 6 While applying the front brake push down hard on the handlebar several times to check for proper fork operation EAU25080 Rear wheel EAU41641 To remove the rear wheel WARNING EWA10820 It is advisable to have a Yamaha dealer service the wheel Securely support the motor cycle so that there is no danger of it falling over 1 Disconnect the brake torque rod from the brake shoe plate by re mov...

Page 67: ...to the rear sprocket 2 Insert the wheel axle from the right hand side 3 Adjust the drive chain slack See page 6 18 4 Lower the rear wheel so that it is on the ground 5 Install the brake rod onto the brake camshaft lever and then install the brake pedal free play adjusting nut onto the brake rod 6 Connect the brake torque rod to the brake shoe plate by installing the bolt and nut and then tighten t...

Page 68: ...se poor starting and loss of power The following troubleshooting chart represents a quick and easy procedure for checking these vital systems your self However should your motorcycle require any repair take it to a Yamaha dealer whose skilled technicians have the necessary tools experience and know how to service the motorcycle properly Use only genuine Yamaha replace ment parts Imitation parts ma...

Page 69: ... is compression There is no compression Check the ignition Have a Yamaha dealer check the vehicle Remove the spark plug and check the electrodes 3 Ignition Wet Dry Wipe off with a dry cloth and correct the spark plug gap or replace the spark plug Have a Yamaha dealer check the vehicle The engine does not start Have a Yamaha dealer check the vehicle Open the throttle halfway and operate the kicksta...

Page 70: ...the ignition Have a Yamaha dealer check the vehicle Remove the spark plug and check the electrodes 3 Ignition Wipe off with a dry cloth and correct the spark plug gap or replace the spark plug Have a Yamaha dealer check the vehicle The engine does not start Have a Yamaha dealer check the vehicle The engine does not start Check the battery Operate the electric starter 4 Battery The engine turns ove...

Page 71: ...dirt do not leave the cleaner on the af fected area any longer than in structed Also thoroughly rinse the area off with water immedi ately dry it and then apply a cor rosion protection spray Improper cleaning can damage windshields cowlings panels and other plastic parts Use only a soft clean cloth or sponge with mild detergent and water to clean plastic Do not use any harsh chemical products on p...

Page 72: ...hrome polish to shine chrome aluminum and stainless steel parts including the exhaust system Even the thermally in duced discoloring of stainless steel exhaust systems can be re moved through polishing 4 To prevent corrosion it is recom mended to apply a corrosion pro tection spray on all metal including chrome and nickel plat ed surfaces 5 Use spray oil as a universal clean er to remove any remai...

Page 73: ...s to pro tect the cylinder piston rings etc from corrosion a Remove the spark plug cap and spark plug b Pour a teaspoonful of engine oil into the spark plug bore c Install the spark plug cap onto the spark plug and then place the spark plug on the cylinder head so that the electrodes are grounded This will limit spark ing during the next step d Turn the engine over several times with the starter T...

Page 74: ...park plug cap and spark plug b Pour a teaspoonful of engine oil into the spark plug bore c Install the spark plug cap onto the spark plug and then place the spark plug on the cylinder head so that the electrodes are grounded This will limit spark ing during the next step d Turn the engine over several times with the starter This will coat the cylinder wall with oil e Remove the spark plug cap from...

Page 75: ...CYCLE CARE AND STORAGE 7 5 7 C 90 F For more information on storing the battery see page 6 24 NOTE Make any necessary repairs before storing the motorcycle U3P281E0 book Page 5 Monday April 17 2006 11 26 AM ...

Page 76: ...ement Forward inclined single cylinder Displacement 89 0 cm 5 43 cu in Bore stroke 47 0 51 8 mm 1 85 2 04 in Compression ratio 8 50 1 Starting system TT R90 Kickstarter TT R90E Electric starter and kickstarter Lubrication system Wet sump Engine oil Type TT R90 SAE10W30 or SAE10W40 or SAE15W40 or SAE20W40 or SAE20W50 AUS AUT BEL CHE DEU DNK ESP FIN FRA GBR GRC IRL NLD NOR NZL PRT SWE ZAF TT R90 YAM...

Page 77: ...mary reduction system Spur gear Primary reduction ratio 67 18 3 722 Secondary reduction system Chain drive Secondary reduction ratio 35 14 2 500 Transmission type Constant mesh 3 speed Operation Left foot operation Gear ratio 1st 37 13 2 846 2nd 33 19 1 736 3rd 28 23 1 217 Chassis Frame type Steel tube backbone Caster angle 24 83 Trail 56 0 mm 2 20 in Front tire Type With tube Size 2 50 14 4PR Man...

Page 78: ...l 110 0 mm 4 33 in Rear suspension Type Swingarm monocross Spring shock absorber type Coil spring gas oil damper Wheel travel 95 0 mm 3 74 in Electrical system Ignition system CDI Battery Model TT R90E GT4B 5 Voltage capacity TT R90E 12 V 2 5 Ah Fuse Fuse TT R90E 10 0 A U3P281E0 book Page 3 Monday April 17 2006 11 26 AM ...

Page 79: ...entification number TT R90E W The key identification number is stamped into the key Record this num ber in the space provided and use it for reference when ordering a new key EAU26400 Vehicle identification number The vehicle identification number is stamped into the steering head pipe Record this number in the space pro vided NOTE The vehicle identification number is used to identify your motorcy...

Page 80: ...label is affixed to the frame under the seat See page 3 7 Record the information on this label in the space provided This information will be needed when ordering spare parts from a Yamaha dealer 1 Model label U3P281E0 book Page 2 Monday April 17 2006 11 26 AM ...

Page 81: ...ch TT R90E W 3 1 Maintenance and lubrication periodic 6 4 Maintenance emission control system 6 3 Maintenance periodic 6 1 Model label 9 2 P Parking TT R90E W 5 5 Parking TT R90 W 5 4 Part locations 2 1 Pre operation check list 4 2 S Safety information 1 1 Seat 3 7 Shifting 5 3 Shift pedal 3 2 Sidestand 3 7 Sidestand checking and lubricating 6 22 Spark arrester cleaning 6 12 Spark plug checking 6 ...

Page 82: ...YAMAHA MOTOR CO LTD PRINTED ON RECYCLED PAPER PRINTED IN JAPAN 2006 04 0 3 1 CR E U3P281E0 book Page 1 Monday April 17 2006 11 26 AM ...

Reviews: