PERIODIC MAINTENANCE AND MINOR REPAIR
6-15
2
3
4
5
6
7
8
9
drogen gas. Therefore, keep
sparks, flames, cigarettes, etc.,
away from the battery and pro-
vide sufficient ventilation when
charging it in an enclosed
space.
●
KEEP THIS AND ALL BATTER-
IES OUT OF THE REACH OF
CHILDREN.
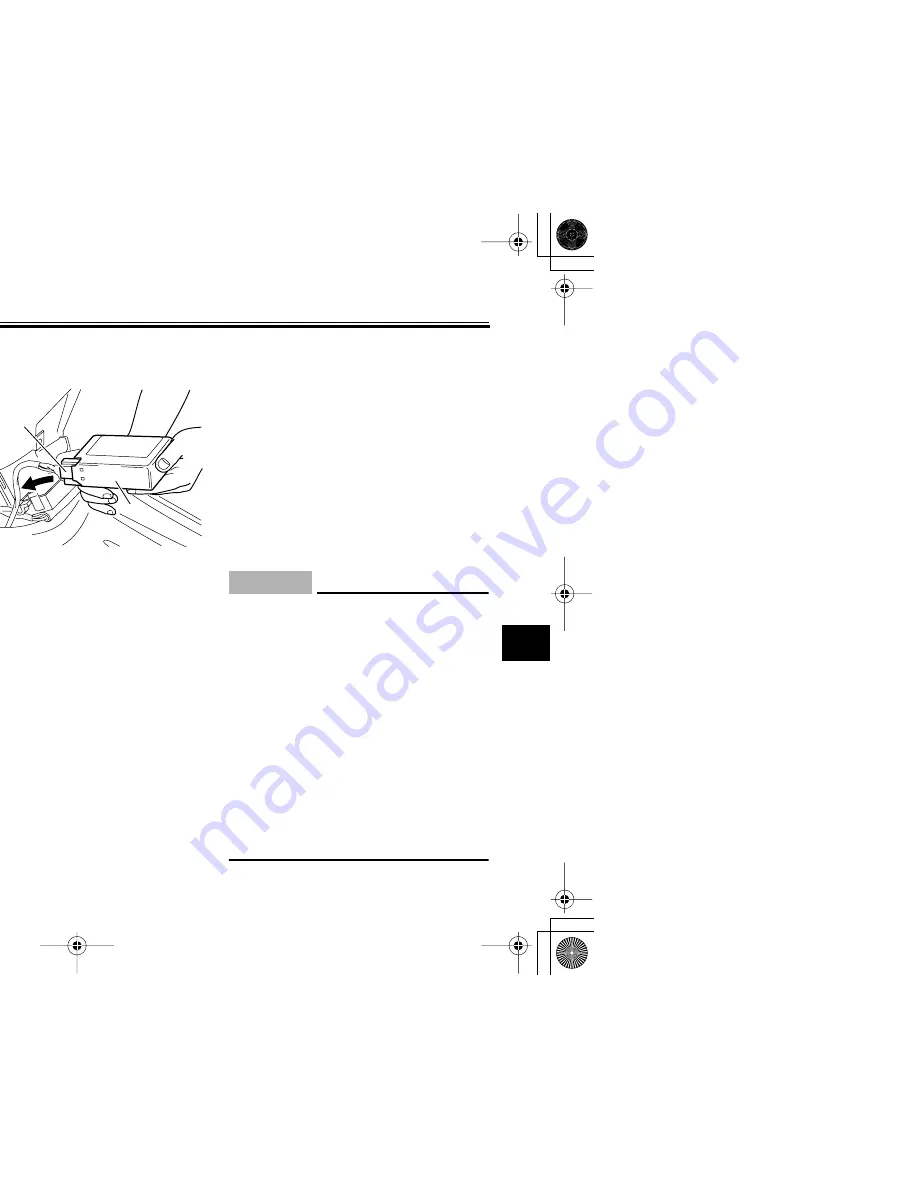
To remove the battery
1. Remove panel A. (See page 6-5.)
2. Remove the battery box cover by
removing the screw.
3. Pull the battery out from the bat-
tery box, and then disconnect the
battery coupler.
To install the battery
1. Connect the battery coupler, and
then place the battery in the origi-
nal position.
2. Install the battery box cover by in-
stalling the screw.
3. Install the panel.
To charge the battery
Have a Yamaha dealer charge the bat-
tery as soon as possible if it seems to
have discharged. Keep in mind that the
battery tends to discharge more quickly
if the vehicle is equipped with optional
electrical accessories.
To store the battery
1. If the vehicle will not be used for
more than one month, remove the
battery, fully charge it, and then
place it in a cool, dry place.
2. If the battery will be stored for more
than two months, check it at least
once a month and fully charge it if
necessary.
3. Fully charge the battery before in-
stallation.
CAUTION:
ECA10630
●
Always keep the battery
charged. Storing a discharged
battery can cause permanent
battery damage.
●
To charge a sealed-type (MF)
battery, a special (constant-volt-
age) battery charger is required.
Using a conventional battery
charger will damage the battery.
If you do not have access to a
sealed-type (MF) battery charg-
er, have a Yamaha dealer
charge your battery.
1. Battery box cover
2. Screw
1
2
1. Battery coupler
2. Battery
1
2
Summary of Contents for VINO YJ50RT
Page 1: ...OWNER S MANUAL 5LY 28199 15 YJ50RAT LIT 11626 18 26 YJ50RT ...
Page 2: ...5LY 9 15_hyoushi2 3 3 30 04 3 02 PM Page 1 ...
Page 12: ...1 6 EAU10381 y before operating this vehicle 4 5 ...
Page 14: ...2 1 EAU10410 3 4 5 6 7 ...
Page 15: ...DESCRIPTION 2 2 2 3 4 5 6 7 8 9 EAU10420 5 4 7 3 6 ...
Page 16: ...2 3 EAU10430 3 4 5 6 7 8 ...
Page 29: ...PRE OPERATION CHECKS 4 3 2 3 4 5 6 7 8 9 y CHECKS PAGE ...
Page 34: ...NT RIDING POINTS 5 5 ...
Page 35: ...6 1 2 3 4 5 6 7 8 9 ODIC MAINTENANCE AND MINOR REPAIR ...
Page 38: ...ND MINOR REPAIR 6 4 EAU18690 e riding in unusually wet or dusty areas ...
Page 59: ...CONSUMER INFORMATION 9 2 2 3 4 5 6 7 8 9 ...
Page 62: ...9 5 EAU26680 S A RIVA LIMITED WARRANTY ...


