3 - 40
CHK
ADJ
CHECKING AND ADJUSTING THE STEERING HEAD
EAS00146
CHECKING AND ADJUSTING THE
STEERING HEAD
1. Stand the motorcycle on a level surface.
WARNING
@
Securely support the motorcycle so that
there is no danger of it falling over.
@
NOTE:
@
Place the motorcycle on a suitable stand so
that the front wheel is elevated.
@
2. Check:
• steering head
Grasp the bottom of the front fork legs and
gently rock the front fork.
Binding/looseness
→
Adjust the steering
head.
3. Remove:
• headlight body bracket bolt
• flasher light bracket
• handlebar holder assembly
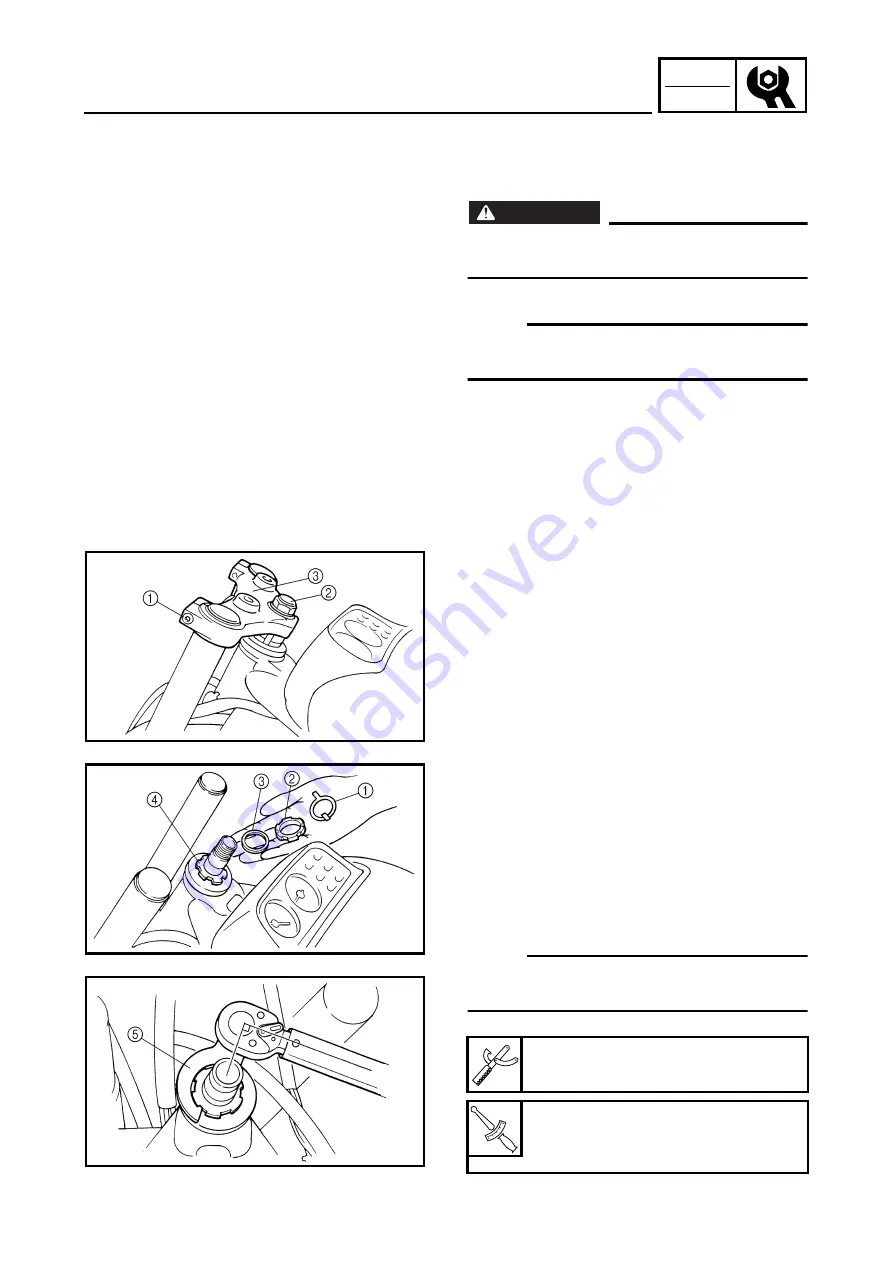
4. Loosen:
• upper bracket pinch bolts
1
5. Remove:
• steering stem nut
2
• washer
• upper bracket
3
6. Adjust:
• steering head
▼▼▼▼▼▼▼▼▼▼▼▼▼▼▼▼▼▼▼▼▼▼▼▼▼▼▼▼▼▼▼
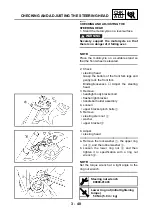
a. Remove the lock washer
1
, the upper ring
nut
2
, and the rubber washer
3
.
b. Loosen the lower ring nut
4
and then
tighten it to specification with a ring nut
wrench
5
.
NOTE:
@
Set the torque wrench at a right angle to the
ring nut wrench.
@
Steering nut wrench
90890-01403
T
R
.
.
Lower ring nut (initial tightening
torque)
50 Nm (5.0 m • kg)
Summary of Contents for VMX12 2001
Page 1: ...VMX12 2001 3LRD AE1 SERVICEMANUAL ...
Page 2: ......
Page 8: ......
Page 9: ...GEN INFO 1 ...
Page 11: ...GEN INFO ...
Page 21: ......
Page 22: ...SPEC 2 ...
Page 24: ...SPEC ...
Page 52: ...2 28 SPEC OIL FLOW DIAGRAMS 1 Camshaft 2 Main gallery 3 Crankshaft 4 Oil level switch ...
Page 54: ...2 30 SPEC OIL FLOW DIAGRAMS 1 Crankshaft 2 Oil pipe 3 Oil filter ...
Page 65: ...CHK ADJ 3 ...
Page 125: ......
Page 126: ...ENG 4 ...
Page 130: ...ENG ...
Page 236: ......
Page 237: ...COOL 5 ...
Page 239: ...COOL ...
Page 258: ...CARB 6 ...
Page 260: ...CARB ...
Page 272: ......
Page 273: ...CHAS 7 ...
Page 389: ......
Page 390: ...ELEC 8 ...
Page 396: ...8 4 ELEC SWITCHES ...
Page 417: ...8 25 ELEC STARTER MOTOR 3 Install O rings 1 bolts 2 New T R 5 Nm 0 5 m kg ...
Page 445: ...TRBL SHTG 9 ...

