4 - 15
ENG
CAMSHAFTS
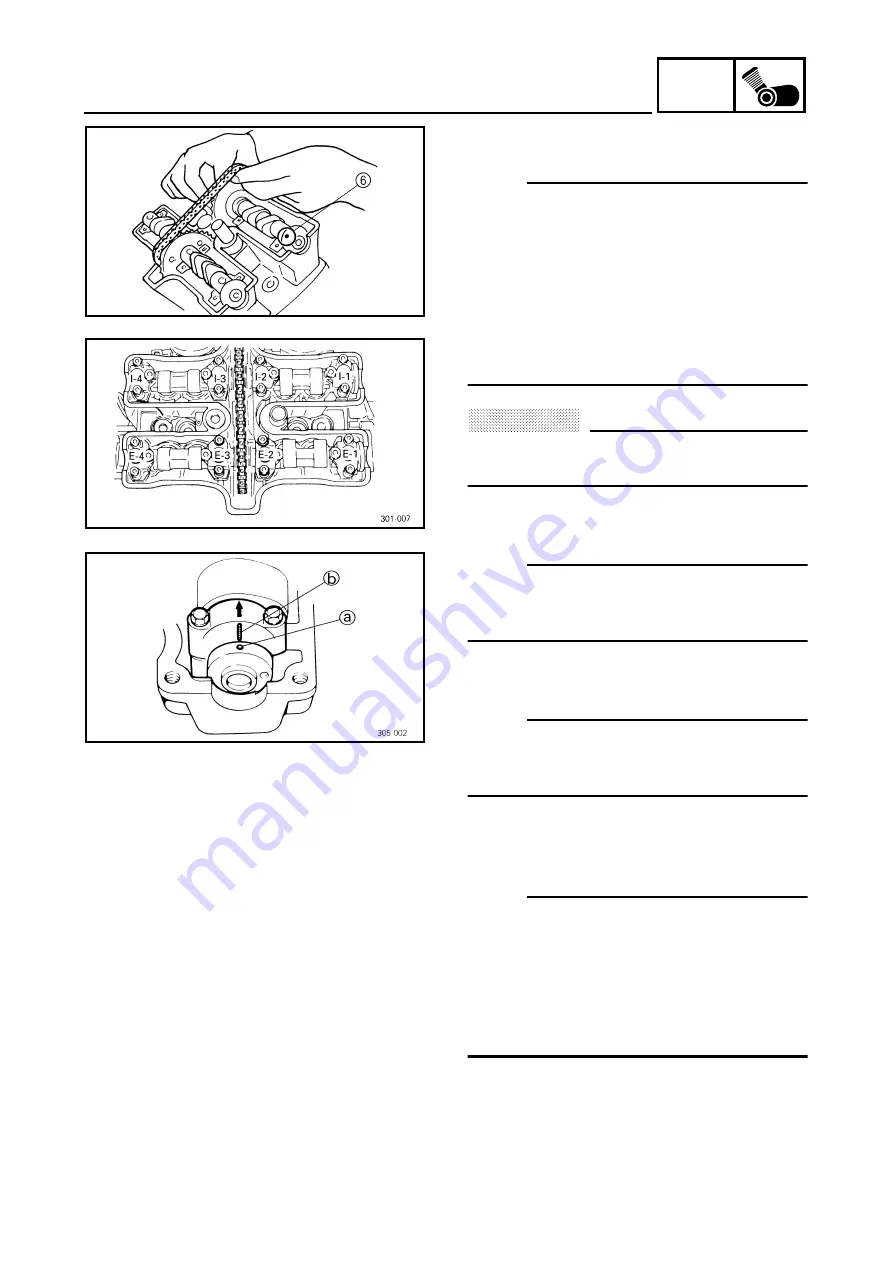
b. First, install the exhaust camshaft, and then
the intake camshaft.
NOTE:
@
• Be sure to install the camshafts in the correct
place as shown.
“IN” mark = intake camshaft
“EX” mark = exhaust camshaft
• Make sure the timing marks
6
(o: small
hole) in the camshaft face up.
• Be sure to keep the timing chain as tight as
possible on the exhaust side.
• Remove the wire from the timing chain.
@
CAUTION:
@
Do not turn the camshaft, as damage could
occur to the pistons and valves.
@
c. Install intake and exhaust camshaft caps
#1, #3, and finally #4.
NOTE:
@
At this point, do not install intake camshaft cap
#2, exhaust camshaft cap #2, and the timing
chain guide (top side).
@
d. Align the mark
a
on the camshaft with the
mark
b
camshaft cap.
NOTE:
@
Cylinder #1 is at TDC when the small hole in
the camshaft is aligned with the camshaft cap
mark.
@
e. Lubricate the camshaft cap bolts with
engine oil.
f. Tighten the camshaft cap bolts.
NOTE:
@
• The camshaft caps are numbered from right
to left.
• First, tighten intake and exhaust camshaft
cap bolts #3, #1, and finally #4.
• Tighten the camshaft cap bolts in stages and
in a crisscross pattern, working from the
inner caps out.
@
Summary of Contents for VMX12 2001
Page 1: ...VMX12 2001 3LRD AE1 SERVICEMANUAL ...
Page 2: ......
Page 8: ......
Page 9: ...GEN INFO 1 ...
Page 11: ...GEN INFO ...
Page 21: ......
Page 22: ...SPEC 2 ...
Page 24: ...SPEC ...
Page 52: ...2 28 SPEC OIL FLOW DIAGRAMS 1 Camshaft 2 Main gallery 3 Crankshaft 4 Oil level switch ...
Page 54: ...2 30 SPEC OIL FLOW DIAGRAMS 1 Crankshaft 2 Oil pipe 3 Oil filter ...
Page 65: ...CHK ADJ 3 ...
Page 125: ......
Page 126: ...ENG 4 ...
Page 130: ...ENG ...
Page 236: ......
Page 237: ...COOL 5 ...
Page 239: ...COOL ...
Page 258: ...CARB 6 ...
Page 260: ...CARB ...
Page 272: ......
Page 273: ...CHAS 7 ...
Page 389: ......
Page 390: ...ELEC 8 ...
Page 396: ...8 4 ELEC SWITCHES ...
Page 417: ...8 25 ELEC STARTER MOTOR 3 Install O rings 1 bolts 2 New T R 5 Nm 0 5 m kg ...
Page 445: ...TRBL SHTG 9 ...


