BASICS
Chapter 1
Setting It Up
1 - 8
Controls and Connectors
(1)
(2)
(3) (4)
(5)
Front Side
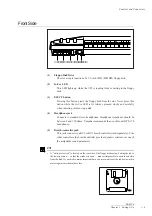
(1)
Floppy-Disk Drive
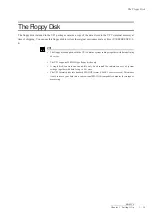
The slot accepts insertion of a 3.5-inch 2HD (MF2HD) floppy disk.
(2)
In-Use LED
This LED lights up while the VP1 is reading from or writing to the floppy
disk.
(3)
EJECT button
Pressing this button ejects the floppy disk from the slot. Never press this
button while the In-Use LED is lit. Always proceed slowly and carefully
when inserting or removing a disk.
(4)
Headphone jack
Connects to standard stereo headphones. Headphone impedance should be
between 8 and 150 ohms. Yamaha recommends the use of model HPE-170
headphones.
(5)
Breath-controller jack
This jack connects to a BC2 or BC1 breath controller (sold separately). Like
other controllers, the breath controller provides dynamic control over one of
the assignable sound parameters.
FYI
•
A “write-protect tab” is located on the rear side of the floppy disk casing. Setting the tab to
the lower position — so that the window is open — makes it impossible to write to or delete
from the disk. If your disk contains important data, you may want to set the tab downward to
protect against accidental data loss.
Summary of Contents for VP1
Page 1: ......
Page 12: ...BASICS PART...
Page 69: ...REFERENCE PART...
Page 151: ...App 1 REFERENCE Appendix Appendix...
Page 171: ...Index 1 VP1 OWNER S MANUAL Index...


