10
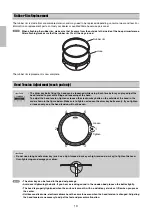
The rubber rim is made from consumable material, and may need to be replaced depending on normal wear and tear. For
information on replacement parts, contact your dealer or qualified Yamaha service personnel.
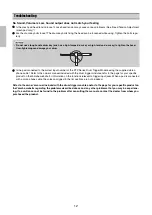
When attaching the rubber rim, make sure that it covers from the outside to the inside of the hoop circumference.
After attaching, make sure that the rubber rim fits all the way around.
The rubber rim replacement is now complete.
• The drum key can be found in the pad set package.
• Avoid over-tightening the bolts. If you hear a creaking sound in the wooden body, loosen the bolts slightly.
• The head is properly tightened when the surface is smooth, with no wrinkles, yet sinks a little when you press
the center.
• Unlike acoustic drums, electronic drums have the same tone even when the head tension is changed. Adjusting
the head tension is necessary to adjust the feel and prevent malfunction.
Rubber Rim Replacement
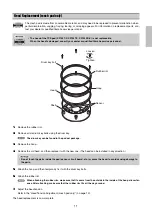
Head Tension Adjustment (mesh pad only)
• The drum key bolts fixing the head can be loosened while using. Each time before you play, adjust the
head tension to prevent rattling and loosening of the head.
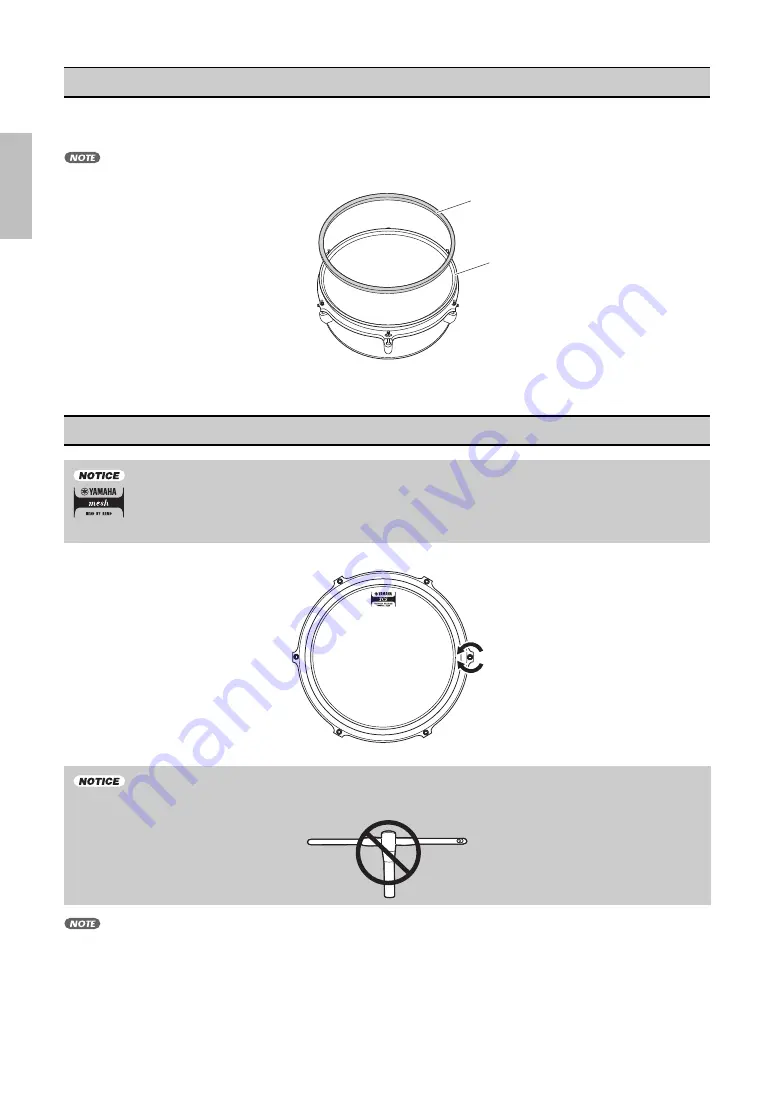
To adjust the head tension, tighten or loosen the six drum key bolts on the outside of the head in the
order shown in the figure below. Make sure to tighten or loosen the drum key bolts evenly. If you tighten
or loosen only one, the head tension will not be even.
• Do not use a long handle drum key (such as a high-torque drum key or high-tension drum key) to tighten the head.
Over-tightening can damage your drum.
Rubber rim
Hoop
1
3
2
5
6
4
Loosen
Tighten


