VALVES AND VALVE SPRINGS
5-19
2. Replace:
●
Valve guide
NOTE:
To ease valve guide removal and installation,
and to maintain the correct fit, heat the cylinder
head to 100
°
C (212
°
F) in an oven.
▼▼▼▼▼▼▼▼▼▼▼▼▼▼▼▼▼▼▼▼▼▼▼▼▼▼▼▼▼▼▼▼
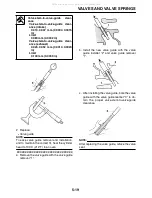
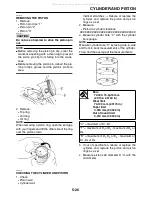
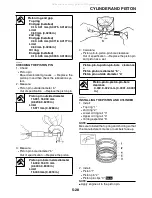
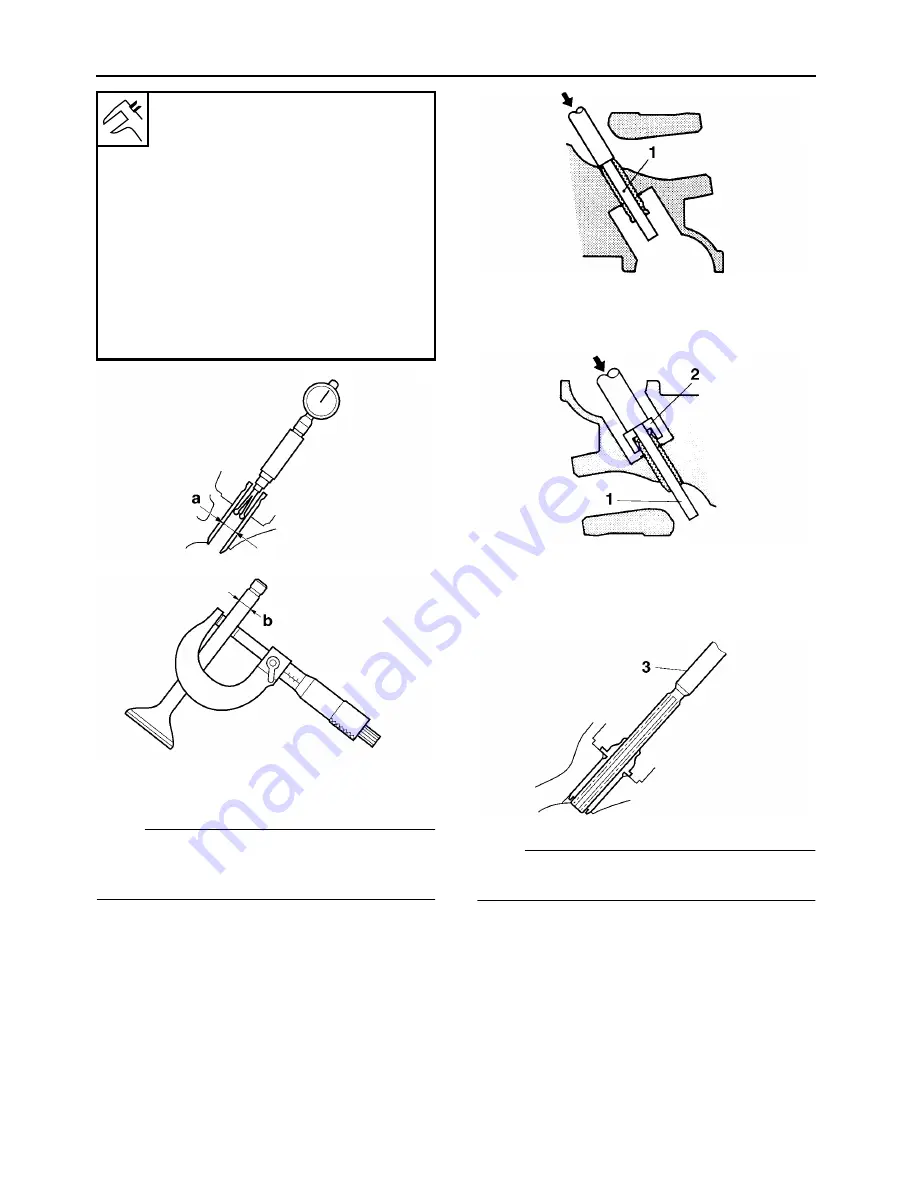
a. Remove the valve guide with the valve guide
remover “1”.
b. Install the new valve guide with the valve
guide installer “2” and valve guide remover
“1”.
c. After installing the valve guide, bore the valve
guide with the valve guide reamer “3” to ob-
tain the proper valve-stem-to-valve-guide
clearance.
NOTE:
After replacing the valve guide, reface the valve
seat.
Valve-stem-to-valve-guide
clear-
ance
Valve-stem-to-valve-guide clear-
ance (intake)
0.010
–
0.037 mm (0.0004
–
0.0015
in)
Limit
0.080 mm (0.0032 in)
Valve-stem-to-valve-guide clear-
ance (exhaust)
0.025
–
0.052 mm (0.0010
–
0.0020
in)
Limit
0.100 mm (0.0039 in)
All manuals and user guides at all-guides.com
Summary of Contents for XT250X 2008
Page 2: ...All manuals and user guides at all guides com...
Page 8: ...All manuals and user guides at all guides com...
Page 54: ...CABLE ROUTING 2 35 All manuals and user guides at all guides com...
Page 82: ...ELECTRICAL SYSTEM 3 27 a b All manuals and user guides at all guides com...
Page 170: ...VALVES AND VALVE SPRINGS 5 24 All manuals and user guides at all guides com...
Page 224: ...AIR INDUCTION SYSTEM 6 13 All manuals and user guides at all guides com...
Page 239: ...CHARGING SYSTEM 7 14 All manuals and user guides at all guides com...
Page 243: ...LIGHTING SYSTEM 7 18 All manuals and user guides at all guides com...
Page 249: ...SIGNALING SYSTEM 7 24 All manuals and user guides at all guides com...
Page 253: ...CARBURETOR HEATING SYSTEM 7 28 All manuals and user guides at all guides com...
Page 279: ...All manuals and user guides at all guides com...

