ENGINE
3-9
▼▼▼
▼
▼
▼▼▼
▼
▼
▼▼▼
▼
▼
▼▼▼
▼
▼
▼▼▼
▼
▼
▼▼▼
▼
▼▼▼
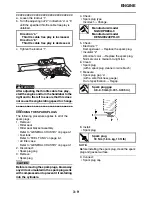
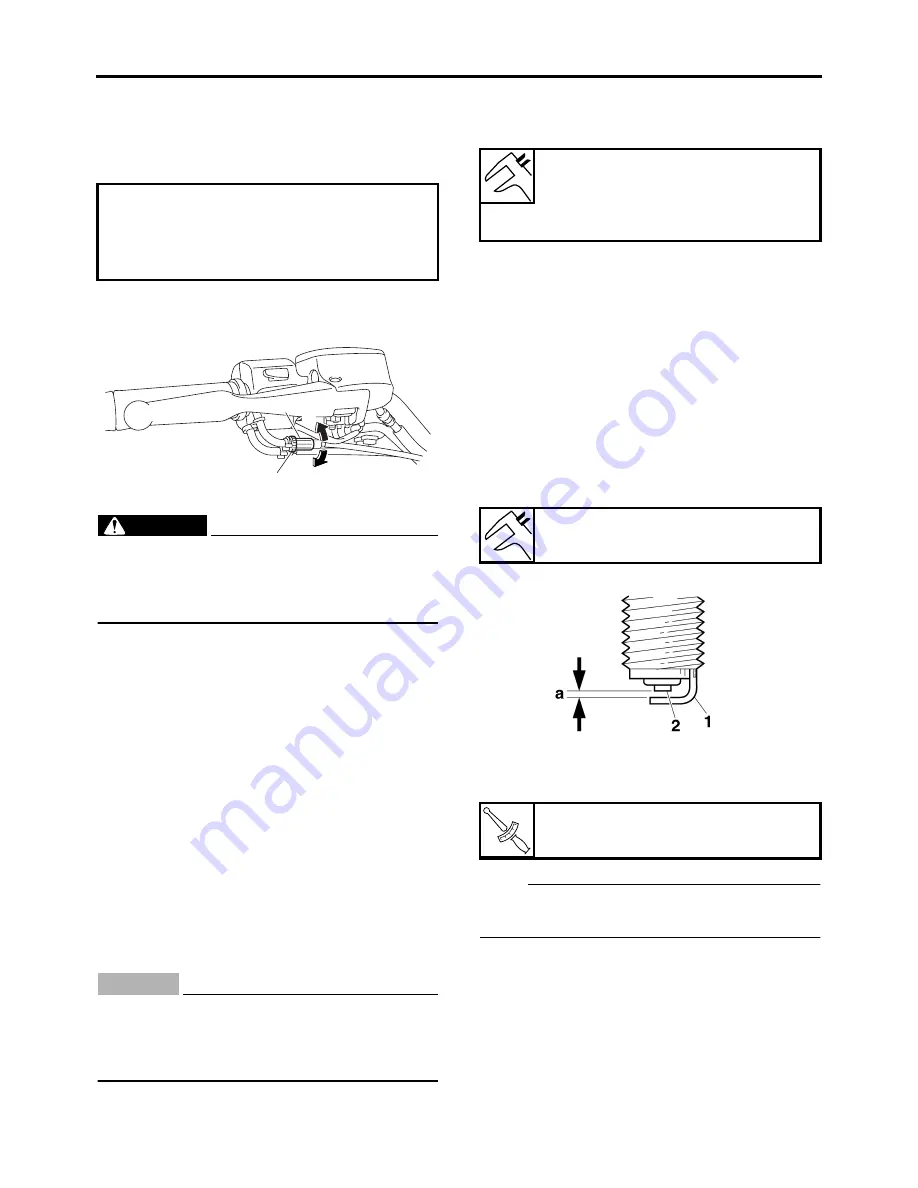
a. Loosen the locknut “1”.
b. Turn the adjusting nut “2” in direction “a” or “b”
until the specified throttle cable free play is
obtained.
c. Tighten the locknut “1”.
WARNING
EWA12910
After adjusting the throttle cable free play,
start the engine and turn the handlebar to the
right and to the left to ensure that this does
not cause the engine idling speed to change.
▲▲▲
▲
▲
▲▲▲
▲
▲
▲▲▲
▲
▲
▲▲▲
▲
▲
▲▲▲
▲
▲
▲▲▲
▲
▲▲▲
EAS20680
CHECKING THE SPARK PLUGS
The following procedure applies to all of the
spark plugs.
1. Remove:
• Rider seat
• Rider seat bracket assembly
Refer to “GENERAL CHASSIS” on page 4-1.
• Fuel tank
Refer to “FUEL TANK” on page 6-1.
• Air filter case
Refer to “GENERAL CHASSIS” on page 4-1.
2. Disconnect:
• Spark plug cap
3. Remove:
• Spark plug
CAUTION:
ECA13320
Before removing the spark plugs, blow away
any dirt accumulated in the spark plug wells
with compressed air to prevent it from falling
into the cylinders.
4. Check:
• Spark plug type
Incorrect
→
Change.
5. Check:
• Electrode “1”
Damage/wear
→
Replace the spark plug.
• Insulator “2”
Abnormal color
→
Replace the spark plug.
Normal color is medium-to-light tan.
6. Clean:
• Spark plug
(with a spark plug cleaner or wire brush)
7. Measure:
• Spark plug gap “a”
(with a wire thickness gauge)
Out of specification
→
Regap.
8. Install:
• Spark plug
NOTE:
Before installing the spark plug, clean the spark
plug and gasket surface.
9. Connect:
• Spark plug cap
Direction “a”
Throttle cable free play is increased.
Direction “b”
Throttle cable free play is decreased.
a
b
1
2
Manufacturer/model
NGK/DPR8EA-9
Manufacturer/model
DENSO/X24EPR-U9
Spark plug gap
0.8–0.9 mm (0.031–0.035 in)
T
R
.
Spark plug
18 Nm (1.8 m·kg, 13 ft·lb)
Summary of Contents for XV19SW 2006
Page 6: ......
Page 8: ......
Page 24: ...SPECIAL TOOLS 1 15...
Page 55: ...LUBRICATION POINTS AND LUBRICANT TYPES 2 30...
Page 60: ...LUBRICATION SYSTEM CHART AND DIAGRAMS 2 35 D D B B D D C C A A B C C B 3 2 1 3 4 6 7 6 7 5...
Page 62: ...LUBRICATION SYSTEM CHART AND DIAGRAMS 2 37 A A A A 1 3 2 4...
Page 64: ...LUBRICATION SYSTEM CHART AND DIAGRAMS 2 39 A 1 2 3 4...
Page 66: ...LUBRICATION SYSTEM CHART AND DIAGRAMS 2 41 A A A 1 5 5 1 3 2 4 B B B B...
Page 68: ...LUBRICATION SYSTEM CHART AND DIAGRAMS 2 43 1 2...
Page 69: ...LUBRICATION SYSTEM CHART AND DIAGRAMS 2 44 1 Transfer gear oil pump 2 Middle driven shaft...
Page 78: ...CABLE ROUTING 2 53...
Page 86: ...CABLE ROUTING 2 61...
Page 89: ......
Page 122: ...ELECTRICAL SYSTEM 3 33 a b 1...
Page 125: ......


