4 - 15
ENG
NOTE:
_
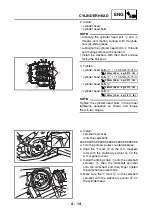
• When installing the camshaft sprocket, be
sure to keep the timing chain as tight as pos-
sible at the exhaust end of the chain.
• Align the projection on the camshaft with the
slot in the camshaft sprocket.
CAUTION:
_
Do not turn the crankshaft when installing
the camshaft to avoid damage or improper
valve timing.
e. Remove the wire from the timing chain.
▲▲▲
▲
▲ ▲▲▲
▲
▲ ▲▲▲
▲
▲ ▲▲▲
▲
▲ ▲▲▲
▲
▲ ▲▲▲
▲
▲▲▲
5. Install:
• timing chain tensioner
▼▼▼
▼
▼ ▼▼▼
▼
▼ ▼▼▼
▼
▼ ▼▼▼
▼
▼ ▼▼▼
▼
▼ ▼▼▼
▼
▼▼▼
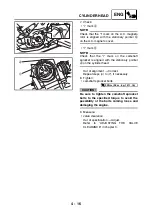
a. Remove the timing chain tensioner cap bolt
1
, copper washer
2
and spring
3
.
b. Release the timing chain tensioner one-way
cam
4
and push the timing chain tensioner
rod
5
all the way into the timing chain ten-
sioner housing.
c. Install the timing chain tensioner and gasket
6
onto the cylinder.
NOTE:
Install the gasket with its beaded side facing
the timing chain tensioner end.
d. Install the spring and timing chain tensioner
cap bolt.
▲▲▲
▲
▲ ▲▲▲
▲
▲ ▲▲▲
▲
▲ ▲▲▲
▲
▲ ▲▲▲
▲
▲ ▲▲▲
▲
▲▲▲
6. Turn:
• crankshaft
(several turns counterclockwise)
T
R
.
.
Timing chain tensioner bolt
10 Nm (1.0 m · kg, 7.2 ft · lb)
T
R
.
.
Timing chain tensioner cap bolt
20 Nm (2.0 m · kg, 14 ft · lb)
6
3
2
1
New
New
4
5
Summary of Contents for YFM700RV 2006
Page 1: ...YFM700RV SERVICE MANUAL 1S3 28197 E0 ...
Page 34: ...2 11 SPEC ENGINE SPECIFICATIONS Cylinder head tightening sequence 1 3 2 4 5 7 8 6 ...
Page 52: ...2 29 SPEC OIL FLOW DIAGRAMS 1 Oil delivery pipe 2 Oil filter 3 Oil pump 2 3 A A A A 2 1 ...
Page 55: ...2 32 SPEC OIL FLOW DIAGRAMS 1 Balancer 1 2 Crankshaft 2 1 ...
Page 408: ...YAMAHA MOTOR CO LTD 2500 SHINGAI IWATA SHIZUOKA JAPAN ...


