7 - 59
CHAS
FRONT ARMS AND FRONT SHOCK ABSORBER
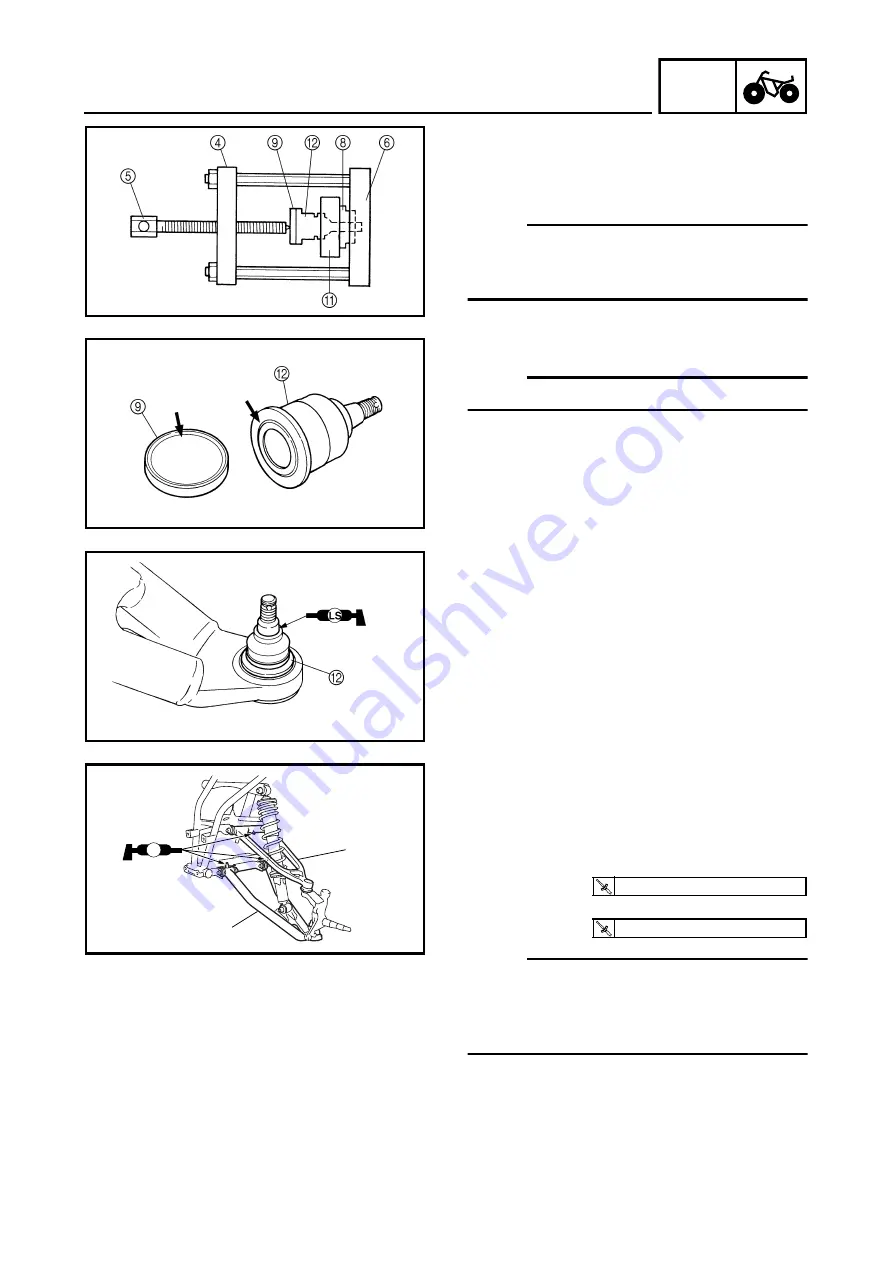
f. Attach the assembled ball joint remover/
installer, new ball joint (with rubber boot and
retaining ring)
B
, installer spacer
8
and
installer washer
9
to the lower front arm
A
.
NOTE:
_
• Do not tap or damage the top of the ball joint.
• Installer spacer
8
must be aligned with the
projection on the head of the ball joint
B
.
g. Remove the ball joint remover.
h. Install a new circlip.
NOTE:
_
Always use a new ball joint set.
▲▲▲
▲
▲ ▲▲▲
▲
▲ ▲▲▲
▲
▲ ▲▲▲
▲
▲ ▲▲▲
▲
▲ ▲▲▲
▲
▲▲▲
EBS00473
INSTALLING THE FRONT ARMS
The following procedure applies to both of the
front arms.
1. Install:
• upper front arm
1
• lower front arm
2
NOTE:
_
• Be sure to position the bolts (upper and
lower) so that the bolt head faces forward.
• Apply lithium-soap-based grease to the
grease nipple.
LS
2
1
T
R
.
.
38 Nm (3.8 m · kg, 27 ft · lb)
T
R
.
.
55 Nm (5.5 m · kg, 40 ft · lb)
Summary of Contents for YFM700RV 2009
Page 1: ...YFM700RV SERVICE MANUAL 1S3 28197 E0 ...
Page 34: ...2 11 SPEC ENGINE SPECIFICATIONS Cylinder head tightening sequence 1 3 2 4 5 7 8 6 ...
Page 52: ...2 29 SPEC OIL FLOW DIAGRAMS 1 Oil delivery pipe 2 Oil filter 3 Oil pump 2 3 A A A A 2 1 ...
Page 55: ...2 32 SPEC OIL FLOW DIAGRAMS 1 Balancer 1 2 Crankshaft 2 1 ...
Page 408: ...YAMAHA MOTOR CO LTD 2500 SHINGAI IWATA SHIZUOKA JAPAN ...


