Initial settings
14
En
■
AUTO SETUP via setup menu
1
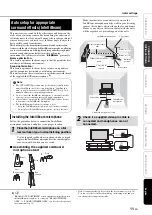
Place the IntelliBeam microphone and
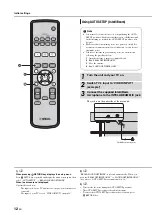
press
SETUP key.
2
Press
U
/
V
to select “AUTO SETUP”
and then press
ENTER key.
3
Press
U
/
V
to select one of the items
below and then press
ENTER key.
Select Item:
“BEAM+SOUND OPTIMIZE” (Beam optimization
and sound optimization)
It is recommended that you should select this optimization
feature, if you make settings for the first time.
This menu takes about three minutes.
“BEAM OPTIMIZE ONLY”(Beam optimization
only)
Use to optimize the beam angle so that the parameter best
matches your listening environment.
This menu takes about one minute.
“SOUND OPTIMIZE ONLY”(Sound optimization
only)
Use to optimize the beam delay, volume, and quality so
that the parameters best match your listening environment.
You must optimize the beam angle with “BEAM
OPTIMIZE ONLY” before starting “SOUND OPTIMIZE
ONLY”. It is recommended that you should select this
optimization feature in the following cases:
• If you have opened or closed the curtains in your
listening room before using this unit
• If you have manually set the beam angle.
This menu takes about two minutes.
4
Connect the IntelliBeam microphone to
this unit after “AUTO SETUP
(PREPARATION & CHECK)” screen is
displayed.
For the details on installing and connecting IntelliBeam
microphone, refer to “Installing the IntelliBeam
microphone (
5
Perform the step 4, 5 and 6 of “Using
AUTO SETUP (IntelliBeam) (
p. 13)”.
6
After setup is completed, remove the
IntelliBeam microphone.
The best setting may not be done if you are in the room. Prepare to
leave the room in 10 seconds after pressing
ENTER in step 4.
Note

