YSP-1100
9
YSP-1100
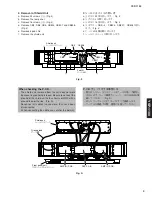
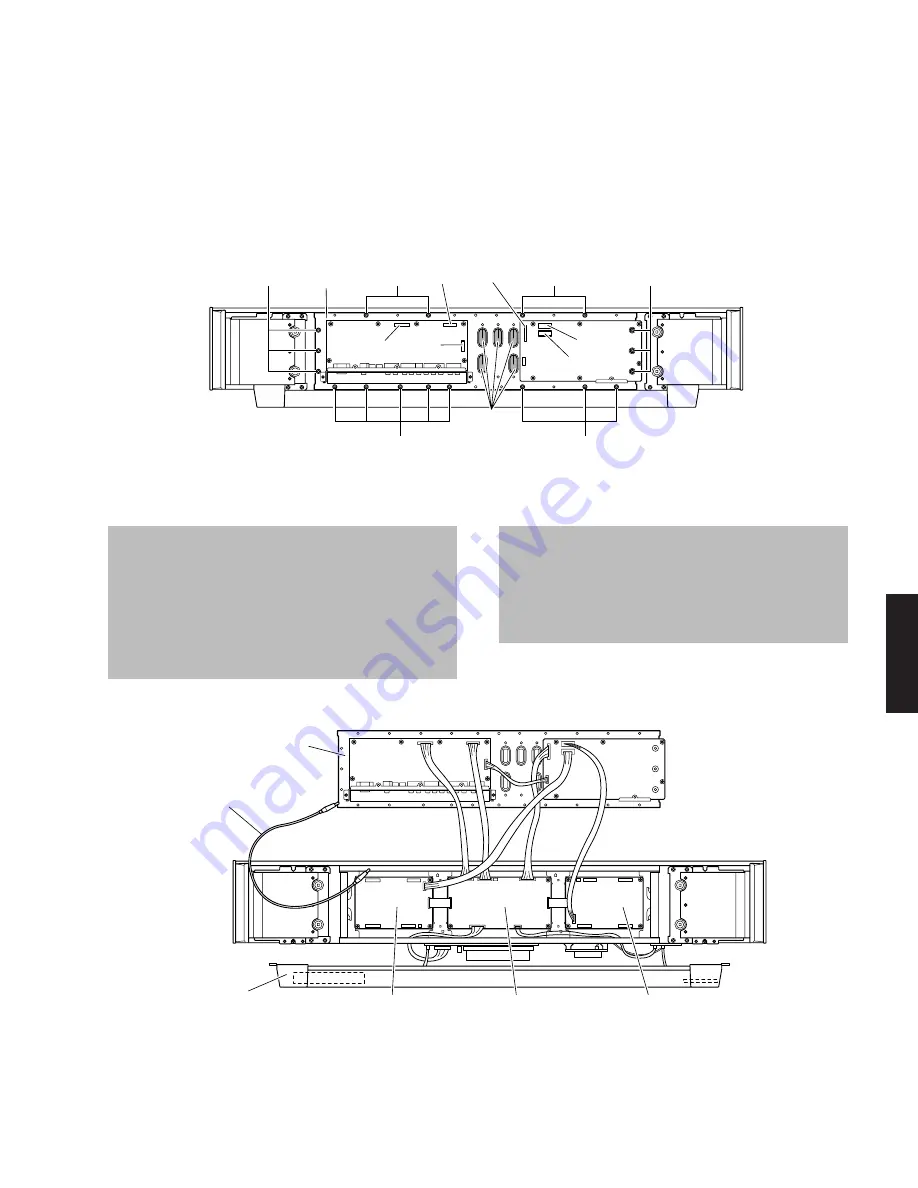
2. Removal of Shield Unit
a. Remove 22 screws (
3
). (Fig. 2)
b. Remove the rear panel.
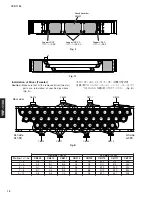
c. Remove 18 screws (
4
). (Fig. 3)
d. Remove CB2, CB3, CB4, CB504, CB507 and CB508.
(Fig. 3)
e. Remove 5 pad LNs.
f. Remove the shield unit.
2. シールドユニットの外し方
a.
3
のネジ 22本を外します。(Fig. 2)
b. リアパネルを取り外します。
c.
4
のネジ 18本を外します。(Fig. 3)
b. コネクター CB2〜4、CB504、CB507、CB508を外し
ます。(Fig. 3)
e. パッド LN 5個を取り外します。
f. シールドユニットを取り外します。
Fig. A
Fig. 3
When checking the P.C.B. :
• The shield unit removed from the unit does not work
because its grounding is loose. Be sure to connect the
ground of the shield unit to the chassis or GND with a
ground lead or the like. (Fig. A)
• Reconnect all cables (connectors) that have been
disconnected.
• When connecting the cable, use care for the polarity.
P.C.B.チェックをする場合には
・ 取り外したシールドユニットはアースが浮いて動作し
ませんので、リード線等でシャーシ、またはGNDに接
続してください。(Fig. A)
・ 外したケーブル(コネクター)をすべて接続します。
・ ケーブルを接続する際、極性に注意してください。
CB3
CB2
CB508
CB504
CB507
CB4
Shield unit
シールドユニット
Pad LN
パッドLN
4
4
4
4
4
4
Shield unit
シールドユニット
Front panel unit
フロントパネルユニット
DSP P.C.B.
AMP (R) P.C.B.
AMP (L) P.C.B.
Ground lead
アース線


