85
En
MANUAL SETUP
AD
V
ANC
ED
OPERA
T
ION
English
• Select OFF to deactivate the HDMI up-conversion
feature
• Select THROUGH not to up-scale any analog video
signals.
• Select 480p
(or 576p), 1080i, or 720p to up-scale
analog video signals to 480p (or 576p), 1080i, or 720p
of resolution.
• When “MONITOR CHECK” is set to “YES”, this unit receives
the information of the available video signal resolutions from
the video monitor connected via HDMI and you can only select
the resolutions supported by the video monitor in “UP-
SCALING” (see page 84).
• When “MONITOR CHECK” is set to “SKIP”, an asterisk (*)
appears on the left of the unavailable video signal resolution(s)
(see page 92).
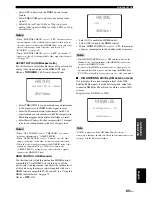
ASPECT RATIO (HDMI aspect ratio)
Use this feature to select the adjustment of aspect ratio for
analog video signals output at the HDMI OUT jack.
Choices:
THROUGH
, 16:9 Normal, Smart Zoom
• Select THROUGH if you do not make any adjustments
to the aspect ratio for HDMI video signal sources.
• Select 16:9 Normal to display video images with 4:3 of
aspect ratio on your video monitor with 16:9 of aspect ratio.
Black stripes appear on the right and left sides as a result.
• Select Smart Zoom to fit video images with 4:3 of aspect
ratio to your video monitor with 16:9 of aspect ratio.
• When “UP-SCALING” is set to “THROUGH”, you cannot
make any adjustments to “ASPECT RATIO”.
• When “ASPECT RATIO” is set to “Smart Zoom”, the video
images of the edge of the video monitor are rather stretched.
• When the video signals are input at the HDMI IN jacks or the
signals are input with 720p or 1080i of resolution, the
“ASPECT RATIO” setting does not affect the video signals
output at the HDMI OUT jack.
HDMI CONTROL (HDMI control)
Use this function to link this unit and an HDMI control-
compatible TV via HDMI. You can turn on or off the
power, select the input mode, and adjust the volume level
of this unit using the remote control supplied with your
HDMI control-compatible TV. For details, see “Using the
HDMI control feature” on page 73.
Choices:
OFF
, ON
• Select ON to enable the HDMI control.
• Select OFF to disable the HDMI control.
• When “HDMI CONTROL” is set to “ON”, the amount
of power consumption in the standby mode is increase.
• When HDMI CONTROL is set to OFF and this unit is in the
standby mode, the signals input at the HDMI IN jacks are not
output at the HDMI OUT jack.
• In order for the HDMI control function to work properly, we
recommend that the devices connected using the HDMI jacks
(TV, DVD recorder, Blu-ray recorder, etc.) be of the same make.
■
XM ANTENNA LEVEL (XM antenna level)
Use to display the current reception level of the XM
Satellite Radio signals. For the best reception, orient the
connected XM Mini-Tuner Dock to obtain a value of 60%
or more.
Display status: NONE, 0 to 100%
“NONE” is displayed if the XM Mini-Tuner Dock is not
connected to this unit. In this case, check the antenna connections
(see page 5 in the Reference Guide).
Notes
Notes
HDMI ASPECT RATIO
;;;
THROUGH
XXXXXXXXXXXXXXXXXXXXXXXXXXXXX
XXXXXXXXXXXXXXXXXXXXXXXXXXXXX
XXXXXXXXXXXXXXXXXXXXXXXXXXXXX
[ ]/[ ]:Select
[ENTER]:Return
p
p
e)ASPECT RATIO
Notes
Note
OFF
ON
XXXXXXX
XXXXXXXXXXXXXXXXXXXXXXXXXXXXX
XXXXXXXXXXXXXXXXXXXXXXXXXXXXX
XXXXXXXXXXXXXXXXXXXXXXXXXXXXX
[ ]/[ ]:Select
[ENTER]:Return
p
p
f)HDMI CONTROL
p
XM ANTENNA LEVEL
;;;;
97%
[ENTER]:Return
F)XM ANTENNA LEVEL
Summary of Contents for YSP-3050 - Digital Sound Projector Home Theater...
Page 1: ...YSP 3050 YSP 3050 Digital Sound ProjectorTM OWNER S MANUAL U ...
Page 114: ......
Page 115: ......


