40
En
■
OSD SETUP (OSD setup)
SET MENU
→
DISPLAY MENU
→
OSD SETUP
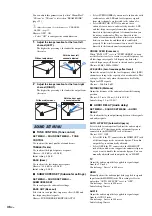
Use to adjust the display position and select the
background color of the OSD.
OSD SHIFT (OSD shift)
Use to adjust the vertical position of the OSD. Adjust
toward the – (minus) direction to raise the position of the
OSD, and adjust toward the + (plus) direction to lower it.
Choices: –5 to +5
Initial setting: ±0
OSD BACK COLOR (OSD background color)
Use to select the background color of the OSD.
Choices: Blue*, Gray, Black, Purple, Red
■
LANGUAGE SETUP (Language setup)
SET MENU
→
DISPLAY MENU
→
LANGUAGE
SETUP
Use to select the language used in the OSD.
Choices: ENGLISH (English), DEUTSCH (German),
Français (French), ESPAÑOL (Spanish),
ITALIANO (Italian), NEDERLANDS (Dutch),
Русский
(Russian)
Initial setting: ENGLISH (English)
■
UNIT SETUP (Unit Setup)
SET MENU
→
DISPLAY MENU
→
UNIT SETUP
Use this to change the display unit of measurement.
Choices: METERS, FEET*
• Select METERS to enter distances in meters.
• Select FEET to enter distances in feet.
Note
• If you change this setting, the adjusted sound beam settings may
change.
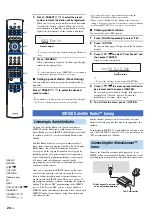
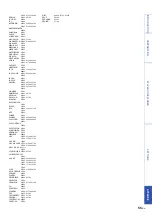
This unit has additional menus that are displayed in the front panel display. These menus offer additional operations to
adjust and customize the way this unit operates.
1
Press
C
Power
p
key to set this unit to the
standby mode.
2
While holding down INPUT on the front
panel, press
C
Power
p
key on the remote
control.
Keep holding down INPUT until “ADVANCED
SETUP” appears on the front panel display.
3
Press
I
SETUP.
4
Press
G
/
to select the desired menu
and then press
G
ENTER.
y
• To return to the previous screen, press
I
RETURN.
5
Press
G
/ to select the desired
parameter.
6
Press
C
Power
p
key to set this unit to the
standby mode.
The new setting will be reflected when you turn on
this unit next time.
y
• The initial settings are marked with “*”.
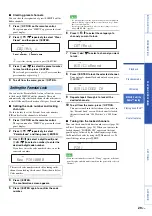
TURN ON VOLUME (Volume level at power-on)
Set the initial volume level when the power of this unit is
turned on.
Control range: OFF*, 01 to 99, MAX (Maximum)
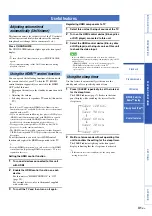
MAX VOLUME SET (Maximum volume setting)
Set the maximum volume level so that this unit will not
output sound beyond the limited volume level.
Control range: 01 to 99, MAX* (Maximum)
PANEL INP.KEY (Front panel input key)
Select whether or not to enable the INPUT key on front
panel key. To disable the operations, select “P.INPUT:
OFF”.
Choices: P.INPUT: ON*, P.INPUT: OFF
F.PANEL KEY (Front panel key)
Select whether or not to enable front panel key operations
(except ADVANCED SETUP operations). To disable the
operations, select “F.PANEL: OFF”.
Choices: F.PANEL: ON*, F.PANEL: OFF
System configurations (ADVANCED SETUP)
INPUT
VOLUME
INTELLIBEAM MIC
INPUT
VOL
DEMO
X
MODE
Example (when “DEMO MODE” is selected)
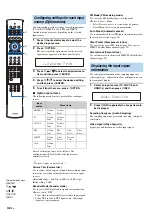
C
Power
E
OFF
F
STEREO
F
SURROUND
G
ENTER
G
/
G
/
I
RETURN
I
SETUP
0
+10
ENT
7
8
9
4
5
6
1
2
3
HDMI 4
iPod
RADIO
ENTER
SURROUND
STEREO
OFF
ENTER
TAINMENT
MUSIC
CINEMA DSP
MOVIE
HDMI 1
HDMI 2
HDMI 3
TV
AUX 1
AUX 2
TV
AV
MENU
TOP MENU
OPTION
TV
MUTE
CODE SET
UNIVOLUME
SUR. DECODE INTELLIBEAM
TV
INPUT
MUTE
TV VOL
CH
VOLUME
SETUP
RETURN
MEMORY
SLEEP
INFO
TUNING
PRESET
CATEGORY
E
F
OPTION
SETUP
RETURN
I
ENTER
G
C

