For Service Engineers
Service Information
SI1906002E-001=YSP10 installation and adjustment procedures
89/120
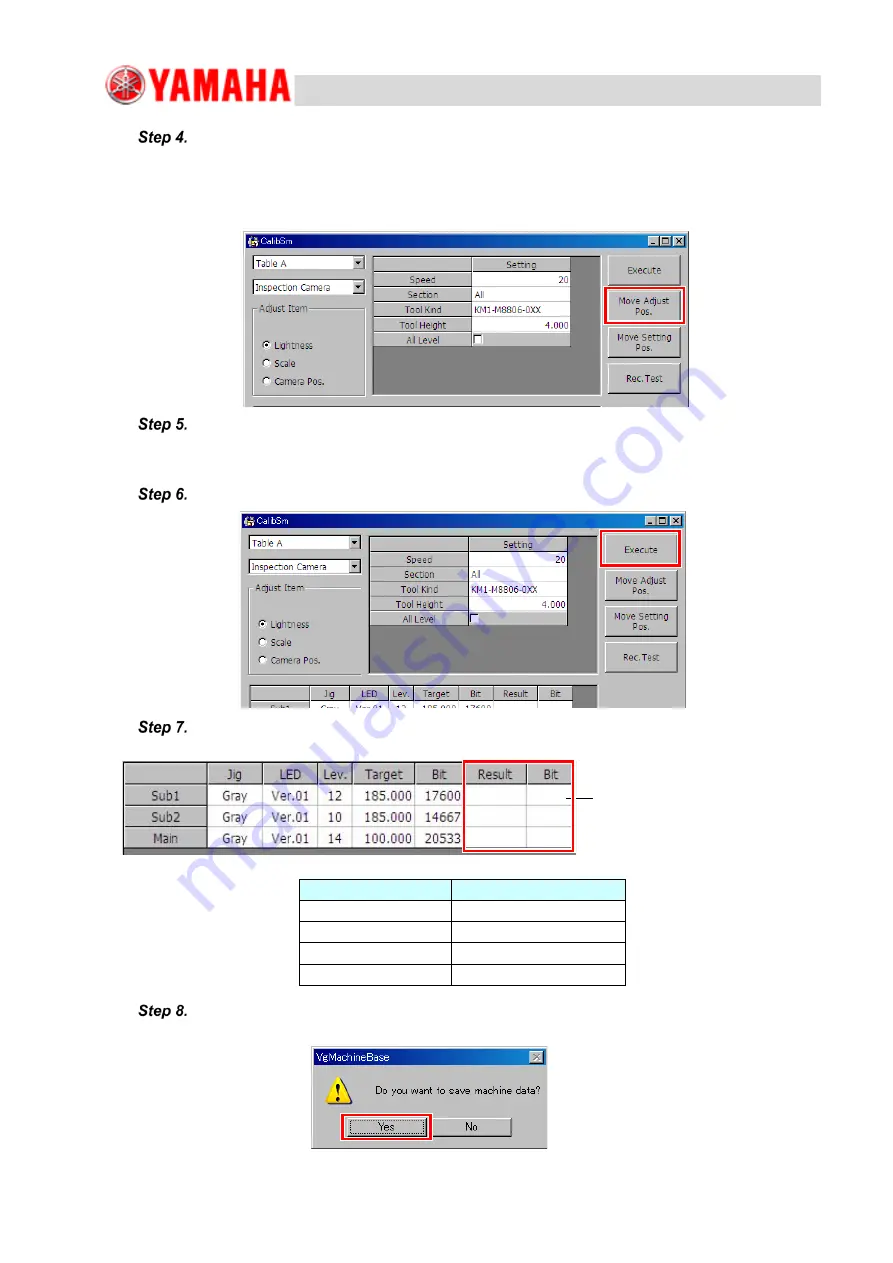
Press the [Move Adjust Pos.] button.
Note
The position of the adjustment tool for the inspection camera adjustment is the same for the PCB
camera. Since the lightness adjustment for the inspection camera is performed immediately after
that for the PCB camera, you don’t have to set the adjustment tool (already set in place).
Check the image taken by the inspection camera on the [Move Axis] screen.
Adjust the head unit position manually or by moving axis and make sure that the light gray portion of the
lighting axis is projected on whole angle of view.
Press the [Execute] button.
Check that the measured values are within acceptable ranges. Fill in the values in
the check sheet.
Acceptable ranges
Item
Acceptable range
Result values
+/-2 of target value
Bit (Sub1)
up to 35000
Bit (Sub2)
up to 35000
Bit (Main)
up to 35000
Press the [Yes] button in the provided confirmation message box. The measured
data is saved and the lightness adjustment of the inspection camera is complete.
Displayed after
executing the
adjustment.


