YT140
YT140
YT140
YT140
OWNER’S MANUAL
Thank you for purchasing the YAMAHA YT140 Guitar/Bass Auto Tuner.
Please read this manual thoroughly and keep it in a safe place for future reference.
GUITAR/BASS AUTO TUNER
ACCORDEUR AUTOMATIQUE DE GUITARE/BASSE
MODE D’EMPLOI
Nous vous remercions d’avoir porté votre choix sur l’accordeur automatique de
guitare/basse YAMAHA YT140. Nous vous prions de lire attentivement ce mode
d’emploi et de le conserver en lieu sûr pour vous y reporter ultérieurement.
■
PRECAUTIONS
◆
To prevent damage, do not use the tuner in the following locations:
• places where the unit will be in direct sunlight;
• places subject to temperature and humidity extremes;
• places that are sandy or dusty.
◆
To power the tuner, use only a 6F22 or 006P 9V dry cell battery.
◆
For maximum battery life, always be sure the tuner is turned OFF when not in use.
◆
If an exhausted battery is left in the unit for an extended period of time, it may
leak and cause malfunctioning of the unit. When the battery becomes
exhausted, always remove it and replace it as soon as possible.
◆
Do not subject the tuner to strong physical shock or vibration. Do not use
excessive force on any of the controls.
◆
Never use solvents such as benzene or thinner to clean the tuner. Wipe clean
with a soft, dry cloth.
◆
After reading the owner's manual, keep it in a safe place for future reference.
Never dispose of used batteries by burning them.
Also make sure to keep batteries away from children.
■
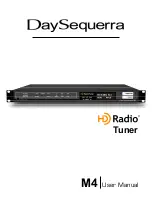
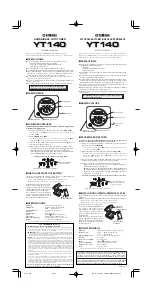
COMPONENTS
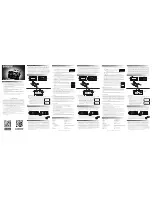
r
POWER switch
e
Built-in microphone
w
Tuning guide
q
Pitch indicator
t
INPUT jack
■
PRECAUTIONS
◆
Afin de ne pas endommager l’accordeur, évitez de l’utiliser dans des endroits
répondant aux conditions suivantes :
• plein soleil
• humidité ou températures excessives.
• sable ou poussière
◆
Pour alimenter l’accordeur, utilisez exclusivement une pile sèche 6F22 ou 006P
de 9 Volts.
◆
Pour garantir une longévité maximale des piles, mettez toujours l’accordeur
hors tension lorsque vous ne l’utilisez pas.
◆
Les piles épuisées qui restent dans l’accordeur pendant une longue période,
peuvent fuir et provoquer des anomalies de fonctionnement. Lorsque les piles
présentent des signes de décharge, remplacez-les dans le délai le plus bref.
◆
L’accordeur ne doit pas subir de chocs ni de vibrations importants. Ne le
manipulez jamais avec une force excessive.
◆
N’utilisez jamais de solvants tels que de la benzine ou du diluant pour nettoyer
l’accordeur. Essuyez-le avec un chiffon doux et sec.
◆
Après avoir lu ce mode d’emploi, conservez-le en lieu sûr pour vous y reporter
ultérieurement.
Ne jetez jamais les piles au feu et conservez-les toujours
hors de portée des enfants.
■
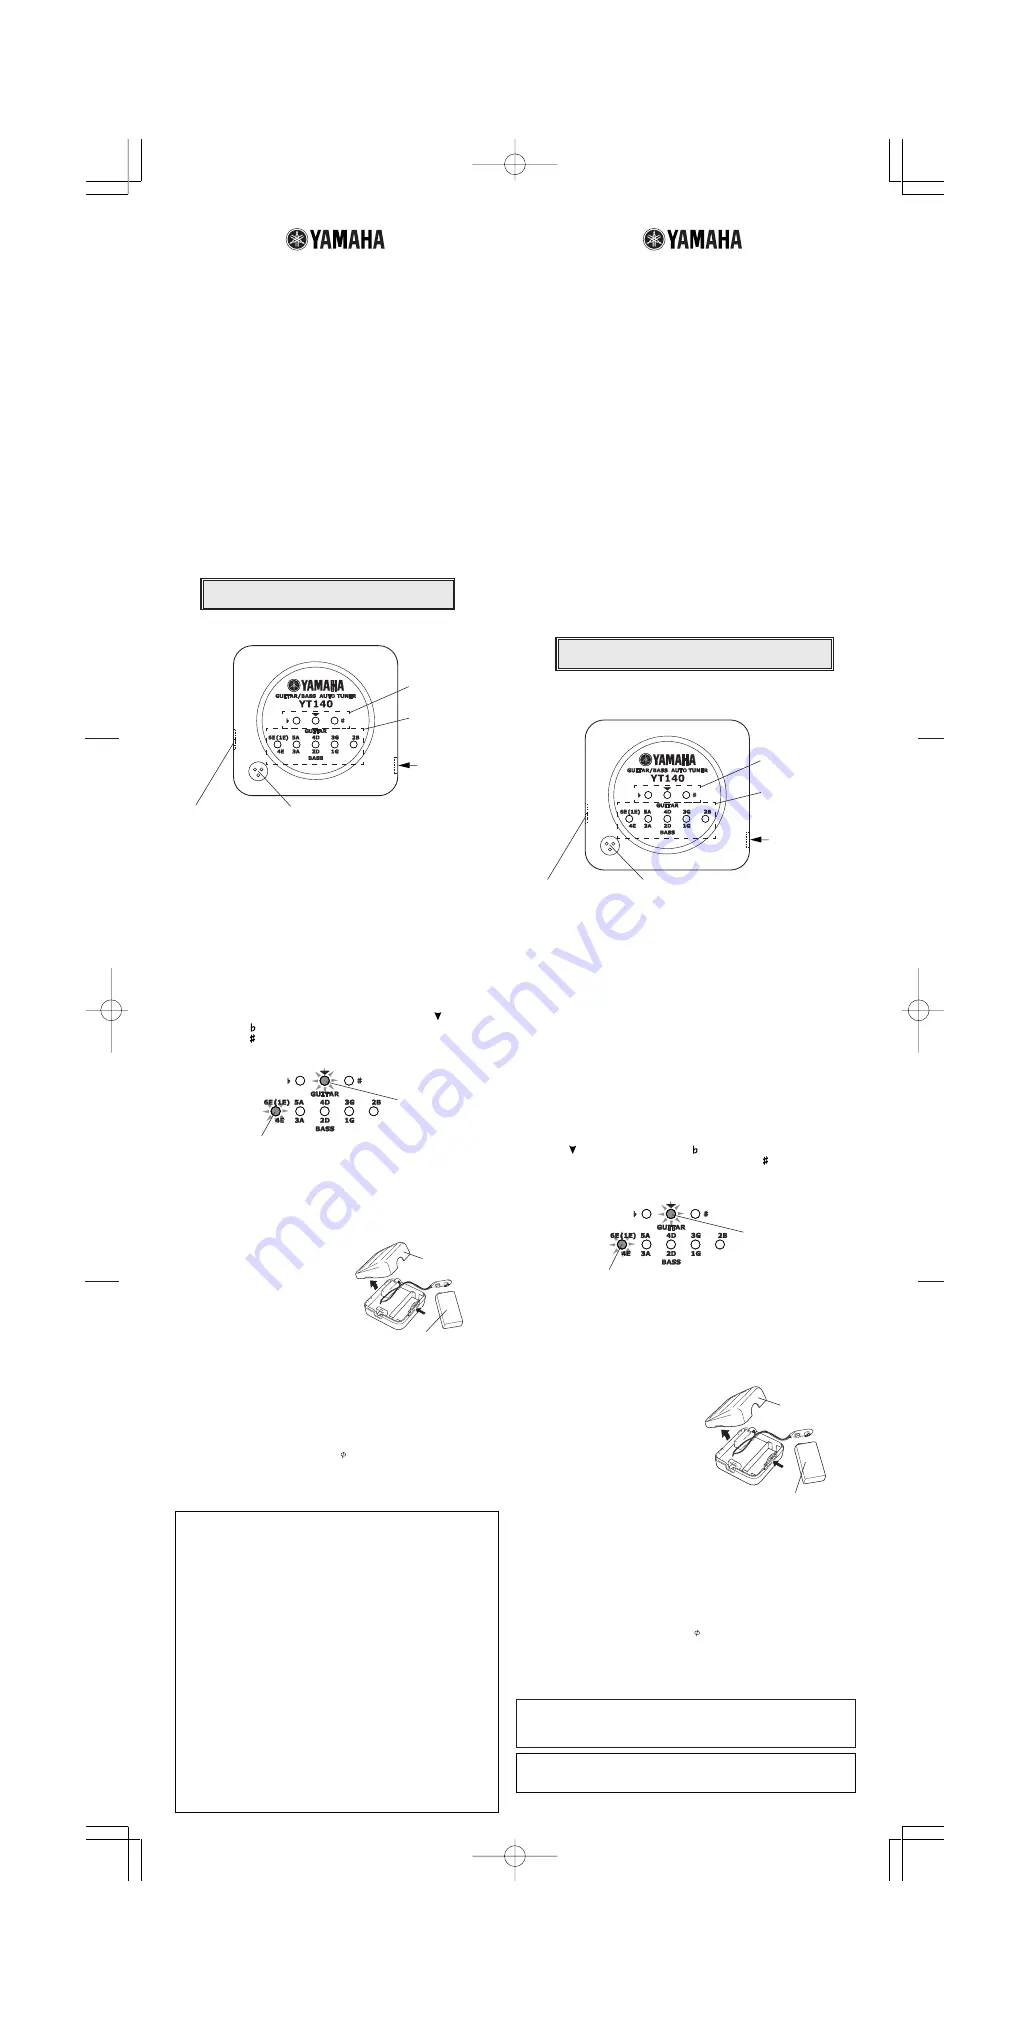
NOMENCLATURE
■
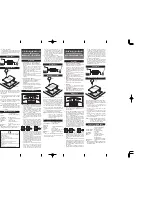
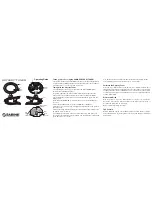
TUNING PROCEDURES
The tuner will automatically select the closest note name (string name)
to the plucked string’s pitch.
1. For electric guitars/basses, connect the guitar cable to the
INPUT
jack
t
.
* The built-in microphone
e
will not operate when a cable is plugged into the
INPUT jack
t
.
2. Turn the
POWER
switch
r
ON.
* To remind you that the tuner’s power is switched on, the pitch indicators
q
and
tuning guides
w
will light at random when the power is switched ON.
3. To tune an acoustic guitar, place the tuner’s internal microphone
e
as close
as possible to the guitar’s sound hole.
4. Pluck the string to be tuned. (Do not pluck more than one string at a time.)
• First, adjust the string so that the appropriate string name pitch indicator flashes.
• Next, tune the string until the tuning guide’s green lamp ( ) lights.
When the lamp on the tuning guide lights, raise the instrument’s pitch.
When the lamp lights, lower the instrument’s pitch.
When this LED lights,
the string is tuned.
example) To tune the “E” string on a six string guitar.
The string name of the plucked string flashes.
■
PROCÉDURES D'ACCORD
L'accordeur sélectionne automatiquement le nom de note le plus proche
(nom de la corde) de la hauteur du son de la corde pincée.
1.
Dans le cas des guitares électriques ou des basses, raccordez le câble de
guitare à la prise d'entrée
INPUT
t
.
* Le microphone interne incorporé
e
n'est plus opérationnel quand un câble est
raccordé à la prise INPUT
t
.
2. Mettez l'accordeur sous tension avec son interrupteur POWER
r
.
* Comme moyen de rappel que l'alimentation du tuner est appliquée, l'indicateur de
hauteur du son
q
et les guides d'accord
w
s'allumeront en mode aléatoire au
moment de la mise sous tension.
3. Pour accorder une guitare acoustique, approchez le microphone interne de
l'accordeur au maximum de l'ouverture de la caisse de guitare.
4. Pincez la corder à accorder. (Ne pincez plus d'une corde à la fois.)
• Réglez d'abord la corde pour faire en sorte que l'indicateur de approprié
de hauteur du nom de la corde clignote.
•
Ensuite, accordez la corde jusqu'à ce que le témoin vert du guide d'accord
( )
s'allume.
Quand le témoin du guide d'accord s'allume, relevez la
hauteur du son de l'instrument. Quand le témoin s'allume, abaissez la
hauteur du son de l'instrument.
Exemple) Comment accorder la corde "E" d'une guitare à six cordes.
THIS DIGITAL APPARATUS DOES NOT EXCEED THE “CLASS B” LIMITS FOR RADIO
NOISE EMISSIONS FROM DIGITAL APPARATUS SET OUT IN THE RADIO INTERFER-
ENCE REGULATION OF THE CANADIAN DEPARTMENT OF COMMUNICATIONS.
LE PRESENT APPAREIL NUMERIQUE N'EMET PAS DE BRUITS RADIOELECTRIQUES
DEPASSANT LES LIMITES APPLICABLES AUX APPAREILS NUMERIQUES DE LA
" C L A S S E B " P R E S C R I T E S D A N S L E R E G L E M E N T S U R L E B R O U I L L A G E
RADIOELECTRIQUE EDICTE PAR LE MINISTERE DES COMMUNICATIONS DU CANADA.
Printed in China
■
FICHE TECHNIQUE
Indicateurs
: Indicateur de hauteur de son, guides d'accord
Notes d’accord
: guitare
6E(1E), 5A, 4D, 3G, 2B
basse
4E, 3A, 2D, 1G
Plage de réglage de note
: A0 (-50 centièmes) - B5 (+50 centièmes)
Précision
:
±
1 centième
Hauteur de son standard
: A4 = 440Hz (fixe)
Entrée
: INPUT (6
monaurale), microphone
Source d’alimentation
: Pile sèche de 9V (6F22 ou 006P)
Dimensions (L x H x P)
: 69 x 64 x 38 mm
Poids
: 50 g *sans la pile
* Les spécifications et l’aspect externe peuvent être modifiés sans aucun avis.
■
INSTALLATION OU REMPLACEMENT DE LA PILE
La pile n'est pas fournie avec l'accordeur. Vous devez faire l'achat d'une pile 6F22
(006P) 9 V.
Retirez le couvercle inférieur de logement de pile pour installer la pile à l'intérieur.
* N'oubliez pas de couper l'alimentation avant de remplacer la pile.
* Vérifiez que les pôles de la pile (+/-) sont alignés correctement.
Lorsque la puissance de la pile diminue,
l'indicateur s'assombrit. L'utilisation d'une
p i l e é p u i s é e p e u t e n g e n d r e r u n
fonctionnement anormal de l'appareil.
Veuillez remplacer la pile usée par une
pile neuve (6F22, 006P 9V) dans les
meilleurs délais.
Notez aussi que si l'accordeur n'est pas
utilisé à long terme dans lequel une pile
épuisée est chargée, le suintement de
liquide de la pile risque d'endommager
l'accordeur ou autre.
Pile sèche 6F22
ou 006P 9 V
Couvercle
inférieur de
logement de pile
■
SPECIFICATIONS
Indicators
: Pitch indicator, Tuning guides
Tuning Notes
: GUITAR
6E (1E), 5A, 4D, 3G, 2B
BASS
4E, 3A, 2D, 1G
Note Setting Range
: A0 (–50 cent) – B5 (+50 cent)
Accuracy
:
±
1 cent
Standard Pitch
: A4=440Hz (fixed)
Input
: INPUT (6
monaural), microphone
Power Source
: 9V dry cell battery (6F22 or 006P)
Dimensions (W x H x D)
: 69 x 64 x 38 mm (2-3/4" x 2-1/2" x 1-1/2")
Weight
: 50 g (1.8 oz) *excluding battery
* Specifications and external appearance are subject to change without notice.
■
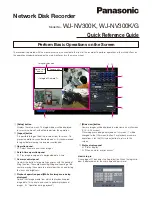
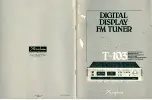
INSTALL/REPLACE THE BATTERY
The tuner is not supplied with a battery. Please purchase an 6F22 (006P) 9V
battery. Remove the bottom cover to install the battery.
* Always turn the POWER switch to “OFF” before changing the battery.
* Make sure that the batteries poles (+, -) are positioned properly.
As the battery ages, the indicator will dim.
Using a weak battery may result in
irregular operation of the device. Please
exchange the worn battery with a new one
(6F22, 006P 9V) as soon as possible.
Also, if the tuner is left for an extended
period of time with a depleted battery
installed, it may result in damage to the
tuner caused by a leaking battery, etc.
FCC INFORMATION (U.S.A.)
1. IMPORTANT NOTICE: DO NOT MODIFY THIS UNIT!
This product, when installed as indicated in the instructions contained in this manual,
meets FCC requirements. Modifications not expressly approved by Yamaha may void
your authority, granted by the FCC, to use the product.
2. IMPORTANT:
When connecting this product to accessories and/or another product
use only high quality shielded cables. Cable/s supplied with this product MUST be
used. Follow all installation instructions. Failure to follow instructions could void your
FCC authorization to use this product in the USA.
3. NOTE:
This product has been tested and found to comply with the requirements
listed in FCC Regulations, Part 15 for Class ”B” digital devices. Compliance with these
requirements provides a reasonable level of assurance that your use of this product in
a residential environment will not result in harmful interference with other electronic
devices. This equipment generates/uses radio frequencies and, if not installed and
used according to the instructions found in the users manual, may cause interference
harmful to the operation of other electronic devices. Compliance with FCC regulations
does not guarantee that interference will not occur in all installations. If this product is
found to be the source of interference, which can be determined by turning the unit
”OFF” and ”ON”, please try to eliminate the problem by using one of the following
measures:
Relocate either this product or the device that is being affected by the interference.
Utilize power outlets that are on different branch (circuit breaker or fuse) circuits or
install AC line filter/s.
In the case of radio or TV interference, relocate/reorient the antenna. If the antenna
lead-in is 300 ohm ribbon lead, change the lead-in to co-axial type cable.
If these corrective measures do not produce satisfactory results, please contact the
local retailer authorized to distribute this type of product. If you can not locate the
appropriate, please contact Yamaha Corporation of America, Electronic Service Divi-
sion, 6600 Orangethorpe Ave, Buena Park, CA 90620
The above statements apply ONLY to those products distributed by
Yamaha Corporations of America or its subsidiaries.
6F22 or 006P
9V dry cell battery
Bottom cover
r
Interrupteur
d’alimentation POWER
e
Microphone incorporé
w
Guide d’accord
q
Indicateur d'accord
t
Prise d'entrée
INPUT
Quand cette diode électro-
luminescente s'allume, la
corde est accordée.
Le nom de la corde de la corde pincée clignote;
YT140̲60B
03.1.16, 5:55 PM
Page 3
Adobe PageMaker 6.0J/PPC