background image

Downloaded 

from www.ScooterTime.net

Summary of Contents for YW50P

Page 1: ...2002 2005 MOTORCYCLE SERVICE MANUAL Model YW50P YW50R YW50S YW50T 5PNF81972000 5PNF81972000 D o w n l o a d e d f r o m w w w S c o o t e r T i m e n e t ...

Page 2: ...D o w n l o a d e d f r o m w w w S c o o t e r T i m e n e t ...

Page 3: ...otor Taiwan Co Ltd First edition November 2001 All rights reserved Any reprinting or unauthorized use without the written permission of Yamaha Motor Taiwan Co Ltd is expressly prohibited D o w n l o a d e d f r o m w w w S c o o t e r T i m e n e t ...

Page 4: ...gnificant changes in specifications or procedures will be forwarded to all authorized Yamaha deal ers and will appear in future editions of this manual where applicable NOTE Designs and specifications are subject to change without notice IMPORTANT MANUAL INFORMATION Particularly important information is distinguished in this manual by the following ZL The Safety Alert Symbol means ATTENTION BECOME...

Page 5: ...order of jobs names of parts notes in jobs etc Jobs requiring more information such as special tools and technical data are described sequen tially Cvlinder head Cylinder and piston removal Engine 1 Muffler Gasket 2 Air hroud cylTnder head 3 SparkIJlug 4 Cylinder head Cylinder head gasket Cylinder 6 Piston pin clip 7 Piston pin Bearing 8 Piston 9 Pistonring set 10 CyITnder gasket Q ty Rurllark Rem...

Page 6: ...mbols to indicate the following Serviceable with engine mounted Filling fluid Lubricant Special tool Tightening torque Wear limit clearance Engine speed Electrical data Symbols to in the exploded diagrams in dicate the types of lubricants and lubrication points Engine oil Gear oil Molybdenum disulfide oil Wheel bearing grease Lithium soap base grease Molybdenum disulfide grease Symbols to in the e...

Page 7: ...DEX GENERAL INFORMATION SPECIFICATIONS 1 g PERIODIC INSPECTION AND ADJUSTMENT ENGINE OVERHAUL CARBURETION CHASSIS o ELECTRICAL TROUBLESHOOTING D o w n l o a d e d f r o m w w w S c o o t e r T i m e n e t ...

Page 8: ...RATION FOR REMOVAL AND DISASSEMBLY 1 2 REPLACEMENT PARTS 1 2 GASKETS OIL SEALS AND O RINGS 1 2 LOCK WASHERS PLATES AND COTTER PINS 1 2 BEARINGS AND OIL SEALS 1 3 CIRCLIPS 1 3 CHECKING OF CONNECTIONS 1 4 HOW TO USE THE CONVERSION TABLE 1 5 CONVERSION TABLE 1 5 SPECIAL TOOLS 1 6 D o w n l o a d e d f r o m w w w S c o o t e r T i m e n e t ...

Page 9: ...NGINE 2 6 MAINTENANCE SPECIFICATION 2 7 CHASSIS 2 7 TIGHTENING TORQUES 2 8 CHASSIS 2 8 MAINTENANCE SPECIFICATION 2 9 ELECTRICAL 2 9 GENERAL TORQUE SPECIFICATIONS 2 1 1 LUBRICATION POINTS AND LUBRICATION TYPE 2 12 ENGINE 2 12 CHASSIS 2 13 CABLE ROUTING 2 14 D o w n l o a d e d f r o m w w w S c o o t e r T i m e n e t ...

Page 10: ...EE PLAY CHECK 3 15 REAR BRAKE LEVER FREE PLAY CHECK 3 15 BRAKE PAD INSPECTION 3 15 BRAKE SHOE INSPECTION 3 16 BRAKE FLUID LEVEL INSPECTION 3 16 AIR BLEEDING HYDRAULIC BRAKE SYSTEM 3 17 STEERING ADJUSTMENT 3 18 TIRE INSPECTION 3 19 WHEEL INSPECTION 3 22 FRONT FORK INSPECTION 3 22 REAR SHOCK ABSORBER INSPECTION 3 22 SEAT LOCK CABLE ADJUSTMENT 3 22 CABLE CHECKING AND LUBRICATING 3 23 LEVERS LUBRICATI...

Page 11: ...PECTION 4 17 V BELT INSPECTION 4 18 PRIMARY SHEAVE INSPECTION 4 19 SECONDARY SHEAVE 4 20 SECONDARY SHEAVE INSTALLATION 4 21 PRIMARY SHEAVE 4 22 STARTER CLUTCH AND STARTER MOTOR 4 24 STARTER CLUTCH AND STARTER MOTOR 4 24 STARTER CLUTCH AND GEARS INSPECTION 4 26 C D I MAGNET 4 27 C D I MAGNETO 4 27 C D I MAGNETO REMOVAL 4 28 C D I MAGNETO INSTALLATION 4 28 AUTOLUBE PUMP 4 29 AUTOLUBE PUMP 4 29 AUTOL...

Page 12: ...N 5 1 CARBURETOR 5 1 CABURETOR DISASSEMBLY 5 2 CABURETOR INSPECTION 5 3 CARBURETOR ASSEMBLY 5 5 FUEL LEVEL ADJUSTMENT 5 6 AUTO CHOKE INSPECTION 5 7 FUEL COCK INSPECTION 5 8 D o w n l o a d e d f r o m w w w S c o o t e r T i m e n e t ...

Page 13: ...ALIPER DISASSEMBLY 6 18 BRAKE CALIPER DISASSEMBLY 6 19 CALIPER INSPECTION 6 19 BRAKE CALIPER ASSEMBLY 6 20 BRAKE CALIPER INSTALLATION 6 20 REAR WHEEL AND REAR BRAKE 6 21 REAR WHEEL 6 21 REAR BRAKE 6 22 REAR WHEEL INSPECTION 6 23 REAR BRAKE INSPECTION 6 23 REAR BRAKE INSTALLATION 6 24 HANDLEBAR 6 25 HANDLEBAR 6 25 HAN DLE BAR INSTALLATIO N 6 27 STEERING 6 29 STEERING 6 29 STEERING REMOVAL 6 30 STEE...

Page 14: ... BULB SOCKETS 7 8 IGNITION SYSTEM 7 9 CIRCUIT DIAGRAM 7 9 TROUBLESHOOTING 7 10 CHARGING SYSTEM 7 14 CIRCUIT DIAGRAM 7 14 TROUBLESHOOTING 7 15 ELECTRIC STARTING SYSTEM 7 18 CIRCUIT DIAGRAM 7 18 TROUBLESHOOTING 7 19 STARTER MOTOR 7 22 STARTER MOTOR DISASSEMBLY 7 23 INSPECTION AND REPAIR 7 24 LIGHTING SYSTEM 7 26 CIRCUIT DIAGRAM 7 26 TROUBLESHOOTING 7 27 LIGHTING SYSTEM CHECK 7 29 SIGNAL SYSTEM 7 33 ...

Page 15: ... STANDING START LOW CLIMBING ABILITY 8 4 POOR ACCELERATION POOR HIGH SPEED 8 4 OVER HEAT 8 5 OVERHEAT 8 5 POOR SPEED 8 5 POOR SPEED 8 5 IMPROPER KICKING 8 6 SLIPPING 8 6 HARD KICKING 8 6 KICK CRANK NOT RETURNING 8 6 FAULTY BRAKE 8 7 POOR BRAKING EFFECT 8 7 MALFUNCTION 8 7 INSTABLE HANDLING 8 8 INSTABLE HANDLING 8 8 FAULTY SIGNAL AND LIGHTING SYSTEM 8 9 HEADLIGHT DARK 8 9 BULB BURNT OUT 8 9 FLASHER...

Page 16: ...he vehicle identification number is stamped into the frame EAS00018 MODEL CODE The model code label is affixed to the loca tion shown in the figure Record the informa tion on this label in the space provided This information will be needed to order spare parts 1 1 D o w n l o a d e d f r o m w w w S c o o t e r T i m e n e t ...

Page 17: ... of all parts 5 Keep all parts away from any source of fire EAS00021 REPLACEMENT PARTS Use only genuine Yamaha parts for all replace ments Use oil and grease recom mended by Yamaha for all lubrication jobs Other brands may be similar in function and appearance but inferior in quality EAS00022 GASKETS OIL SEALS AND O RINGS 1 When overhauling the engine replace all gaskets seals and O rings All gask...

Page 18: ...installing if appro priate Oil seal CAUTION Do not spin the bearing with compressed air because this will damage the bearing surfaces Bearing EAS00025 CIRCLIPS Before reassembly check all circlips carefully and replace damaged or distorted circlips Always replace piston pin clips after one use When installing a circlip make sure the sharp edged corner is positioned opposite the thrust that the cir...

Page 19: ...he terminal comes off bend up the pin and reinsert the terminal into the con Rector 6 Connect Connector NOTE The two connectors click together 7 Check for continuity with a tester NOTE If there is no continuity clean the termi nals Be sure to perform the steps 1 to 7 listed above when checking the wireharness For a field remedy use a contact revitalizer available on the market Use the tester on th...

Page 20: ...IMP Known Multiplier Result m kg 7 233 ft lb Torque m kg 86 794 in lb cm kg 0 0723 ft lb cm kg 0 8679 in lb Weight kg 2 205 Ib g 0 03527 oz Distance Volume Capacity Miscellaneous km h km m m ca mm cc cm 3 cc cm 3 lit liter lit liter kg mm kg cm 2 Centigrade 0 6214 0 6214 3 281 1 094 0 3937 0 03937 0 03527 0 06102 0 8799 0 2199 55 997 14 2234 9 5 C 32 mph mi ft yd in in oz IMP liq cu in qt IMP liq ...

Page 21: ... tor rotor bolt Clutch spring holder This tool is used to disassembly and assem bly the secondary pulley Crankshaft Installation set Adapter These tools are used to install the crank shaft Flywheel puller This tool is used for removing the rotor Crankcase Separating tool This tool is used to remove the crankshaft or separate the crankcase Oil seal guide This tool is used for protecting the oil sea...

Page 22: ...trument is necessary for checking the ignition system components Quick Gasket This sealant is used to seal to mating sur faces e g crankcase mating sur faces Lockn ut wrench This tool is used to loosen and tighten the clutch carrier Iocknut of the secondary sheave Front fork seal driver Weight Adapter Q2 These tools are used when installing the fork seal T handle Damper rod holder These tools are ...

Page 23: ...ade Engine Oil Transmission Oil Oil Capacity Oil Tank Engine Oil Transmission Oil Periodic Oil Change Total Amount Air cooled 2 strcke gasoline torque induction Forward inclined single cylinder 49cm 3 2 99 cu in 40 0 x 39 2 mm 1 57 x 1 54 in 7 2 1 Electric and kick starter Separate lubrication For YAMAHA brand Yamalube 2 or Air cooled 2 stroke engine oil ISO EG C EG D grade Yamalube 4 SAE 10W 30 S...

Page 24: ...ront suspension Rear suspension Shock absorber Front shock absorber Rear shock absorber Wheel travel Front wheel travel Rear wheel travel Electrical Ignition system Generator system Battery type Battery capacity Helical gear 4 000 Supur gear 3 666 V belt Automatic Steel tube underbone 26 5 93mm 3 7 in Tubeless 120 90 10 130 90 10 CHENG SHIN CHENG SHIN 56J 59J 143 kg 315 Ib 200kpa 2 0 kg crn 2 29 p...

Page 25: ...ty Headlight Tail brake light Flasher light Licence plate light Meter light High beam indicator light Oil indicator light Turn indicator light 12V 35W 35Wx2 12 V 5W 21Wx1 10Wx4 5Wx 1 3 4Wxl 1 7Wxl 1 7Wx 1 1 7Wx 1 1 7Wx 1 2 3 D o w n l o a d e d f r o m w w w S c o o t e r T i m e n e t ...

Page 26: ...ing 2nd Ring Side Clearance Installed Top Ring 2nd Ring I Yl 0 035 0 040 mm 0 0014 0 0016 in 39 958 39 972 mm 1 5731 1 5737 in 5 mm O 2 in 10 004 10 015 mm 0 3939 0 3943 in 9 996 10 000 rnrn 0 3935 0 3937 in 1 2 1 6 mm keystone 0 05 0 06 in 1 2 1 6 ram keystone 0 05 0 06 in 0 15 0 35 mm 0 005 0 01 in 0 15 0 35 mm 0 005 0 01 in 0 03 0 05 mm 0 0012 0 0020 in 0 03 0 05 mm 0 0012 0 0020 in 0 03 mm 0 0...

Page 27: ...ht Fuel level height Engine Idling Speed Reed Valve Thickness Valve Stopper Height Valve bending limit D q p A M J NJ J N M A J C A P J V S G S 37 90 37 95 mm 1 49 1 49 in 0 03 mm 0 0012 in 0 2 0 5 mm 0 0029 0 020 in 0 4 0 8 mm 0 016 0 031 in 4 0 mm 0 16 in 105 mm 4 13 in 94 mm 3 7 in 3 300 3 700 r min 5 500 6 500 r rain 16 6 mm 0 65 in Ratchet type 1 5 2 5 N 0 15 0 25 kgf 0 34 0 56 Ib 5DA 01 8O 2...

Page 28: ...Kick crank Starter motor Clutch housing Clutch weight Magnet base C D I rotor Bolt Plug Screw Bolt Bolt Nut Nut Screw Nut Tightening Thread Q ty torque size Nm m kg ft lb M 14 1 20 2 0 14 M 7 4 14 1 4 10 M 7 4 10 1 0 7 M 6 3 7 0 7 5 1 6 0 1 2 0 2 1 4 M 6 3 7 0 7 5 1 M 5 2 4 0 4 2 8 M 6 4 11 1 1 8 0 M 6 2 9 0 9 6 5 M 4 2 2 0 2 1 4 M 6 2 9 0 9 6 5 M 8 2 26 2 6 18 2 M 6 3 11 1 1 8 0 M 6 1 9 0 9 6 5 M...

Page 29: ...linder outside diameter Brake fluid type Rear drum brake Type Drum inside diameter Shoe thickness Brake lever Brake lever free play front at lever side Brake lever free play rear Throttle cable free play 70 rnrn 2 8 in 236 6 mm 9 31 in 212 1 mm 8 35 in 15 68 Nm mm 1 6 kg mm 901b in 23 5 Nm mm 2 43 kg mm 1361b in 55 mm 2 2 in 281 8 rnrn 11 1 in 159 8 mm 6 29 in 71 15 N mm 7 26 kg mm 4071b in Cast w...

Page 30: ...nut Rear wheel axle and nut Rear brake cam lever Front brake caliper and front fork Brake disc and hub Brake hose and caliper Brake caliper and bleed screw Tightening Th read torque Remarks size Nm m kg ft lb M 12 84 8 4 61 M 10 45 4 5 31 M 6 13 1 3 9 4 M 10 30 3 0 22 M 8 16 1 6 12 M 25 22 2 2 16 See M 10 43 4 3 37 page3 18 M 8 20 2 0 14 M 6 10 1 0 7 M 6 7 0 7 5 1 M 5 4 0 4 2 9 M 6 7 0 7 5 1 M 6 7...

Page 31: ...2 White Black 0 4 0 6 Yellow Red Black 12 15V 3 000 8 000 rpm 3GF Taichung 8A 18V C D I Magneto Model Man ufacturer Nominal output Charging current Charging voltage Charging Coil Resistance Color Lighting Coil Resistance Color Lighting Voltage Rectifier Model Ma n ufactu rer Capacity Withstand voltage Battery Specific gravity 1 320 Constant mesh type 4WX shulin 0 14 kw 0 0648 0 0792 E2at 20 C 68 F...

Page 32: ...equency Fuel gage Model man ufacturer Sender unit resistance Standard 4KP Asian 1 5A Capacitor 60 120 Cycle min 4VP Sa n Chu 4 10 90 100 full empty Oil level gauge Model man ufacturer 4VP Lun Ping Circuit breaker Type Fuse MAIN 7Axl pc limit 2 10 D o w n l o a d e d f r o m w w w S c o o t e r T i m e n e t ...

Page 33: ...mblies in a crisscross fashion in progressive stages until full torque is reached Unless otherwise specified torque specifica tions call for clean dry threads Components should be at room temperature A B Nut Bolt 10 mm 6 mm 12 mm 8 mm 14 mm 10 mm 17 mm 12 mm 19 mm 14 mm 22 mm 16 mm General torque specifications Nm 6 15 30 55 85 130 m kg ft lb 0 6 4 3 1 5 11 3 0 22 5 5 40 8 5 61 13 0 94 F A Am A Di...

Page 34: ... lips O rings Bearings 11 Piston surface 411 Piston pin 411 Cyl inder 11 Transmission case bearing 411 Autolube pump Starter wheel gear Idle gear plate 11 Secondary drive gear II1 Kickstarter pinion gear Drive axle 11 Pump drive gear Main axle qG Main axle bearing 11 2 12 D o w n l o a d e d f r o m w w w S c o o t e r T i m e n e t ...

Page 35: ...s Bearings Speedometer drive gear Front brake camshaft Front brake cable Throttle cable Tube guide throttle grip inner surface Upper steering stem ring nut Upper bearing outer race Lower bearing outer race Rear brake camshaft Centersta nd 2 13 D o w n l o a d e d f r o m w w w S c o o t e r T i m e n e t ...

Page 36: ...gh the guide Passthe wire harness through the inside of ignition coil Secure the ground lead and the ignition coil base to the ignition coil stay Passthe wire harness through the inside of oil tank Pass the seat cable through the inside of frame Align the clip with the white brand Clamp the wire harness Insert the seat cable through the frame tube Clamp wireharness rear brake cable throttle cable ...

Page 37: ...k breather hose Fuel hose Breather hose Pass the brake hose through the holder Insert the fuel overflowhose bottom Pass the fuel overflowhose through the rear fender hole Pass the fuel overflowhose through the holder Hold the fuel overflowhose with a clamp Pass the brake cable through the holder 2 15 D o w n l o a d e d f r o m w w w S c o o t e r T i m e n e t ...

Page 38: ...se Front fender Front fork assembly Nut Plate washer Brake hose holder Flange bolt Bolt Brake hose holder Flange bolt Pass the brake hose through the holder Q t f f 2 16 D o w n l o a d e d f r o m w w w S c o o t e r T i m e n e t ...

Page 39: ...s the seat lock cable through the hole of bracket Pass the fuel tank breath hose over seat lock cable Clamp carburetor vacuum hose fuel hose and fuel cock vacuum hose Clamp autochoke leads and autolube hose on to carbure tor throttle cable Pass the battery leads over frame member Put fuse box on to footrest board holder Pass throttle cable1 3 wireharness autolube pump cable brake cable through the...

Page 40: ...ottle cable 3 Front flasher leads Pass brake cable through the slot of bracket Avoid clamping front flasher leads when in stalling handlebar covers Pass throttle cable1 3 through between handlebar and wireharness Hang the wireharness bind on to the bracket 7 L j j f I F I i i JI 3 B C 2 18 D o w n l o a d e d f r o m w w w S c o o t e r T i m e n e t ...

Page 41: ...and vacuum hose Fuel line for cracks or damage O Replace if necessary Check condition Refer to SPARK Spark plug Clean regap or replace if neces PLUGINSPECTION O sa ry Air filter element Clean or replace if necessary s ginooil O Check operation fluide level and Brake fluidDOT4 Front brake vehicle for fluid leakage IorDOT3 O Replace brake pads Whenever worn to the limit Check operation Rear brake Ad...

Page 42: ...icle for oil O O O sion oil leakage Every 12 000 km 8 000 Replace Yarnalubel0W 30 SE4orSAEGL O mi or 24 mont hs whichever gear oil Occurs first V belt oReplace Every 9 000 kin 6 000 mi Items marked with an asterisk require special tools data and technical skills for servicing Take the scooter to a Yamaha dealer NOTE The air filter needs more frequent service if you are riding in unusually wet or d...

Page 43: ...oval Battery box cover Seat Seat hange Rear carrier Rear cover Left side cover Right side cover Center cover Q ty Remarks Remove the parts in order NOTF Insert the screwdriver into the slot of battery cover and pickup then remove Reverse the removal procedure for instal lation 3 3 D o w n l o a d e d f r o m w w w S c o o t e r T i m e n e t ...

Page 44: ...e 2 3 4 5 6 Q ty Lower cowling upper cover leg shield 1 2 and footrest board re moval Lower cowling 1 Upper cover 1 Leg shield 1 1 Main switch cover leg shield 2 1 1 Battery 1 Footrest board 1 Remarks Remove the parts in order Reverse the removal procedure for instal lation 3 4 D o w n l o a d e d f r o m w w w S c o o t e r T i m e n e t ...

Page 45: ...2 3 4 Q ty Handlebar cover Front and Rear re moval Mirrors 2 Front handlebar cover 1 Rear handlebar cover 1 Flasher light Left Right 1 1 Remarks Remove the part in order Reverse the removal procedure for instal lation 3 5 D o w n l o a d e d f r o m w w w S c o o t e r T i m e n e t ...

Page 46: ... VAVL W II Before starting the engine be sure to use the centerstand for safety Attach Inductive tachometer To the spark plug lead I 1 Inductive tachometer YU 8036 A 4 Check Engine idle speed Out of specification Adjust I 1 Engine idle speed 1 750 1 850 r min 5 Adjust Engine idle speed Adjustment steps Turn the throttle stop screw in or out until specified idle speed is obtained I Turn i ut Idle s...

Page 47: ...the adjuster cover Loosen the Iocknut on the throttle cable Turn the adjuster in or out until the speci fied free play is obtained I Turning in Free play is increased I Turning out Free play is decreased Tighten the Iocknuts Install the adjuster cover After adjusting the throttle cable free play start the engine and turn the handlebar to the right and to the left to ensure that this does not cause...

Page 48: ...ir bubbles dis appear When air bubbles are expelled completely tighten the bleed screw NOTE Check the bleed screw gasket If damaged re place with a new one Place a oil pan under the autolube pump to catch oil 3 Air bleeding Pump distributor and or delivery hose Air bleeding steps Start the engine Run the engine for 2 3 minutes at 2000 r min This will completely remove autolube pump system of air 3...

Page 49: ...e Insulator Abnormal color Replace Normal color is a medium to light tan color 4 Clean the spark plug with a spark plug cleaner or wire brush 5 Measure Plug gap Use a wire gauge or feeler gauge Out of specification Regap Il 0ar 0u00ao I 0 6 0 7 mm 0 02 0 03 in 6 Tighten Spark plug I 4 i20Nm 2 0m kg 14ft lb I 7 Install Battery box cover 3 9 D o w n l o a d e d f r o m w w w S c o o t e r T i m e n ...

Page 50: ...n light Inspect faulty electrical circuit light bulbs etc Turn main switch to ON position t OIL indicator light does I_ C not come on Engine oil level and elec trical circuit are OK 1 OIL indicator comes on Supply engine oil OIL indicator light comes on light 1 Recommended oil For Yamaha Yamalube 2 or 2 stroke engine oil ISO EG C EG D grade Total 1 4L 1 23 Imp qt 1 48 US qt NOTE Install the oil ta...

Page 51: ...all Drain bolt H 18 m m g 13 1 6 Fill Transmission case 1Recommended oil Yamalube 4 SAE 10W 30SE or GL gear oil Oil capacity Total amount 0 13 L 0 11 Imp qt 0 13 US qt Periodic oil change 0 11 L 0 096 Imp qt 0 12 US qt CAUTION Always use the same type of oil mixing oils may result in a harmful chemical re action and lead to poor performance Do not allow foreign material to enters the transmission ...

Page 52: ...enter causing rapid wear and possible en gine damage Additionally operation without the cleaner element will affect carburetor jet ting with subsequent poor performance and possible engine overheating Be careful not to have rags or the like blocking the intake area of the air filter 5 Inspect Element Da mage Replace 6 Clean Air filter element Air filter element cleaning steps Wash the element gent...

Page 53: ...explosion Squeeze the excess solvent out of the ele ment and let dry CAUTION Do not twist the element when squeezing the element Apply the foam air filter oil or engine oil Squeeze out the excess oil NOTE The element should be wet but not dripping 7 Install Air filter Battery box cover 3 13 D o w n l o a d e d f r o m w w w S c o o t e r T i m e n e t ...

Page 54: ...ves Refer to ENGINE OVERHAUL INSPEC TION AND REPAIR section in the CHAP TER 4 Measure V belt width Out of specification Replace Refer to ENGINE OVERHAUL section in the CHAPTER 4 V belt width 16 6 mm 0 65 in Limit 14 6 mm 0 57 in NOTE Measure the V belt width on several points 3 14 4 Install Crankcase cover 1 left I l 12Nm 1 2m kg 8 4 ft lb I Air cleaner l 9Nm 0 9m kg 6 5 ft lb I Crankcase cover 2 ...

Page 55: ...ed braking capability and can result in loss of control and an accident Inspect and bleed the system if necessary REAR BRAKE LEVER FREE PLAY CHECK 1 Check Rear brake lever free play Out of specification Adjust I 110 20 mm o3 0 79 n I X o to Rear brake lever free play adjustment steps Turn the adjuster in or out until the cor rect free play is obtained j 3 15 BRAKE PAD INSPECTION 1 Activate the bra...

Page 56: ...N The fluid may corrode painted surfaces or plas tic parts Always clean up spilled fluid imme diately LvAv 1 II eUse only the designated quality fluid Other wise the rubberseals may deteriorate caus ing leakage and poor brake performance eRefill with the same type of fluid Mixing flu ids may result in a harmful chemical reaction leading to poor brake performance eBe careful that water does not ent...

Page 57: ...ther end ofthetube into a con tainer e Slowly applythe brake lever several times f Pull the lever in Hold the lever in posi tion g Loosen the bleed screw and allow the le ver to travel towards its limit h Tighten the bleed screw when the limit has been reached then release the lever i Repeat steps e to h until the air bubbles have been removed from the system j Add brake fluid to proper level LvAv...

Page 58: ... that they form a right angle Loosen the ring nut 3 1 4 turn Install rubber ring and ring nut 2 then tighten the ring nut 2 until it contacts with rubber ring CAUTION Aligning the slot of ring nut 2 with the slot of ring nut 3 If not slightly tighten ring nut 2 un til the slots alignment Install special washer NOTE Insert the projections of special washer into the slots of ring nut 3 2 Install rin...

Page 59: ...verloaded scooter could cause tire damage an accident or an injury NEVER OVERLOAD THE SCOOTER Basic weight with oil and a 94kg 2071b full uel tank Maximum load 143kg 3151b Front Rear Cold tire pres sure 200 kpa 200 kpa 2 0 kgf cm 2 2 0 kgf cm 29 psi 29 psi Total of cargo rider passenger and acces sories WARNING It is dangerous to ride with a worn out tire When the tire tread reaches the wear limit...

Page 60: ... recom mended If it is absolutely necessary to do so use great care and replace the tube as soon as possible with a good quality replace ment Tire IB Wheel Tube wheel Tube tire only Tubeless wheel Tube or tubeless tire After extensive tests the tires listed below have been approved by Yamaha Motor Co Ltd for this model The front and rear tires should always be by the same manufacturer and of the s...

Page 61: ...erefore approximately 100 km should be traveled at normal speed before any high speed riding is done NOTE For tires with a direction of rotation mark Install the tire with the mark pointing in the direction of wheel rotation Align the mark with the valve installation point 3 21 D o w n l o a d e d f r o m w w w S c o o t e r T i m e n e t ...

Page 62: ...Grease leakage Replace inner tube comp fork ass y Unsmooth operation Replace fork ass y REAR SHOCK ABSORBER INSPECTION 1 Inspection Rear shock absorber Oil leaks Da mage Re place 2 Check Tightening torque Upper nut 30Nm 3 0 m kg 22ft lb Lower bolt 16 Nm 1 6 m kg 12ft lb SEAT LOCK CABLE ADJUSTMENT 1 Remove Upper cover Refer to COVER AND PANEL section 2 Adjust Seat cable Seat cable adjustment steps ...

Page 63: ...ration Rough movement Lubricate Recommended lubricant t Engine oil or a suitable cable lubri ca nt NOTE Hold the cable end upright and pour a few drops of lubricant into the cable sheath or use a suitable lubricating device EAS00171 LEVERS LUBRICATING Lubricate the pivoting point and metal to metal moving parts of the levers Recommended lubricant Lithium soap base grease EAS00173 CENTERSTAND LUBRI...

Page 64: ... time charging current and charging voltage for the MF battery is differ ent than general type batteries The MF battery should be charged as in structed in the Charging method Should the battery be overcharged the electrolyte level will lower extremely Therefore use special care when charging the battery Avoid using any electrolyte other than speci fied The specific gravity of the MF battery elect...

Page 65: ...ing batteries KEEP BATTERIES AND ELECTROLYTE OUT OF REACH OF CHILDREN Avoid bodily contact with electrolyte as it can cause severe burns or permanent eye injury FIRST AID IN CASE OF BODILY CONTACT EXTERNAL Skin Wash with water Eyes Flush with water for 15 minutes and get immediate medical attention INTERNAL Drink large quantities of water or milk fol lowed with milk of magnesia beaten egg or veget...

Page 66: ...ed on the motorcycle for some reason be sure to dis connect the wire at the negative terminal Never remove the sealing plug from the MF battery Use special care so that charging clips are in a full contact with the terminal and that they are not shorted A corroded clip of the charger may cause the battery to generate heat at the contact area A weak clip spring may cause sparks Before removing the ...

Page 67: ...er charging Will be insufficient If too high the battery Will be over charged l NO 1 By turning the charging voltage adjust dial set the charging volt age at 20 25 V Monitor the amperage for 3 5 minutes to check if the standard charging current is reached NO 1 If current does not exceed stan dard charging current after 5 minutes replace the battery In case that charging requires more than 5 hours ...

Page 68: ... is higher than the standard charging current written on the battery NOTE Set the charging time at 20 hours maximum NO 1 This type of battery charger Can not charge the MF battery A variable voltage charger is rec ommended Checkthe open circuit voltage after hav ing left the battery for 30 minutes after charging 12 8 V or more Charging is complete 12 7 V or less Recharging is neces sary Under 12 V...

Page 69: ... and the circuit Install a new fuse of proper amperage Turn on switches to verify operation of elec trical device If fuse blows immediately again check cir cuit in question Lvlv 1 11 Never use a fuse with an amperage rating other than that specified Improvising or using a fuse with the wrong amperage rat ing may cause extensive damage to the electrical system cause the lighting and ignition system...

Page 70: ...ght beam HEADLIGHT BULB REPLACEMENT 1 Remove Upper cover Refer to COVER AND PANEL section 2 Disconnect Headlight coupler 3 Remove Bulb holder cover 4 Remove Headlight bulb holder Turn the bulb holder counterclockwise to remove it 5 Remove Bulb defective W VAV I II 1 Since the headlight bulb gets extremely hot keep flammable products and your hands away from the bulb until it has cooled down 3 30 D...

Page 71: ...ughly clean it with a cloth moistened with alcohol or lacquer thinner 7 Install Bulb holder Turn the bulb holder clockwise to install it 8 Install Bulb holder cover 9 Connect Headlight coupler 10 Install Upper cover 11 Adjust Headlight beam Refer to HEADLIGHT BEAM ADJ USTMENT section _ REAR TURN SIGNAL BULB REPLACEMENT 1 Remove Screw Lens 2 Replace Bulb defective 3 Install Lens Screw CAUTION Do no...

Page 72: ... luminous flux will be adversely af fected If the headlight bulb gets soiled thor oughly clean it with a cloth moistened with alcohol or lacquer thinner TAILLIGHT BULB REPLACEMENT 1 Remove Screws Lens 2 Replace Bulb defective 3 Install Lens Screws LICENSE LIGHT BULB REPLACEMENT 1 Remove Screws Lens 2 Replace Bulb defective 3 Install Lens Screws 3 32 D o w n l o a d e d f r o m w w w S c o o t e r ...

Page 73: ...ireharness and cables removal Rear carrier Tail cover Left side panel Right side panel Battery box cover Center cowling Air filter case Carburetor Air shroud 1 Autolube delivery hose Q ty Remarks Remove the parts in order Refer to COVER AND PANEL section in CHAPTER 3 Refer to CARBURETOR section in CHAPTER 6 4 1 D o w n l o a d e d f r o m w w w S c o o t e r T i m e n e t ...

Page 74: ...lug cap Battery lead C D I magneto leads coupler Starter motor leads coupler Rear wheel nut Rear brake adjuster Rear brake cable Pin Bolt Engine mount bolt Engine Q ty 1 1 1 1 1 Remarks NOTF Loosen the rear wheel nut Reverse the removal procesure for instal lation 4 2 D o w n l o a d e d f r o m w w w S c o o t e r T i m e n e t ...

Page 75: ... 10 Q ty Remarks Cylinder head Cylinder and piston removal Engine Muffler Gasket 1 1 Air shroud 2 1 Spark plug 1 Cylinder head Cylinder head gasket 1 1 Cylinder 1 Piston pin clip 2 Piston pin Bearing 1 1 Piston 1 Piston ring set 1 Cylinder gasket 1 Remove the parts in the order Refer to the ENGINE REMOVAL sec tion Reverse the removal procedure for in stallation 4 3 D o w n l o a d e d f r o m w w ...

Page 76: ... out CYLINDER HEAD INSPECTION 1 Eliminate Carbon deposits Use a rounded scrapper 2 Inspect Cylinder head warpage Out of specification Re surface Warpage measurement and re surfacement steps Attach a straight edge and a thickness gauge on the cylinder head Measure the warpage limit Ilaroaoe t I 0 03 mm 0 0012 in If the warpage is out of specification reface the cylinder head NOTE Rotate the head se...

Page 77: ...core markes and lacquer deposits From the sides of piston 5 Inspect Piston wall Wea r Scratches Da m age Re place 6 Measure Piston to cylinder clearance Piston to cylinder clearance measurement steps First step Measure the cylinder bore C with a cylin der bore gauge NOTE Measure the cylinder bore C in parallel to and at right angles to the crankshaft Then find the average of the measurements 4 5 D...

Page 78: ...e the piston skirt diameter p with a micrometer 10 mm from the piston bottom edge I l st nsze I 39 958 39 972 mm 1 5731 1 5737 in If out of specification replace piston and pis ton rings as a set 3rd step Calculate the piston to cylinder clearance with following formula I Piston to cylinder clearance Cylinder bore I I C Piston skirt diameter p I If out of specification rebore or replace cyl inder ...

Page 79: ...ll Piston ring Into the cylinder Push the ring with the piston crown L Measure End gap Out of specification Replace rings as a set Use a feeler gauge Stand rd Li it a m Top ring 0 15 0 35 mm 0 6ram 0 005 0 01 in 0 02 in 2nd ring 0 15 0 35mm 0 6ram 0 005 0 01 in 0 02 in Measuring Point 20 mm 0 79 in PISTON PIN AND PISTON PIN BEARING 1 Inspect Piston pin Blue discoloration Groove Replace then inspec...

Page 80: ...side diameter piston pin Piston pin to piston clearance I 0 004 0 019 mm 0 0016 0 00075 in 1 Limit 0 07 mm 0 003 in 4 Inspect Bearing piston pin Pitting Da mage Replace 4 8 PISTON PIN AND PISTON INSTALLATION 1 Apply Engine oil to the crankshaft bearing connecting rod big end bearing small end bearing piston pin piston ring grooves and pis ton skirt areas Install Reed valve gasket Reed valve Carbur...

Page 81: ...op the pin clip mate rial into the crankcase Always use a new piston pin clip CYLINDER AND CYLINDER HEAD 1 Install Cylinder gasket new gasket 2 Check Piston rings 1st ring 2nd ring NOTE Make sure the ring ends are properly fitted around the ring locating pins in the piston grooves r 0 4 9 3 Install Cylinder NOTE Install the cylinder with one hand while com pressing the piston rings with the other ...

Page 82: ... gasket new gasket 5 Install Cylinder head 114Nm 1 4m kg 10ft lb Spark plug r 120Nm 2 0m kg 14ft lb Air shroud NOTE Tighten the cylinder head holding nuts in stage using a crisscross pattern 4 10 D o w n l o a d e d f r o m w w w S c o o t e r T i m e n e t ...

Page 83: ... 5 1 ft lb I 190Nm 0 9m kg 6 5 ft lb I Order Job name Part name 1 2 3 4 5 Kick starter and crankcase cover left removal Kick starter Crankcase cover 2 left Crankcase cover 1 left Gasket Pin Q ty Remarks Remove the parts in order Reverse the removal procedure for in stallation 4 11 D o w n l o a d e d f r o m w w w S c o o t e r T i m e n e t ...

Page 84: ...k starter removal Crankcase cover 1 left removal Kickstarter pinion gear Kickstarter pinion gear clip Circlip Plain washer Kickstarter segment gear Return spring Collar Q ty Remarks 1 1 1 1 1 1 1 Remove the parts in order Reverse the removal procedure for in stallation 4 12 D o w n l o a d e d f r o m w w w S c o o t e r T i m e n e t ...

Page 85: ...kstarter segment gear Collar Plain washer Circlip 4 13 Installation steps a Install return spring and segment gear as shown b Install clip c Hook the spring onto the crankcase pro jection d Install the kick starter pinion gear and the kick starter D o w n l o a d e d f r o m w w w S c o o t e r T i m e n e t ...

Page 86: ...sing Secondary sheave assembly V belt Conical washer One way clutch Crow washer Primary fixed sheave Collar Washer Primary sliding sheave Cam Slider Weight Q ty 1 1 1 1 1 1 1 1 1 1 1 3 6 Remarks Remove the parts in order Refer to COVER AND PANEL section in chapter 3 Refer to ENGINE REMOVAL section IRefer to SECONDARY SHEAVE AND V J BELT REMOVAL section Refer to PRIMARY SHEAVE REMOVAL ASSE M BLY se...

Page 87: ...ion spring 1 Spring seat 1 Guide pin 2 Secondary sliding sheave 1 O ring 2 Oil seal 2 Secondary fixed sheave 1 Remarks Disassemble the parts in order Refer to SECONDARY SHEAVE DISAS SEMBLY section Refer to SECONDARY SHEAVE IN STALLATION section Refer to SECONDARY SHEAVE IN STALLATION section Reverse the disassembly procedure for assembly 4 15 D o w n l o a d e d f r o m w w w S c o o t e r T i m e...

Page 88: ... Rotor holdiyu_01235ngtool I 3 Remove Conical spring washer One way clutch Washer Primary fixed sheave Shim V Belt 4 Remove Collar Primary sheave assembly SECONDARY SHEAVE REMOVAL 1 Remove Nut secondary sheave NOTE Hold the secondary sheave using sheave holder I 1 Sheave holder I YU 01701 2 Remove Clutch housing Secondary sheave assembly Dowel pins 4 16 D o w n l o a d e d f r o m w w w S c o o t ...

Page 89: ... If the nut is removed without compressiong the secondary sheave It jumps and causes in jury 4 Attach Clutch spring holder I l CIutch spring holder ys_28891 5 Remove Clutch securing nut 6 Remove Clutch assembly Clutch spring Spring seat Guide pins Secondary sliding sheave CLUTCH INSPECTION 1 Inspect Clutch shoes Glazed parts Sand with coarse sand paper NOTE After using the sand paper clean of the ...

Page 90: ...ness 4 mm 0 16 in Wear limit 2 5 mm 0 1 in V BELT INSPECTION 1 Inspect V belt Crack Replace NOTE Replace the V belt smeared with a lot of oil or grease Measure V belt width Out of specification Replace 1 V belt width 16 6 mm 0 65 in Wear limit 14 6 mm 0 57 in 4 18 D o w n l o a d e d f r o m w w w S c o o t e r T i m e n e t ...

Page 91: ...mage Replace Check Free movement Insert the collar into the primary slid ing sheave and check for free move ment Stick or excessive play Replace the sheave or collar Measure Out side diameter weight Out of specification Replace Out side diameter weight 15 0 mm 0 59 in Limit 14 5 mm 0 57 in 4 19 D o w n l o a d e d f r o m w w w S c o o t e r T i m e n e t ...

Page 92: ...tch spring free length Out of specification Replace Clutch spring free length 94 mm 3 7 in Limit 91 mm 3 58 in 4 Inspect Clutch housing inner surface Oil Scratches Remove Use a rag soaked in lacquer Oil thinner or solvent Use an emery cloth lightly Scratches and evenly polishing 4 20 Measure Clutch housing inside diameter Out of specification Replace Clutch housing inside diameter 105 mm 4 13 in W...

Page 93: ...NOTE Be careful so that the oil seal lips are not turned over when installing the sheave 3 Apply Lithium soap base grease to the torque cam grooves and O rings 4 Install Guide pin 5 Check Sliding sheave Unsmooth operation Repair Install Clutch securing nut Use clutch spring holder c utchs0r n0ho der s288 l I Tighten Clutch securing nut I 150Nm 5 0 m kg 36ft lb I Use Flywheel holding tool otorho d ...

Page 94: ...heave 1 140 Nm 4 0 m kg 29 ft b I Use sheaveholder Sheaveho der I YU 01701 4 22 PRIMARY SHEAVE 1 Clean Primary sliding sheave face Primary fixed sheave face Collar Weight Primary sliding sheave cam surface 4 Install Weight Cam Slider Collar Check Cam operation Not smooth Repair Install Primary sheave assembly Collar Install V belt D o w n l o a d e d f r o m w w w S c o o t e r T i m e n e t ...

Page 95: ...en Nut primary sheave l 45 Nm 4 5 m kg 31ft lb N O T E When tightening the nut primary sheave hold the C D I magneto using Flywheel Holding Tool l t rh d n t 01 I Adjust V belt O Tense the V belt by turning the primary sheave several times 9 Install Fan I 7 Nm 0 7 m kg 5 1 bl I 4 23 D o w n l o a d e d f r o m w w w S c o o t e r T i m e n e t ...

Page 96: ...enter cover Lower cowling Air shroud 3 Cooling fan Rear wheel Crankcase cover left l 2 Primary sheave Plate Plain washer Idle gear Plain washer Starter clutch 4 24 Q ty Remarks Remove the parts in order Refer to COVERS AND PANE L section in chapter 3 Refer to C D I MAGNETO section Refer to REAR WHEEL section in chap ter 6 Refer to KICKER STARTER section Refer to V BELT PRIMARY SHEAVE section D o w...

Page 97: ...k0 5 8 ft b 8 Order Job name Part name 6 7 8 9 10 11 Gear boss Bearing Starter wheel gear Plate washer Starter motor Starter motor coupler Q ty 1 1 1 1 1 2 Remarks Reverse the removal procedure for instalation 4 25 D o w n l o a d e d f r o m w w w S c o o t e r T i m e n e t ...

Page 98: ...C F 3 Inspect Starter clutch operation Clutch operation checking steps Install the starter wheel gear to the starter clutch and hold the starter clutch When turning the wheel gear clockwise the starter clutch and the wheel gear should be engaged If not the starter clutch is faulty Replace it When turning the wheel gear counter clock wise the wheel gear should turn freely If not the starter clutch ...

Page 99: ...Tail cover Left side cover Right side cover Center cover Lower cowling Air shroud 1 Fan O ring Magneto rotor Bind Couplers magneto leads Stator coil Wood ruff key Gasket Magneto cover Q ty Re m a rks 1 1 1 1 1 1 1 1 1 Remove the parts in order Refer to COVER AND PANEL section in chapter 3 Reverse the removal procedure for in stallation 4 27 D o w n l o a d e d f r o m w w w S c o o t e r T i m e n...

Page 100: ...ase grease to oil seal 3 Pass the C D I magneto lead through the crankcase hole 4 Install Stator assembly R e8 Nm 0 8m kg 5 8 ft lb I 5 Install Wood ruff key C D I magneto Rotor Plain washer Nut l 38Nm 3 S m kg 31 1ft lb I NOTE Clean the tapered portion of the crankshaft and the magneto rotor hub When installing the magneto rotor make sure the woodruff key is properly seated in the keyway of the c...

Page 101: ...p removal C D I magneto Air shroud 2 1 Circlip 1 Pump drive gear 1 Pin 1 Oil hose 1 Oil delivery hose 1 Autolube pump ass y 1 Remarks Remove the parts in order Refer to C D I magneto section Refer to Autolube pump installation section Reverse the removal procedure for in stallation 4 29 D o w n l o a d e d f r o m w w w S c o o t e r T i m e n e t ...

Page 102: ... it must be bleeded 1 Install Pin O Pump drive gear Circlip 2 Apply Lithium soap base grease to O ring 3 Install Autolube pump J4 Nm 0 4m kg 2 8ft lb 4 Apply Lithium soap base grease to autolube pump gear 15 cc 0 92 cu o in 4 30 D o w n l o a d e d f r o m w w w S c o o t e r T i m e n e t ...

Page 103: ...ission oil Transmission case cover 1 Gasket transmission case cover 1 Dowel pin 2 Primary drive gear 1 Drive gear 1 Circlip 1 Main axle 1 Q ty Remarks Remove the parts in order Refer to REAR WHEEL REAR BRAKE section in chapter 7 Refer to V BELT CLUTCH SECOND ARY PRIMARY SHEAVE section Refer to TRANSMISSION OIL RE PLACEMENT section in chapter 3 4 31 D o w n l o a d e d f r o m w w w S c o o t e r T...

Page 104: ...3 5 4 I 112Nm 1 2m kg 8 4ft lb 1 1 8Nm 1 8 m kg 13ft lb I Order Job name Part name 8 Drive axle Q ty 1 Remarks Reverse the removal procedure for in stallation 4 32 D o w n l o a d e d f r o m w w w S c o o t e r T i m e n e t ...

Page 105: ...ch starter motor Autolube pump Rear wheel Transmission Q ty Rem a rks Remove the parts in order Refer to ENGINE REMOVAL section Refer to CYLINDER HEAD CYLINDER AND PISTON section Refer to KICK STARTER AND CRANK CASE COVER LEFT section Refer to V BELT CLUTCH AND SEC ONDARY PRIMARY SHEAVE section Refer to C D I MAGNETO section Refer to STARTOR CLUTCH AND STARTOR MOTOR section Refer to AUTOLUBE PUMP ...

Page 106: ... J Order Job name Part name 1 2 3 4 5 6 7 8 9 10 Q ty Remarks Intake manifold 1 Reed valve 1 Valve seat gasket 1 Stopper 1 Crankcase 2 1 Dowel pin 2 Engine mount spacer 1 Circlip 1 Bearing 1 Oil seal 1 Reverse the removal procedure for in stallation 4 34 D o w n l o a d e d f r o m w w w S c o o t e r T i m e n e t ...

Page 107: ... level tool body Remove Crankcase right As pressure is applied alternately tap on the engine mounting bosses 4 35 CHECKING THE CRANKCASE 1 Thoroughly wash the crankcase halves in a mild solvent 2 Thoroughly clean all the gasket surfaces and crankcase mating surfaces 3 Check crankcase Cracks damage Replace oil delivery passages Obstruction Blow out with com pressed air CHECKING THE BEARINGS AND OIL...

Page 108: ... lReedvavecearance I Less than 0 2 mm 0 0079 in ii I I CRANKCASE RIGHT INSTALLATION 1 Install Dowel pins Engine mount spacer 2 Apply Sealant To the mating surfaces of both case helves 1 Quick gasket I ACC 1100 15 01 NOTE Do not allow any sealant to come into contact with the oil galley 3 Attach Crankshaft installing tool Crankshaft installation set YU 90050 Crankshaft installer adapter M 10 YU 900...

Page 109: ...age using a crisscross pattern 5 Check Crankshaft operation Unsmnothoperation Repair 6 Install Oil seal right crank case Apply grease on to oil seal lip Install Oil seal stopper plate H 9 ml09 m kg 6 5 ft lb I Install Gasket Reed valve Intake manifold I 111 Nm 1 1 m kg 8 ft lb I 4 37 D o w n l o a d e d f r o m w w w S c o o t e r T i m e n e t ...

Page 110: ...removal Right crankcase removal Crankshaft 1 Bearing 2 Oil seal 2 Crankcase cover left 1 Q ty Re m a rks Remove the parts in order Refer to CRANK CASE AND REED VALVE section Reverse the removal procedure for in stal lation 4 38 D o w n l o a d e d f r o m w w w S c o o t e r T i m e n e t ...

Page 111: ...ecting rod big end side clearance iJ g rr Small end free play limit F Out of specification Replace Use V blocks dial gauge and thickness gauge Runout limit C 0 03 mm 0 0012 in Connecting rod big end side clear ance D 0 2 0 5 mm 0 0079 0 020 in Small end free play F 0 4 0 8 mm 0 016 0 031 in 2 Inspect Bearings crankshaft Spin the bearing inner race Excessive play Ro ugh ness Replace Pitting Da mage...

Page 112: ...grease and each bear ing with engine oil NOTE Hold the connecting rod at top dead center TDC with one hand while turning the nut of the crankshaft installing tool with the other Turn the crankshaft installing tool until the crankshaft assembly bottoms against the bear ing i P J Install Oil seal Apply lithium soap base grease onto the oil seal lip Use the guide and seal driver to install the oil se...

Page 113: ... Right cover Center cover Air cleaner case assembly Auto choke lead coupler Fuel hose vacuum hose Oil delivery pipe assembly Carburetor Throttle cable Q ty Re m arks Remove the parts in order Refer to COVER AND PANEL section in CHAPTER 3 Reverse the removal procedure for instal lation 5 1 D o w n l o a d e d f r o m w w w S c o o t e r T i m e n e t ...

Page 114: ...r o ring Throttle stop screw Auto choke unit assembly Float chamber Seal ring Float pin Float Needle valve Main jet Pilot jet Main nozzle Carburetor body Q ty Remarks 1 1 1 1 1 1 1 1 1 1 1 1 1 1 Disassemble the parts in order Reverse the removal procedure for in stallation 5 2 D o w n l o a d e d f r o m w w w S c o o t e r T i m e n e t ...

Page 115: ...y caustic carbure tor cleaning solution b Blow out all of the passages and jets with compressed air 3 Check Float chamber body Dirt Clean 4 Check Float chamber rubber gasket Cracks damage wear Replace 5 Check Float Damage Replace Check Needle valve O Damage obstruction wear Replace the needle valve Check Throttle valve Damage scratches wear Replace 5 3 D o w n l o a d e d f r o m w w w S c o o t e...

Page 116: ...acks damage wear Replace Obstruction Clean Blowoutthe hoses with compressed air 11 Measure Float height Out of specification lnspect needle valve float and valve seat Feathe0ht I 15 17 mm 0 59 0 67 in Float height measurement steps Install the needle valve float and float pin to the carburetor body Hold the carburetor in an upside down posi tion Measure the distance between the mating surface of t...

Page 117: ...and valve seat If it is worn replace it NOTE The float height is properly adjusted at the Yama ha factory Never attempt to adjust it CARBURETOR ASSEMBLY To assemble the carburetor reverse the disas sembly procedures Note the following points CAUTION Before reassembling wash all parts in clean gasoline Always use a new gasket 5 5 D o w n l o a d e d f r o m w w w S c o o t e r T i m e n e t ...

Page 118: ... the scooter on a level surface Use a garage jack under the engine to en sure that the carburetor is positioned verti cally Connect the fuel level gauge to the drain pipe Fuel level gauge I YM 01312 A Loosen the drain screw Measure the fuel level with the gauge If the fuel level is incorrect adjust the fuel level Remove the float chamber float and the needle valve Inspect the needle valve If it is...

Page 119: ...ood condition Impossible Replaceauto choke unit 3 Inspect Auto choke unit with battery Inspection and adjustment steps Connect auto choke unit leads to the 12 V battery for 5 minutes Black terminal 12 V battery Black terminal 12 V battery Connect a suitable hose to the starter and blow it with the mouth etc Possible Replace auto choke unit Im possible Good condition 5 7 D o w n l o a d e d f r o m...

Page 120: ...ops flowing out in a few seconds the fuel cock is in good condition If not clean or replace the fuel cock Disconnect the vacuum hose and breathe in the vacuum hose with the mouth etc for vacuum If fuel flows out of the fuel hose under vacuum and stops under non vacuum the fuel cock is in good condition If not clean or replace the vacuum hose fuel hose and fuel cock 4 Install Battery box cover Left...

Page 121: ...ometer cable 1 Front brake hose holder 1 Brake caliper 1 Wheel axle 1 Front wheel assembly 1 Gear unit assembly 1 Collar 1 Brake disc 1 Q ty Rem arks Remove the parts in order Securely support the scooter so there is no danger of it falling over Refer to FRONT WHEEL INSTALLA TION section Refer to FRONT WHEEL ASSEMBLY section Reverse the removal procedure for in stallation 6 1 D o w n l o a d e d f...

Page 122: ...ame Front wheel disassembly Oil seal Bearing Collar Spacer Bearing Q ty 1 m 1 1 1 1 Remarks Remove the parts in order Refer to FRONT WHEEL DISASSEM BLY ASSEMBLY section Reverse the removal procedure for in stallation 6 2 D o w n l o a d e d f r o m w w w S c o o t e r T i m e n e t ...

Page 123: ... 1 Do not attempt to straighten a bent wheel axle Ilheeaxeendn0 I 0 25 mm 0 0098 in 2 Inspect Front tire Wea r da mag e Replace Refer to TIRE INSPECTION in CHAP TER 3 Front wheel Refer to WHEEL INSPECTION in CHAPTER 3 3 Measure Front wheel runout Over the specified limits Replace Front wheel runout limits Radial 1 0 mm 0 04 in Lateral 1 0 mm 0 04 in 4 Inspect Front wheel bearings Bearings allow fr...

Page 124: ...t of specification Replace 6 4 Ye FRONT WHEEL ASSEMBLY 1 Install Bearing Collar Spacer Bearing Oil seal NOTE Apply the lithium soap base grease on the bearing and oil seal lip when installing Use a socket that matches the outside diam eter of the race of the bearing Always use a new oil seal Install the oil seal with its manufacturer s marks or numbers facing outward CAUTION Do not strike the inne...

Page 125: ...eter gear unit NOTE Make sure that the wheel hub and the speed ometer gear unit are installed with the three projections meshed into the two slots 3 Install Front wheel NOTE Make sure that the slot in the speedometer gear unit fits over the stopper on the front forkouter tube 4 Tighten Front wheel axle Axle nut front wheel axle H 70 NmCT0 m kg 51 btl CAUTION Before tightening the axle nut stroke t...

Page 126: ...wheel so that the X mark is 90 up d Release the wheel and wait for it to rest Put an X2 mark on the wheel s bottom spot e Repeat the above b c and d several times until all marks come to the same spot f This spot is the wheel s heavy spot X 4 Adjust Wheel static balance Adjusting steps Instail a balancing weight on the rim ex actly opposite to the heavy spot X NOTE Start with the smallest weight T...

Page 127: ...k Wheel static balance Checking steps Turn the wheel so that it comes to each point as shown Checkthat the wheel is at rest at each point If not readjust the front wheel static balance 6 7 D o w n l o a d e d f r o m w w w S c o o t e r T i m e n e t ...

Page 128: ...rder Job name Part name 1 2 3 4 Q ty Re m a rks Brake pad removal Caliper support bolt 1 I Caliper 1 J Brake pad 2 Pad spring 2 Remove the parts in order Refer to BRAKE PAD REPLACEMENT section Reverse the removal procedure for in stallation 6 8 D o w n l o a d e d f r o m w w w S c o o t e r T i m e n e t ...

Page 129: ...r Disconnect any hydraulic connection other wise the entire system must be disas sembled drained cleaned and then prop erly filled and bled after reassembly e o o BRAKE PAD REPLACEMENT NOTE It is not necessary to disassemble the brake caliper and brake hose to replace the brake pads 1 Loosen Retaining bolt 2 Remove Brake caliper Holder brake hose 3 Remove Retaining bolt Pads Pad spring NOTE Replac...

Page 130: ...iston into the caliper by your finger Tighten the capliper bleed screw H 0 k 4 3 i Install the pad spring new and brake pad new Tighten retaining bolt 123 Nm 2 3 m kg 16 6 ft lb I Install brake hose holder l l 7 Nm 0 7 m k 5 15 ft lb I Install caliper 23 Nm 2 3m kg 16 6ft ib I 5 Inspect Brake fluid level Refer to the BRAKE FLUID INSPEC TION section in the CHAPTER 3 LOWER level line 6 10 D o w n l ...

Page 131: ... T B A E IC ASI oI Check Brake lever operation A softy or spongy feeling Bleed brake system Refer to AIR BLEEDING section in the CHAPTER 3 6 11 D o w n l o a d e d f r o m w w w S c o o t e r T i m e n e t ...

Page 132: ...ssion spring Brake switch Union bolt Copper washer Brake hose Master cylinder bracket Master cylinder Q ty Remarks 1 1 1 1 2 1 1 1 Remove the parts in order Refer to BRAKE FLUID REPLACE MENT section in CHAPTER 3 Refer to MASTER CYLINDER INSTAL LATION section Reverse the removal procedure for in stallation 6 12 D o w n l o a d e d f r o m w w w S c o o t e r T i m e n e t ...

Page 133: ... cylinder disassembly Master cylinder boot Circlip Master cylinder kit Spring Q ty Re m a rks Remove the parts in order 1 1 Refer to MASTER CYLINDER ASSEM 1 BLY section 1 Reverse the disassembly procedure for assembly 6 13 D o w n l o a d e d f r o m w w w S c o o t e r T i m e n e t ...

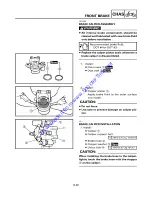
Page 134: ...da mag e Replace YP MASTER CYLINDER ASSEMBLY WARNING All internal brake components should be cleaned and lubricated with new brake fluid only before installation 16 1 Recommended brake fluid DOT 4 or DOT 3 Replace the piston seals and dust seals whenever a master cylinder is disassembled 1 Install Cylinder cup Master cylinder piston Install cylinder cup by using cylinder cup installer 1 Cylinder c...

Page 135: ...ely into the mas ter cylinder groove Master cylinder boot Ye MASTER CYLINDER INSTALLATION 1 Install Master cylinder Master cylinder bracket l 9 Nm 0 9 m kg 6 5ft lb I CAUTION Install the master cylinder bracket with the UP mark facing upward Align the end of the holder with the punch mark b on the handle bar 6 15 D o w n l o a d e d f r o m w w w S c o o t e r T i m e n e t ...

Page 136: ...te causing leakage and poor brake perforrmance Refill with the same type of brake fluid Mixing fluids may result in a harmful chemi cal reaction and lead to poor perforrmance Be careful that water does not enter the sig nificantly lower the boiling point of the fluid may result in vapor lock 3 Inspect Brake operation 6 16 D o w n l o a d e d f r o m w w w S c o o t e r T i m e n e t ...

Page 137: ...id Q ty Remarks Union bolt 1 Copper washer 2 Brake hose 1 Caliper support bolt 1 Caliper assembly 1 Remove the parts in order Refer to BRAKE FLUID REPLACE MENT section in CHAPTER 3 Refer to CALl PER INSTALLATION sec tion Reverse the removal procedure for in stallation 6 17 D o w n l o a d e d f r o m w w w S c o o t e r T i m e n e t ...

Page 138: ... disassembly Caliper bracket 1 Brake pad 2 Pad spring 2 I J Caliper piston 1 Dust seal 1 Piston seal 1 Bleed screw 1 Remove the parts in order Refer to BRAKE CALIPER DISASSEM BLY ASSEMBLY section Reverse the disassembly procedure for assembly 6 18 D o w n l o a d e d f r o m w w w S c o o t e r T i m e n e t ...

Page 139: ...ever try to pry out the caliper piston Cover the caliper piston with a rag Be care ful not to get injured when the piston is ex pelled from the master cylinder CAUTION Carefully remove the caliper piston to prevent damage 2 Remove Dust seal Piston seal When removing push the seals by your finger CAUTION Do not use a sharp instrument Remove seals by your finger Do not re use removed parts YP CALIPE...

Page 140: ...Dust seal 2 Install Caliper piston Apply brake fluid to the outer surface and install CAUTION Do not force Use care to prevent damage on caliper pis ton YP BRAKE CALIPER INSTALLATION 1 Install Caliper Caliper support bolt P 123Nm 2 3m kg 16 6ft lb I Brake hose Copper washer Union bolt H 25Nm 2 5m kg 18ft lb I CAUTION When installing the brake hose to the caliper lightly touch the brake hose with t...

Page 141: ...ke removal 1 2 3 4 Muffler assem bly Gasket Nut Plain washer Rear wheel assembly Plain washer Q ty 1 1 1 1 1 Remarks Remove the parts in order NOTE Place the scooter on a suitable atand so that the rear wheel is elevated Reverse the disassembly procedure for installation 6 21 D o w n l o a d e d f r o m w w w S c o o t e r T i m e n e t ...

Page 142: ...er Job name Part name 1 2 3 4 5 6 7 8 Adjuster Brake cable Pin Return spring Brake shoe Camshaft lever Wear indicator Brake camshaft Q ty 1 1 1 1 1 1 1 1 Remarks Reverse the removal procedure for in stallation 6 22 D o w n l o a d e d f r o m w w w S c o o t e r T i m e n e t ...

Page 143: ...per NOTE After polishing wipe the polished particles with a cloth 2 Measure Brake lining thickness 1 Brake lining thickness Standard 4 mm 0 16 in Limit 2 mm 0 08 in Out of specification Replace Measuring points t NOTE Replace the brake shoes as a set if either is worn to the wear limit Measure Brake drum inside diameter Out of specification Replace the wheel Brake drum inside diameter Standard 130...

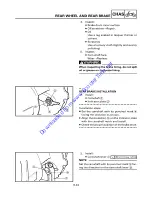
Page 144: ...the brake lining Ye REAR BRAKE INSTALLATION 1 Install Camshaft Indicator plate Installation steps Set the camshaft with its punched mark facing the direction as shown Align the projection on the indicator plate with the camshaft notch and install Checkthe proper position of the brake shoe 6 24 2 Install Camshaft lever r ll0Nm 1 0 m kg 7 2ft lb NOTE Set the camshaft with its punched mark fac ing th...

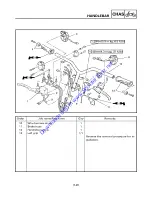
Page 145: ...1 143Nm 4 3 m kg 37 ftJb l 8 Order Job name Part name 10 11 12 13 Wire harness strap Brake hose Handlebar comp Left grip Q ty 1 1 1 1 1 Remarks Reverse the removal procedure for in stallation 6 26 D o w n l o a d e d f r o m w w w S c o o t e r T i m e n e t ...

Page 146: ...ront protector bar Upper cover Front Rear handlebar cover Left Rig ht flasher Brake master cylinder Front brake switch Handlebar switch Right Throttle cable Right grip Brake cable Rear brake switch Handlebar switch Left Bind Q ty 1 1 1 1 1 1 1 1 1 1 Remarks Remove the parts in order Refer to COVERS AND PANEL IN CHAPTER 3 6 25 D o w n l o a d e d f r o m w w w S c o o t e r T i m e n e t ...

Page 147: ...g 37ft lb I NOTE Match the bolt on to the steering column dent CAUTION There must be a space b after tighting bolt 3 Install Ba nd NOTE Clamp the wire harness 4 Apply Lithium soap base grease to throttle cable end and handlebar right end 6 27 5 Install Handlebar switch right NOTE Insert the projection into the hole on the handlebar comp D o w n l o a d e d f r o m w w w S c o o t e r T i m e n e t...

Page 148: ...lebar switch left NOTE Insert the projection into the hole on the handlebar comp 7 Install Master cylinder NOTE Match the slot with the punched mark on the handlebar comp 6 28 D o w n l o a d e d f r o m w w w S c o o t e r T i m e n e t ...

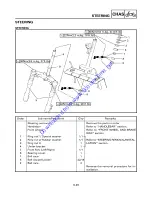
Page 149: ...1 Special washer Ring nut 2 Rubber washer Ring nut 3 Under bracket Front fork Left Right Bearing cover Ball race Ball Upper Lower Ball race Q ty 1 1 1 1 1 1 1 1 1 1 22 19 3 Remarks Remove the parts in order Refer to HANDLEBAR section Refer to FRONT WHEEL AND BRAKE DISC section Refer to STEERING REMOVAL INSTAL LATION section Reverse the removal procedure for in stal lation 6 29 D o w n l o a d e d ...

Page 150: ... nut wrench c l Steering nut wrench YU 33975 I Hold the lower bracket by hand then remove by using the steering nut wrench Do not loss the balls Upper 22 pcs Lower 19 pcs 2 Remove Front fork assembly Refer to FRONT FORK section 3 Remove Ball race Ball race replacement steps Remove the ball races on the head pipe us ing long rod and the harmmer as shown Remove the ball races on the under bracket us...

Page 151: ...ces as set Q 3 Inspect Under bracket Crack Bend Damage Replace W LVAV I II 1 Do not attempt to straighten a bent under bracket as this may dangerously weaken the under bracket STEERING INSTALLATION 1 Install Ball NOTE Upper 22 pcs Lower 19 pcs 2 Lubricate Ball Ball race Lithium soap base grease 6 31 D o w n l o a d e d f r o m w w w S c o o t e r T i m e n e t ...

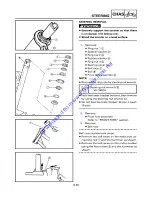
Page 152: ...122 am 2 2 m kg 16 ft b I steor no utwrenoho_9 I NOTE Set the torque wrench to ring nut wrench so that they form right angle Lvlv 11 1 Do not over tightening Loosen the ring nut 3 1 4 turn Checkthe front fork by turning it lock to lock If there is any binding remove the front fork assembly and inspect the steering ball bear ings and ball races Install rubber washer and ring nut 2 then turn the rin...

Page 153: ...not turn the ring nut 2 towards tighten direction until slots alignment Install special washer NOTE Insert the projections of the special washer into the slots Install ring nut 1 and tighten 166Nm 6 6 m kg 47 8ft lb I 6 33 D o w n l o a d e d f r o m w w w S c o o t e r T i m e n e t ...

Page 154: ...val Steering Under fender 1 Speedometer cable holder 1 Cap bolt 2 Pinch bolt 2 Front fork 2 Remove the parts in order Refer to Steering section lRefer to FRONT FORK REMOVAL IN STALLATION section Reverse the removal procedure for in stallation 6 34 D o w n l o a d e d f r o m w w w S c o o t e r T i m e n e t ...

Page 155: ...er washer 1 1 Inner tube 1 Damper rod 1 1 Rebound spring 1 Oil lock piece 1 1 Oil seal clip 1 Oil seal 1 Outer tube 1 Remarks Remove the parts in order Refer to FRONT FORK REMOVAL IN STALLATION section Referto FRONTFORKDISASSEMBLY ASSEMBLY section Reverse the disassembly procedure for assembly 6 35 D o w n l o a d e d f r o m w w w S c o o t e r T i m e n e t ...

Page 156: ...terstand 1 Remove Under fender 2 Remove Cap bolt Pinch bolt W kvAv 1 II 1 Fork spring will jump out after removing cap bolt 3 Remove Front fork Left Right YP703020 FRONT FORK DISASSEMBLY 1 Remove Bolt damper rod Loosen the bolt damper rod while holding the damper rod with T handle and holder 1 T handle YM 1326 Holder YM 01300 1 6 36 D o w n l o a d e d f r o m w w w S c o o t e r T i m e n e t ...

Page 157: ...ing I l Inner tube bending limit 0 2 mm 0 008 in Scratches be nds da m age Replace W VAV I II 1 Do not attempt to straighten a bent inner tube as this may dangerously weaken the tube Q YP FRONT FORK ASSEMBLY Reverse the DISASSEMBLY procedure Note the following points 1 Install Damper rod Rebound spring Oil lock piece Inner tube L 6 37 D o w n l o a d e d f r o m w w w S c o o t e r T i m e n e t ...

Page 158: ...1326 A Holder YM 01300 1 5 Install Oil seal Retaining clip Use the fork seal driver weight and the attachment NOTE Before installing the oil seal apply lithium soap base grease onto the oil seal lips Adjust the retaining clip so that it fits into the outer tube groove 6 38 CAUTION Make sure that the oil seal numbered side faces upward Fork seal driver weight YM 33963 Attachment YM 01400 D o w n l ...

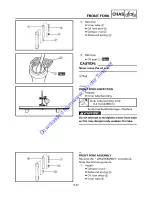
Page 159: ...ng O NOTE Install the fork spring with its smaller pitch upward Before installing the cap bolt apply grease to the O ring Temporarily tighten the cap bolt EB703050 FRONT FORK INSTALLATION Reverse the REMOVAL procedure Note the following points 1 Install Front fork NOTE Apply grease onto cap bolt O ring before in stalling cap bolt Tighten Cap bolts Pinch bolts 1 38Nm 3 8 m kg 27 ft lb I I 40Nm 4 0 ...

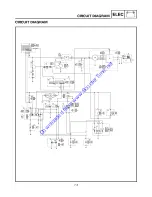
Page 160: ...CUIT DIAGRAM 111L u i i I i i l I 0 __1 I I I III L I II l I I 1 2 I __i I I 4 4 I B I I I1 II I 1 _EB I I I i I I L I I I I I i I I i i L J b__ _J o L _E 2 ____ I 7 2 D o w n l o a d e d f r o m w w w S c o o t e r T i m e n e t ...

Page 161: ...Sky blue P Pink R Red Gy Y W B R Br W G R G Y L B L Y L W Head light for low beam Flasher relay Horn Handlebar switch left Horn switch Dimmer switch Turn switch Fuel sender Meter Fuel gauge Oil indicator light Meter light High beam indicator light Turn indicator light Oil level gauge Handlebar switch right Starter switch Engine stop switch Gray Yellow White Black Red Brown White Green Red Green Ye...

Page 162: ...elector to xl E2 X Br R OFF ON O O O SWITCH CONNECTION AS SHOWN IN THIS MANUAL This manual contains connection charts like the one shown on the left showing the termi nal connections of switches e g the main switch handlebar switch brake switch light ing switch etc The column on the extreme left indicates the different switch positions the top line ind icates the colors of the leads connected to t...

Page 163: ...in the chart Poor connection fault Repair or replace 7 Rear brake switch I I Horn switch P B Release Push in O 0 Dimmer switch G L Y C O 43 gO 00 Turn switch Ch Br VV Dg O O O O L J I I I t I I I I I L Main switch LOCK OPEN OFF Gy Br R B B VV C O ON C O0 O r Front brake switch I I I L iI L Start switch L W L G Release Push in O O Engine stop switch B W B W L G B OFF RUN 0 0 0 0 F Fuse J 7 5 D o w ...

Page 164: ...is scooter are shown in the illustration on the left Bulbs and are used for the headlights and usually use a bulb holder that must be detached before removing the bulb The ma jority of these types of bulbs can be removed from their respective socket byturning them co u nterclockwise Bulbs are used for turn signal and tail brake lights and can be removed from the socket by pushing and turning the b...

Page 165: ...the life of the bulb and the luminous flux will be adversely affected If the headlight bulb gets soiled thoroughly clean it with a cloth moistened with alcohol or lacquer thinner Check bulb for continuity with the pocket tester No continuity Replace 1 Pocket tester YU 03112 NOTE Before checking for continuity set the pocket tester to 0 and to the El x 1 range 18410002 7 7 a Connect the positive te...

Page 166: ...ester I YU 03112 NOTE Check each bulb socket for continuity in the same manner as described in the bulb section however note the following a Install a good bulb into the bulb socket b Connect the pocket tester probes to the respective leads of the bulb socket c Check the bulb socket for continuity If any of the readings indicate no continuity re place the bulb socket 7 8 D o w n l o a d e d f r o ...

Page 167: ... wa or I B B I B I I I I _ I I L I r __ ___J ___ ____ 2 ___ t B v v F l r q I I I L_ I I I I L_ S _ _ _ _ I I I Io I _ _ j L J S F ____ I l b L I Main switch C D I magneto C D I unit Ignition coil Spark plug 3 Engine stop switch 7 9 D o w n l o a d e d f r o m w w w S c o o t e r T i m e n e t ...

Page 168: ...e spark plug type Checkthe spark plug gap Refer to the SPARK PLUG INSPECTION section in the CHAPTER3 CORRECT 2 Ignition spark gap Disconnect the spark plug cap from spark plug Connect the dynamic spark tester as shown Spark plug cap Checkthe ignition spark gap Start engine and increase spark gap until misfire occurs Minimum spark gap 6 0 mm 0 24 in I OUT OF SPECIFI CATION OR NO SPARK Standard spar...

Page 169: ...RICAL COMPONENTS Main switch Flasher relay Oil level gauge C D I UNIT Fuel level gauge Starter relay Fuse ELECTRICAL Battery Ignition coil Rectifier Regulator Horn F 0 Y 7 1 D o w n l o a d e d f r o m w w w S c o o t e r T i m e n e t ...

Page 170: ...gnition coil Tester lead Terminal Tester lead Coil base Check the primary coil for specification resistance Primary coil resistance 0 32 0 48 E2at 20 C 68 F Connect the pocket tester Q x 1 k to the ignition coil Tester lead Spark plug lead Tester lead Coil base Check the secondary coil for specificated resistance Secondary coil resistance 5 68 8 52 k at 20 C 68 F Spark plug lead Coil base BOTH MEE...

Page 171: ...ect the source coil coupler from the wireharness Connect the pocket tester 100 to the source coil terminal Tester lead Black Red lead Tester lead Green White Check the source coil for specificated re sistance Sourcecoilresistance 640 960 E2at 20 C 68 F Black Red Green White 7 MEET SPECIFICATION 7 Main switch Refer to CHECKING SWlTCHS section CONTINUITY OUT OF SPECIFICATION I Pickup coil is faulty ...

Page 172: ...9 Wiring connection Check the entire ignition system for conneo tions Refer to the WIRING DIAGRAM section C O R R E C T I Replace CDI unit NO CONTINUITY I Engine stop switch is faulty replace it I POOR CONNECTION I Correct I 7 13 D o w n l o a d e d f r o m w w w S c o o t e r T i m e n e t ...

Page 173: ...eeL r 4 1 II rq iI _t_ll l l i I i _li ___ T 1 _ _ _ I 14 IHb L i D _ B i I J C 1 I I BI I I I rm 78 r i I I I o d E I R_ I I L I i TE B L_ _ L__ _J i L_____ i I I I I i i i Main fuse Battery Rectifier Regulator CDI magnet 7 14 D o w n l o a d e d f r o m w w w S c o o t e r T i m e n e t ...

Page 174: ... 8036 A I 1 1 Pocket tester YU 03112 1 Fuse main Remove the fuse Connect the pocket tester 1 x 1 to the fuse Check the fuse for continuity CONTINUITY 2 Battery Check the battery condition Refer to the BATTERY INSPECTION sec tion in the CHAPTER 3 Open circuit voltage 12 8V or more at 20 C 68 F 7 CORRECT NO CONTINUITY I Fuse is faulty replace it INCORRECT I o Clean battery terminals Recharge or repl...

Page 175: ...coil resistance Disconnect the charging coil coupler from the wireharness Connect the pocket tester x 1 to the charging coils Measurethe charging coil and lighting coil resistance Charging coil resistance Tester lead White lead Tester lead Earth Lighting coil resistance Tester lead Yellow Red Tester lead Earth Charging coilresistance 0 48 0 72 at 20 C 68 F Lighting coil resistance 0 4 0 6 at 20 C ...

Page 176: ...ring connection i Check the entire ignition system for con nections Refer to the WIRING DIAGRAM section o Replace rectifier regulator POOR CONNECTION I Correct 7 17 D o w n l o a d e d f r o m w w w S c o o t e r T i m e n e t ...

Page 177: ... I L __ I 71 I I I 1 I I r I s D fl t_B_j L_ L B Y B f I I o d Z S4 I I ITZ I o _ I L I I I I I I i a G I 3 B B L_ _J L__ _J S I L I l 0B8I Main switch Main fuse Battery Starter relay Starter motor Rear brake sv switch Front brake switch Engine stop switch Starter switch 7 18 D o w n l o a d e d f r o m w w w S c o o t e r T i m e n e t ...

Page 178: ...the CHAPTER 3 Open circuit voltage 12 8 V or more at 20 C 68 F S CORRECT 3 Startermotor Connect the battery positive terminal and starter motor cable using a jumper lead t J Check the starter motor for operation S MOVES NO CONTINUITY I Fuse is faulty replace it INCORRECT l e Clean battery terminals Recharge or replace battery WARNING A wire for the jumper lead must have the equivalent capacity as ...

Page 179: ...ead terminal Tester lead terminal CONTINUITY 5 Main switch Refer to CHECKING SWITCHS section CONTINUITY 6 START switch Refer to CHECKING SWlTCHS section 7 CONTINUITY 7 Engine stop switch Refer to CHECKING SWlTCHS section 9 CONTINUITY NO CONTINUITY J Replace the starter relay NO CONTINUITY J Main switch is faulty replace it NO CONTINUITY 1 START switch is faulty replace handlebar switch right J Eng...

Page 180: ...f Check the brake switch for continuity Switch Position Good condition Brake is applied 0 Brake is X not applied Bad condition O Continuity X GOOD CONDITION 9 Wiring connection Checkthe entire electrical starting system for connections Refer to WIRING DIAGRAM section I Replace brake switch es POOR CONNECTION I Correct 7 21 D o w n l o a d e d f r o m w w w S c o o t e r T i m e n e t ...

Page 181: ...de cover Center cowling Muffler Rear wheel Air shroud 3 Starter motor coupler Starter motor Q ty m Remarks Remove the parts in order Refer to COVER PANEL CHAPTER 3 section in Refer to REAR WHEEL AND REAR BRAKE section in CHAPTER 6 Refer to ENGINE REMOVAL section chapter 4 Reverse the removal procedure for in stallation 7 22 D o w n l o a d e d f r o m w w w S c o o t e r T i m e n e t ...

Page 182: ...b name Part name Cb Starter motor disassembly O ring Rear bracket Armature ass y Ring Brush holder set Q ty Remarks 1 m 1 1 1 1 Disassembly the parts in order Refer to Starter motor assembly Reverse the disassembly procedure for assembly 7 23 D o w n l o a d e d f r o m w w w S c o o t e r T i m e n e t ...

Page 183: ...f specification Scrape the mica to the proper value a hacksaw blade can be ground to fit NOTE The mica insulation of the commutator must be undercut to ensure proper operation of com mutator m 4 J 4 Inspect Armature coil resistances installation continuity Defects Replace the starter motor If commutator is dirty clean it with sand paper Good condition Bad condition 0 x x 0 x 0 O Continuity x No co...

Page 184: ...Measure Brush length Out of specification Replace I 1 Brush length wear limit 3 0 mm 0 012 in Measure Brush spring force Fatigue out of specification Replace as a set 7 25 D o w n l o a d e d f r o m w w w S c o o t e r T i m e n e t ...

Page 185: ...I D _ B I J C 1 I I BI I I I iI 4 lr ml r i I UL I L r R_ I l l I L I I TE B L_ _J L__ _J i L_____ i I I I I I I I Main switch Fuse Battery C D I magneto Tail light Licence light Head light for high beam Head light for low beam Light dimmer switch Meter light High beam indicator light 7 26 D o w n l o a d e d f r o m w w w S c o o t e r T i m e n e t ...

Page 186: ...over Use the special tools specified in the troubleshooting section ckettester I YU 03112 YP 1 Fuse NO CONTINUITY Referto CHECKING SWITCHES sectionlIII CONTINUITY IReplace the fuse YP 2 Battery Check the battery condition Refer to BATTERY INSPECTION sectior in CHAPTER 3 C O R R E C T IN CORRECT D o Clean battery terminals Recharge or replace battery YP 3 Main switch I NOCONTINUlTY Refer to CHECKIN...

Page 187: ...t the pocket tester x 1 to the lighting coils Measure the lighting coil resistances Tester lead Yellow Red lead Tester lead Earth Lighting coilresistance 0 4 0 6 at 20 C 68 F MEET SPECIFICATION NO CONTINUITY i l Replace the left handlebar switch OUT OF SPECIFICATION I Lighting coil is faulty replace it 7 28 D o w n l o a d e d f r o m w w w S c o o t e r T i m e n e t ...

Page 188: ...ket Refer to CHECKING SWITCHES section 7 CONTINUITY 2 Voltage Connect the pocket tester DC20V to the headlight and high beam indicator light couplers When the dimmer switch is on low beam IBIWhen dimmer switch is on high beam Headlight low beam Tester lead Green O lead Tester lead Black lead Headlight high beam Tester lead Yellow lead Tester lead Black lead High beam indicator light Tester lead Ye...

Page 189: ...ter DC20V to the bulb socket coupler Tester lead Blue terminal Tester lead Black terminal L G_ y B Turn the main switch to on Start the engine Check the voltage 12V of the leads on the bulb socket connector g MEETS SPECIFICATION I This circuit is not faulty OUT OF SPECIFICATION I The wiring circuit from the main switch to bulb socket connector is faulty Repair I NO CONTINUITY 1 I Replace the bulb ...

Page 190: ...ead Brown lead Tester lead Black lead Turn the main switch to on Check the voltage 12V on the Brown lead at the bulb socket connector MEETS SPECIFICATION 12V I This circuit is not faulty NO CONTINUITY I Bulb and or bulb socket are faulty replace I OUT OF SPECIFICATION l I Wiring circuit from main switch to bulb socket connector is faulty Repair 7 31 D o w n l o a d e d f r o m w w w S c o o t e r ...

Page 191: ...ester lead Brown terminal Tester lead Black terminal Turn the main switch to on GH Br B Ch Dg Checkthe voltage 12V on the bulb socket connector MEETS SPECIFICATION I This circuit is not faulty NO CONTINUITY I Replace the bulb and or bulb socket OUT OF SPECIFICATION I The wiring circuit from main switch to bulb I I connector is faulty Repair I 7 32 D o w n l o a d e d f r o m w w w S c o o t e r T ...

Page 192: ...I 3 L_ _J L__ S I b I l 0B8 I I _J Main switch Main fuse Battery Rear brake switch Front brake switch Brake light Rear flasher light right Rear flasher light left Front flasher light right Front flasher light left Flasher relay Horn Handlebar switch Left Horn switch Turn switch Fuel sender Fuel meter Oil indicator light Turn indicator light Oil level gauge 7 33 D o w n l o a d e d f r o m w w w S ...

Page 193: ... Right 3 Upper cover 7 Center cover 4 Rear carrier Use the special tools in the troubleshooting section P ckettester I YU 03112 P NO CONTINUITY I 1 Fuse Refer to CHECKING SWITCHES section C O N T I N U I T Y YP 2 Battery Check the battery condition Refer to BATTERY INSPECTION section in CHAPTER 3 C O R R E C T 3 Main switch YP Refer to CHECKING SWITCHES section X CONTINUITY I Replace the fuse IN C...

Page 194: ... entire sig nal system Refer to CIRCUIT SYSTEM WIRING DIA GRAM section CONTINUITY Check condition of each of the signal system s circuits Refer to SIGNAL SYSTEM CHECK sec tion POOR CONNECTION I Correct I 7 35 D o w n l o a d e d f r o m w w w S c o o t e r T i m e n e t ...

Page 195: ...e horn terminal MEETS SPECIFICATION 3 Horn Connect the pocket tester DC20V to the horn at the Pink terminal Tester lead Pink terminal Tester lead Frame ground Turn the main switch to on Check for voltage on the Pink lead at the horn terminal C O N T I N U I T Y i Adjust or replace horn I Replace the left handlebar switch _L i LoLI OUT OF SPECIFICATION I The wiring circuit from the main switch to t...

Page 196: ...ect the pocket tester DC20V to the bulb socket connector Tester lead Green Yellow terminal Tester lead Black terminal Turn the main switch to on The brake lever is pulled in Check for voltage 12V of the Green Yel low lead on the bulb socket connector MEETS SPECIFICATION JThis circuit is not faulty OUT OF SPECIFICATION 4 Wiring connection Wiring circuit from the main switch to the bulb socket conne...

Page 197: ...n lead Tester lead Black lead Turn the main switch to on Check for voltage 12V of the Brown lead at the flasher relay terminal OUT OF SPECIFICATION MEETS SPECIFICATION 4 Voltage Connect the pocket tester DC20V to the flasher relay coupler Tester lead Brown White lead Tester lead Black lead Turn the main switch to on Check for voltage 12V on the Brown White lead at the flasher relay terminal 7 MEET...

Page 198: ...g circuit from theturn switch to bulb socket connector is fault Repair Refer to CIRCUIT DIAGRAM 4 OIL indicator light does not come on 1 Bulb and bulb socket Checkthe bulb and bulb socket for conti nuity CONTINUITY 2 Oil level switch Remove the oil level switch from the oil tank Connect the Pocket Tester x 1 to the oil level switch Tester Lead Brown Tester Lead Gray Check the oil level gauge for c...

Page 199: ...from the fuel tank Disconnect the fuel sender coupler from the wireharness Connect the pocket tester xl0 to the fuel sender coupler lead Tester lead Green terminal Tester lead Black terminal Check the fuel sender for specificated re sistance Jl Float position Specificated resista nce UP 4 10 DOWN 90 100 7 BOTH MEET SPECIFICATION OUT OF SPECIFICATION 4 Wiring connection Checkthe entire signal syste...

Page 200: ...P or DOWN I Turn the main switch to ON Check the fuel gauge needle moves F or E Float position Needle moves Float UP F Float DOWN E 7 M O V E S I This circuit is not faulty II G I Ch II OUT OF SPECIFICATION l Checkthe connection of the entire signal sys tem Refer to CHECKING OF CONNECTIONS Refer to CIRCUIT DIAGRAM NOTE Before reading the meter stay put the float for more than three minutes respect...

Page 201: ...__I B a L r 1 __ _8 i1 I I r I I I___ I I I IB Y B I o H I I 1 IT 7T I I l i_ l L_ Ira I I o L I I I Lit_ I 6 L ___ T _ 1 I I r I S D fl t_B_j L_ L I I I I i 71 L_ _J L__ s e I L I l 0B8 I I _J 7 Auto choke C D I magneto 7 42 D o w n l o a d e d f r o m w w w S c o o t e r T i m e n e t ...

Page 202: ... special tools specified in the troubleshooting section 1 P cket tester I YU 03112 1 Lighting coil resistance Disconnectthe CDI magneto couple from wire harness Connect the pocket tester E2 xl to the lighting coil coupler Tester Lead Yellow Red terminal Tester Lead Frame earth C D I magneto w Y R Checkthe lighting coil for specificated re sistance Lighting coil resistance 0 4 0 6 20 C 68 F MEETS S...

Page 203: ...lead Tester lead Black terminal Tester lead Black terminal _ Auto choke unit resistance 8 12 at 20 C 68 F M E E T S SPECIFICATION 3 Wiring connection Check the connection of the entire auto choke system Refer to CIRCUIT DIAGRAM section OUT OF SPECIFICATION I Replace the auto choke unit POOR CONNECTION I Correct 7 44 D o w n l o a d e d f r o m w w w S c o o t e r T i m e n e t ...

Page 204: ...ated fuel or fuel containing water or foreign material Clogged fuel tank cap L Clogged fuel hose Clogged fuel cock Faulty fuel cock operation Broken or disconnected fuel cock Carburetor Auto choke Air cleaner Deteriorated fuel fuel containing water or foreign material Clogged pilot jet Clogged pilot air passage Sucked in air Deformed float Groove worn needle valve Improperly sealed valve seat Impr...

Page 205: ...PRESSION SYSTEM PROBABLE CAUSE Cylinder and cylinder head Piston and piston rings Crankcase and crankshaft L L Loose spark plug Loose cylinder head or cylinder Broken cylinder head gasket Broken cylinder gasket Worn damaged or seized cylinder Improperly installed piston ring Worn fatigued or broken piston ring Seized piston ring Seized or damaged piston Improperly seated crankcase Improperly seale...

Page 206: ...em POOR MIDIUM AND HIGH SPEED PERFORMANCE POOR MEDIUM AND HIGH SPEED PERFOR MANCE Carburetor Air cleaner Muffler L Starter plunger malfunction Wax malfunction Faulty thermister Clogged air cleaner Faulty spark plug Faulty spark plug read Faulty C D I unit Faulty source coil Faulty ignition coil PROBABLE CAUSE Refer to starting failure Hard starting item Fuel system Ignition system compression syst...

Page 207: ...eave Compression spring Secondary sheave Clutch shoe POOR ACCELERATION POOR HIGH SPEED V belt Weight m Primary Secondary seave PROBABLE CAUSE Worn damaged or slipped V belt Worn damaged Damaged Damaged Damaged Pealed lining Seized primary sliding sheave and collar PROBABLE CAUSE Worn or slipped V belt Improper operation Damaged Damaged Improper operation Worn guide pin Plealed lining PROBABLE CAUS...

Page 208: ...mproper carburetor setting Clogged air filter Carbon accumulation of cylinder head Clogged Faulty oil pump Faulty oil quality Drag Fan damaged PROBABLE CAUSE L Faulty spark plug Improper spark plug heat range Faulty C D I unit Faulty source coil L Clogged fuel tank cap Clogged air filter Clogged carburetor L Worn cylinder Worn fatigued or broken piston ring Broken cylinder head gasket Broken cylin...

Page 209: ...ton ring m Crankcase and crankshaft PROBABLE CAUSE j High tension of kick clip Seized kick gear L Damaged or seized cylinder Damaged or seized piston Damaged or seized piston ring Improperly seated crankcase L Improperly seated crankshaft Damaged or seized crankshaft Damaged or seized crankshaft bearing KICK CRANK NOT RETURNING L Kick axle assembly PROBABLE CAUSE L Damaged kick return spring Kick ...

Page 210: ...easy brake shoe Oily or greasy brake drum Broken brake cable Worn brake pad Worn brake disc Air in brake fluid Leaking brake fluid Faulty master cylinder kit Faulty caliper seal kit Loose union bolt Broken brake hose Oily or greasy brake pad Oily or greasy brake disc PROBABLE CAUSE Bent deformed or damaged inner tube Bent or deformed outer tube Damaged fork spring Worn or damaged slide metal Impro...

Page 211: ...d ball bearing or bearing race Broken spring L Bonded front forks Tires Wheels Uneven tire pressures on both sides L Incorrect tire pressure Unevenly worn tires Damaged bearing L Bent or loose wheel axle Excessive wheel run out Frame m Engine bracket Rear shock absorber Twisted L Damaged head pipe Improperly installed bearing race Bent or damaged Fatigued spring L Oil leakage 8 8 D o w n l o a d e...

Page 212: ...ded Poor contacts main or light switch Bulb life expires PROBABLE CAUSE Improper bulb L_ Improperly grounded Faulty main and or light switch Bulb life expires PROBABLE CAUSE Improperly grounded Discharged battery Faulty flasher switch Faulty flasher relay Broken wireharness Loosely connected coupler Bulb burnt out Faulty fuse PROBABLE CAUSE Faulty flasher relay L Insufficient battery charged Bulb ...

Page 213: ...r relay Insufficient battery capacity nearly discharged Improper bulb Faulty main and or flasher switch PROBABLE CAUSE Improper bulb L Faulty flasher relay PROBABLE CAUSE Faulty battery Faulty fuse Faulty main and or horn switch Improperly adjusted horn Faulty horn Broken wireharness 8 10 D o w n l o a d e d f r o m w w w S c o o t e r T i m e n e t ...

Page 214: ... I ii I I _ _ j I II i_ _ _1 I I I 1 I I _ _ _ _ I I I I IiI I _ t G I 1 I I _1 t L__ m Jr m r I _ ___ I I __ I I i i L__ _ _t e L I I I I J I I t I I I I L I L nl t l I L D o w n l o a d e d f r o m w w w S c o o t e r T i m e n e t ...

Page 215: ...D o w n l o a d e d f r o m w w w S c o o t e r T i m e n e t ...

Page 216: ...OYAMAHA YAMAHA MOTOR TAIWAN CO LTD D o w n l o a d e d f r o m w w w S c o o t e r T i m e n e t ...

Page 217: ...Yamaha Motor Canada Ltd 480 Gordon Baker Road Toronto ON M2H 3B4 D o w n l o a d e d f r o m w w w S c o o t e r T i m e n e t ...

Reviews: