CHASSIS
3-23
TIP
Although the total number of clicks of a damping
force adjusting mechanism may not exactly
match the above specifications due to small dif-
ferences in production, the actual number of
clicks always represents the entire adjusting
range. To obtain a precise adjustment, it would
be advisable to check the number of clicks of
each damping force adjusting mechanism and
to modify the specifications as necessary.
EAM30240
CHECKING THE SWINGARM OPERATION
1. Check:
•
Swingarm smooth action
•
Swingarm free play
Refer to “SWINGARM” on page 4-28.
EAM30500
LUBRICATING THE SWINGARM PIVOT
1. Lubricate:
•
Oil seal
•
Collar
EAM30243
CHECKING THE TIRES
1. Measure:
•
Tire pressure
Out of specification
Regulate.
TIP
•
Check the tire while it is cold.
•
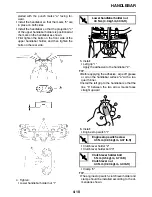
Because if the bead stopper tightening nut is
loose when the tire pressure is low, the tire
could slip off the rim, thus be sure to check and
tighten the bead stopper tightening nut “a”.
•
If the tire valve stem “b” is found tilted, the tire
is considered to be slipping off its position. Cor-
rect the tire position.
EAM30244
CHECKING AND TIGHTENING THE SPOKES
1. Check:
•
Spoke
Bend/damage
Replace.
Loose
Tighten.
TIP
A tight spoke will emit a clear, ringing tone; a
loose spoke will sound flat.
2. Tighten:
•
Spoke
(with a spoke nipple wrench “1”)
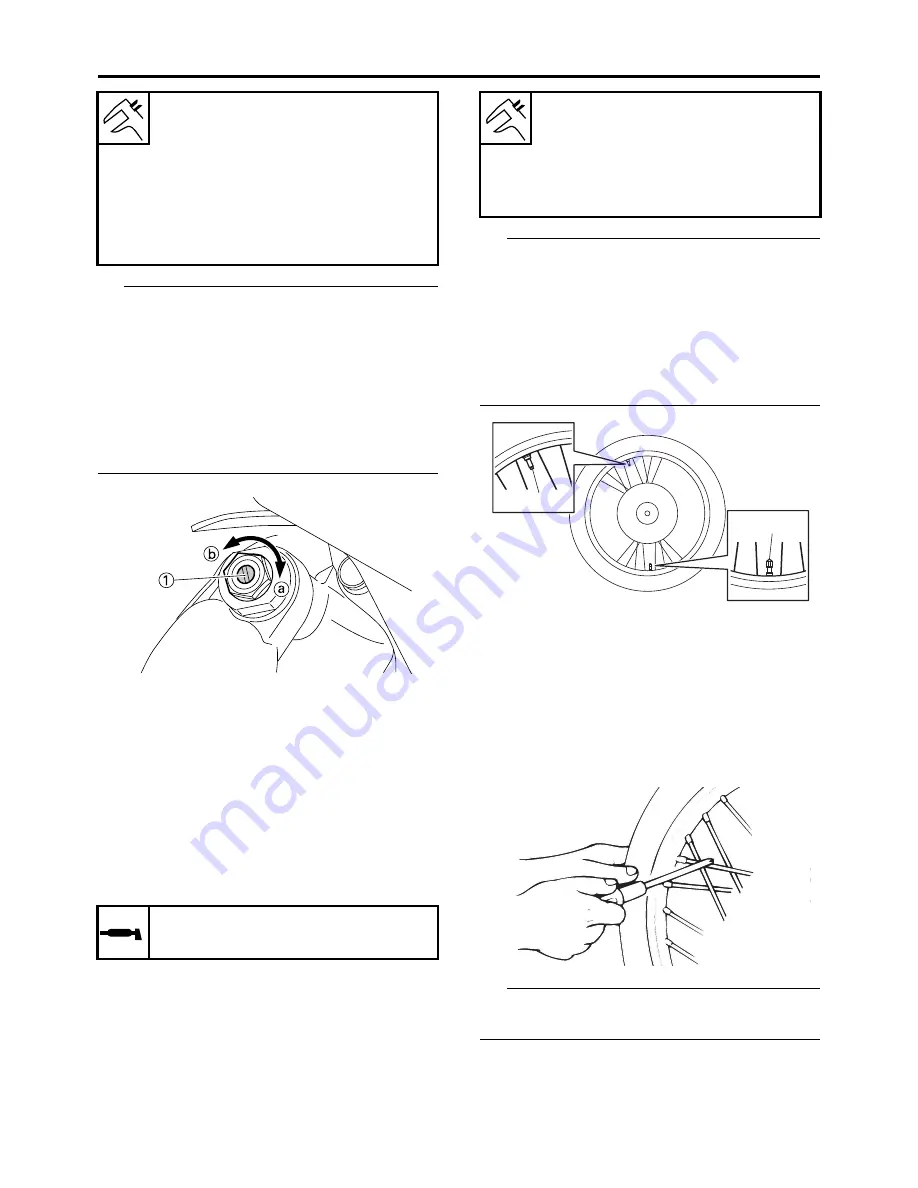
Slow compression damping
Minimum (soft)
20 click(s) in direction “b”*
Standard
12 click(s) in direction “b”*
Maximum (hard)
0 click(s) in direction “b”*
* With the adjusting screw fully turned in di-
rection “a”
Recommended lubricant
Lithium-soap-based grease
Tire air pressure (measured on
cold tires)
Front
100 kPa (1.00 kgf/cm², 15 psi)
Rear
100 kPa (1.00 kgf/cm², 15 psi)
a. Bead stopper tightening nut
b. Tire valve stem
a
b
G089059
Summary of Contents for YZ250 2021
Page 5: ...EAM20162 YAMAHA MOTOR CORPORATION U S A YZ MOTORCYCLE LIMITED WARRANTY ...
Page 6: ......
Page 8: ......
Page 10: ...MOTORCYCLE CARE AND STORAGE 1 16 CARE 1 16 STORAGE 1 17 ...
Page 42: ...TIGHTENING TORQUES 2 13 ...
Page 70: ...CHASSIS 3 26 ...
Page 106: ...CHAIN DRIVE 4 34 ...
Page 112: ...CLUTCH 5 5 ...
Page 113: ...1 2 3 4 5 6 7 8 9 10 ELECTRICAL SYSTEM WIRING DIAGRAM 6 1 COLOR CODE 6 1 ...
Page 128: ...TROUBLESHOOTING 7 13 ...
Page 146: ...CHASSIS 8 17 ...


