background image

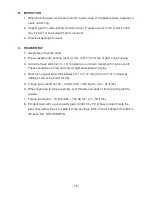
10. Be certain that exhaust pipe is flush with lower unit. 

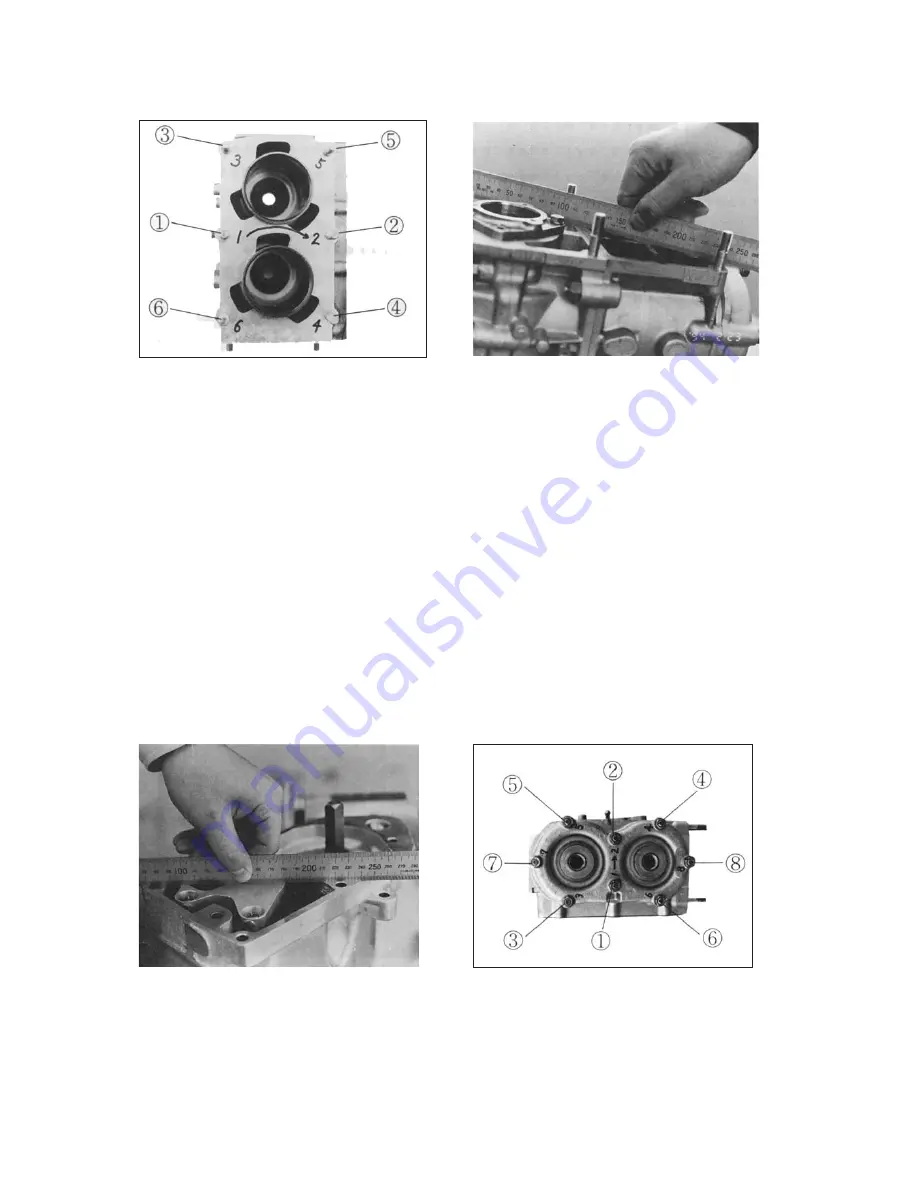
See figure 9.

11. Torque cylinder head 20 ~ 24 Nm (200 ~ 250 kg cm / 14 ~ 18 ft lbs). 

See figure

10

for proper sequence. CAUTION: It is of utmost importance that all bolts and

nuts be torqued as specified. Over-tightening can cause distortion with notice-
able loss of power.

– 10 –

Figure 7

Figure 8

Figure 9

Figure 10

Summary of Contents for 302

Page 1: ...302 YAMATO MOTOR CO LTD Ota Japan November 2012 M O D E L M A N U A L ...

Page 2: ...YAMATO EUROpE www YamatoRacing co uk ...

Page 3: ...ter use 5 7 Submerged motor 5 III DISASSEMBLY INSpECTION AND REASSEMBLY 7 1 Power Unit 7 A Disassembly 7 B Inspection 8 C Reassembly 8 2 Magneto 13 A Disassembly 13 B Reassembly 14 C Specification 14 3 Carburettor 14 A Disassembly 14 B Inspection 17 C Reassembly 17 4 Gearcase 18 A Disassembly 18 B Inspection 19 C Reassembly 19 IV TROUBLE SHOOTING 24 V CROSS SECTION OF MOTOR 25 VI pERFORMANCE CURVE...

Page 4: ... in relation to the job they perform Essentially this 33 h p engine is a strong twin which has been detuned by use of a low compression head mild port timing and one small carburettor When putting out 33 h p at 6 600 rpm the 302 is just Ioafing No wonder the Yamato has become the biggest and most popular class in UIM and APBA racing Compared with other stock powerheads which vibrate crack and fail...

Page 5: ...arefully It will help you get a good understanding of the precautions in operation and how to service and maintain it for maximum performance reliability and extended life As in most form of racing there is risk which may bodily injury The Yamato Motor Co suggest that extreme caution be taken whenever you operate this motor and cannot be responsible or liable for any mishaps that may occur while o...

Page 6: ...never propeller is removed or installed II 2 How to Start Motor A Set fuel cock in vertical position air vent located on fuel cap opened main needle opened 1 1 2 turn and spark plug wire attached to the appropriate plug B Check float pin Approximately 8mm 5 16 should be protruding above carburettor float cover C Set timing handle about midway of travel D Pull choke lever for cold motor only See fi...

Page 7: ...g propeller E Check motor If motor lacks power see trouble shooting chart II 4 Things to Observe and Adjust During Operation A Be sure timing lever Magneto 1 is in full advanced position B Open throttle for maximum power C Adjust high speed main needle Carb 16 for for maximum power D Check water outlet Be sure it is not steaming E Check RPM if tachometer is fitted Do not exceed 8 000 rpm F Listen ...

Page 8: ...urther internal damage 3 Turn motor by hand If complete revolution is possible without any bind complete the following a If motor has been submerged in salt water flush motor with fresh water through carburettor while turning motor slowly CIean exterior parts with fresh water b Remove starter pulley and coil plate assembly see par III 2 Flush with clean fresh water Clean and dry all electrical par...

Page 9: ...er CAUTION Remove spark plug wire when installing or removing propeller q Install on hull and run at least ten minutes at half throttle 4 If motor binds when turned by hand internal damage such as bent connecting rod bent crankshaft crankcase and or fracture in cylinder may have occurred Remove as much water as possible by following step 3 a thru 3 i Wash and coat internal and external parts with ...

Page 10: ... holding lower bearing case assembly P 18 It is not necessary to remove tail flange assembly except when replacing oil seal 13 Remove flywheel and key 14 Remove four 6 mm bolts holding upper bearing case assembly P 7 15 Split crankcase by removing 8 nuts and 2 socket head bolts using 12 mm socket 16 Split crankcase assembly by tapping with soft hammer CAUTION Do not pry with screwdriver or other s...

Page 11: ... with the following precautions 1 Lubricate all bearings 2 When placing crankshaft in crankcase be sure knock pin P 64 fits into split sleeve of center bearing P 15 Center bearing clip faces up See figure 5 3 After placing crankshaft in crankcase install two 6 mm bolts on upper bearing case assembly and one 6mm bolt on lower bearing case assembly on to crankcase See figure 3 and 4 4 Use gasket sea...

Page 12: ...that faces cylinder head is marked with a T 9 Be sure that cylinder block and crankcase is flush at bottom Torque cylinder to crankcase nut 30 34 Nm 300 350 kg cm 22 25 ft lbs See figures 7 and 8 9 Figure 3 Figure 4 Figure 5 Figure 6 ...

Page 13: ...que cylinder head 20 24 Nm 200 250 kg cm 14 18 ft lbs See figure 10 for proper sequence CAUTION It is of utmost importance that all bolts and nuts be torqued as specified Over tightening can cause distortion with notice able loss of power 10 Figure 7 Figure 8 Figure 9 Figure 10 ...

Page 14: ... 11 pOWER UNIT GROUp ...

Page 15: ...pOWER UNIT GROUp 12 ...

Page 16: ...42 washers M 20 and clamp plates M 41 5 Remove coil plate assembly M 1 Tap with soft hammer to lift up See figure 11 6 Remove flywheel nut M 46 Use special tool 102 809 0100 Clamp flywheel See figure 12 7 Remove flywheel M 44 using special tool 102 809 0200 See figure 13 8 Clean all parts in solvent Wipe dry or blow with air Figure 11 Figure 12 Figure 13 13 ...

Page 17: ...ark plug hole Rotate pulley to mark red line on coil plate assembly Spark plug of 1 cylinder should spark when inscribed mark on pulley on coil plate assembly See figure 14 C Specification 1 Ignition timing when using dial indicator in spark plug hole 0 200 0 250 5 6 6 mm 2 Spark distance min 0 24 6 mm 500 rpm min 0 40 10 mm 3000 rpm 3 Fly wheel nut torque 54 63 Nm 550 650 Kg cm 40 47 ft lbs 4 Pul...

Page 18: ... 15 MAGNETO GROUp ...

Page 19: ... 16 CARBURETTOR GROUp ...

Page 20: ... passage ways and jets for obstructions C Reassemble in Reverse Order CAUTION 1 Check throttle butterfly for smooth movement and proper return 2 Set float level to 29 mm Measure from tip of float pin to top of float See figure 15 Figure 15 3 Do not misplace main air jet C 30 and slow air jet C 31 Main air jet has an I D of 1 5 mm 0 059 Slow air jet C 31 has an I D of 0 9 mm 0 036 and is located be...

Page 21: ...wly heat tail cap assembly 100 120O C 200 250O F k Tap propeller shaft gently from gear end to remove propeller shaft with attached parts See figure16 1 Remove needle roller bearing G 32 m Remove clip G 21 n Remove two ball bearings G 20 3 Remove pinion gear nut G 17 using 14 mm box wrench 4 Remove clip G 14 5 Clamp pinion shaft G 10 in vice 6 Tap gear case with plastic or rubber hammer to remove ...

Page 22: ...5 to adjust up and down movement of pinion shaft There should be no bind and only a slight perceptible end play 4 Back lash of gear should be between 0 1 to 0 15 mm 0 004 to 0 01 Adjust by adding or removing shims G 26 5 Torque pinion shaft nut 30 34 Nm 300 350 Kg cm 22 25 ft lbs 6 When replacing tail cap assembly coat threads and body of tail cap with graphite grease 7 Torque tail cap 64 73 Nm 65...

Page 23: ... 20 LOWER UNIT GROUp ...

Page 24: ... 21 LOWER UNIT GROUp ...

Page 25: ...GEAR CASE GROUp 22 ...

Page 26: ... 23 FUEL TANK GROUp ...

Page 27: ... 24 IV TROUBLESHOOTING ...

Page 28: ... 25 V CROSS SECTION OF MOTOR ...

Page 29: ... 26 30 25 20 15 10 9 5 3000 4000 5000 6000 7000 4 0 3 5 3 0 kg m 500 400 300 g PSh Fuel Consumption Torque Horsepower YAMATO 302 pERFORMANCE CURVES VI pERFORMANCE CURVES Engine Revolution RPM HP ...

Page 30: ...2 Carburettor One Ventury 28mm 13 Ignition Transistor Magneto 14 Flywheel Weight 1 29 kg 2 86 lbs Min 15 Starting Rope 16 Gear Ratio 14 15 17 Fuel Regular petrol Min 86 Octane 18 Fuel Tank Capacity 2 3 Litre 0 6 Gallon 19 Oil 2 cycle watercooled 20 Fuel Mixing Ratio 30 1 21 Weight 41 7 Kg 92 lbs 22 Transom Height 343 mm 13 5 inches 23 Ignition Timing 5 6 4 mm 0 200 0 250 B T D C 24 Spark Plug NGK ...

Reviews: