background image

X4

5

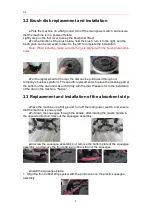
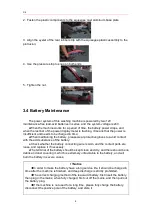
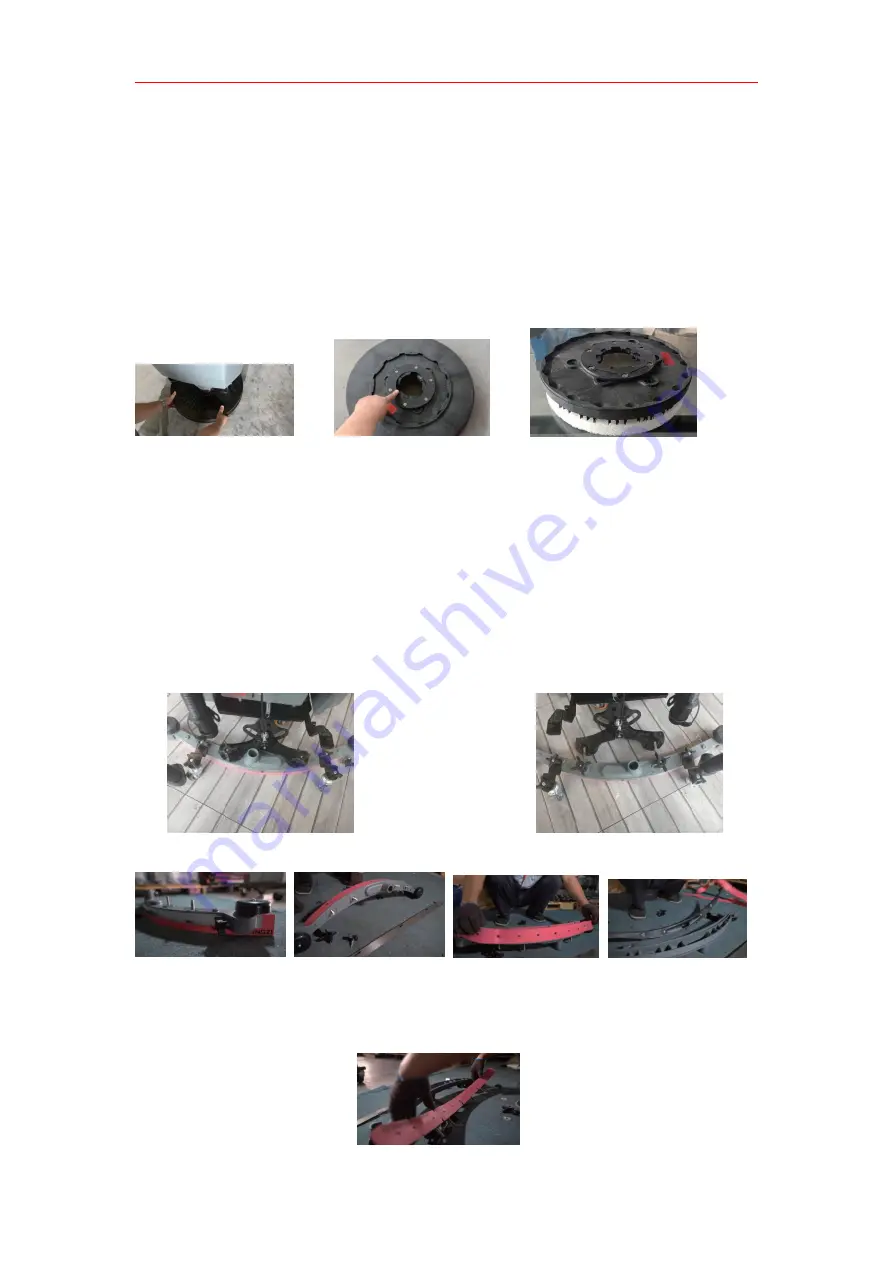
3.2 Brush disk replacement and installation

● Park the machine on a flat ground, turn off the main power switch, and ensure

that the machine is in a power-off state;

Lightly step on the foot lever to keep the brush disc lifted;

●For the direction of the brush plate, hold the brush, turn it to the right, and the

brush plate can be removed; rotate it to the left to complete the installation.

Note: When installing, make sure the flange is aligned with the brush plate button

holes.

●For the replacement of the dial, the dial can be purchased through our

company's business platform. The specific replacement is to place the cleaning pad at

the bottom of the dial and make it fit firmly with the dial. Please refer to the installation

of the dial on the machine. "Notice".

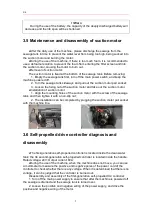
3.3 Replacement and installation of the absorbent strip

●Place the machine on a flat ground, turn off the main power switch, and ensure

that the machine is powered off.

●Put down the squeegee through the handle; after rotating the plastic handle in

the opposite direction, take out the squeegee assembly.

●Unscrew the squeegee assembly nut, remove the bottom plate of the squeegee

assembly, and remove the front and rear rubber strips of the squeegee.

●Install the squeegee blade.

1. Align the front rubber strip eyelets with the protrusions on the plastic squeegee

assembly

Summary of Contents for X4

Page 1: ...X4 FLOOR SCRUBBER Operating instruction...

Page 2: ...ne Maintenance and Disassembly and Replacement of Wearing Parts 4 Chapter 4 Analysis Table of Common Problems of Floor Scrubber 8 Chapter 5 Maintenance 9 Warranty card 11 Warranty Conditions 11 Floor...

Page 3: ...B Sewage pipe Suction pipe Squeegee Travel switch Performance parameters Category Self propelled Ordinary Drive motor power 300w Fresh water tank capacity 55L Recovery tank capacity 65L Battery capaci...

Page 4: ...silk ropes belts high temperature sundries accumulated water flammable or toxic and harmful substances so as to avoid entanglement burning the main brush and side brush and making them unable to work...

Page 5: ...h is in the ON position Before removing or installing batteries first disconnect the negative battery wire and then disconnect the positive battery wire When rewiring be sure to pay attention to the p...

Page 6: ...e flashing disk Forward and backward switch start this button to control the machine to move forward or backward Speed control switch press the tortoise button the machine runs at low speed press the...

Page 7: ...achine Before the normal operation of the machine make sure that the squeegee is installed correctly and the sewage suction pipe is inserted into the suction port 1 Use the handle to lower the squeege...

Page 8: ...loor it is necessary to add a cleaning pad to avoid the abrasion of the epoxy floor by the brush The machine is filled with clean water and attention should be paid to the clean water so as not to blo...

Page 9: ...placement of Wearing Parts 3 1 Periodic Inspection Regular maintenance and inspection Intervals h 4 50 100 200 500 1 Battery level detection 2 Motor carbon brush inspection 3 Whether the main brush is...

Page 10: ...ness platform The specific replacement is to place the cleaning pad at the bottom of the dial and make it fit firmly with the dial Please refer to the installation of the dial on the machine Notice 3...

Page 11: ...ective gloves to avoid contact with the acid substance of the battery Check whether the battery connecting wire is worn and the contact parts are loose and replace it if necessary The terminal of the...

Page 12: ...non slip nut 2 The installation can be completed by plugging the suction motor pair socket with the machine line 3 6 Self propelled drive controller diagnosis and disassembly The first generation sel...

Page 13: ...e is powered off the sewage is drained and the sewage tank is turned over 2 Remove the handle iron plate fixing screws 3 Loosen the positive and negative wiring of the power supply and drive the posit...

Page 14: ...too loud Please contact the service center Suction motor burned out Replace the suction motor Carbon brush wear Please contact the service center Little or no water flow out Clogged water tank drain v...

Page 15: ...vironment front and rear space at least 300mm Maintenance schedule Warranty Warranty is not covered under the following conditions of use Failure to perform maintenance in accordance with the maintena...

Page 16: ...e guaranteed within the warranty 4 During the warranty period users who do not follow the operating instructions or those who dismantle and repair by themselves will not be covered by the warranty if...

Page 17: ...X4 1...

Reviews: