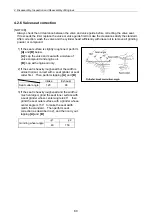
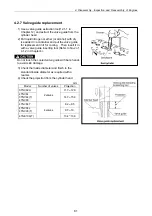
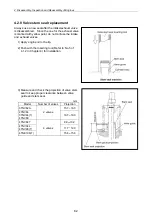
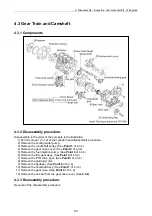
4. Disassembly, Inspection and Reassembly of Engines
86
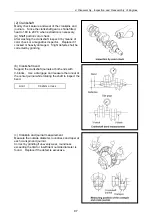
[Disassemble]
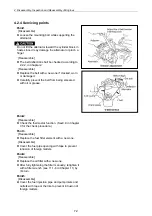
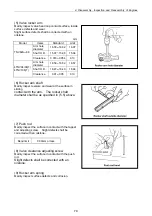
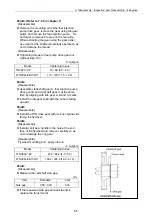
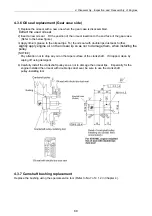
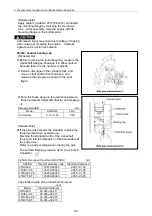
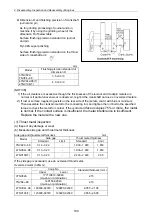
Since the camshaft gear is shrink-fit, heat it to
180
200 for extraction.
For camshaft removal, raise the engine with its
mounting flange at the bottom. After removing
the thrust metal mounting bolt from the camshaft
gear hole, extract the camshaft carefully so as not
to damage the bearing bushing.
Rotate the camshaft a few turns before extracting
it to prevent the tappet from being caught by the
cam.
After removing the camshaft, set the engine
horizontal and fix it on the base.
Unforeseen injury may arise due to falling of slipping
when raising the engine vertically or returning it to
the horizontal position. Proceed carefully so as not
to lose balance.
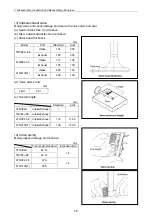
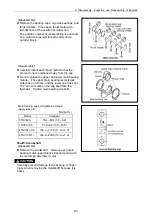
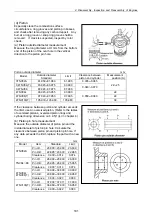
Point8: Gear case
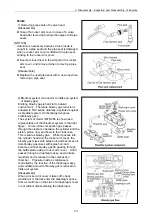
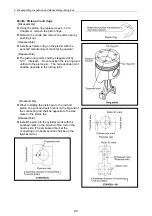
[Reassemble]
Do not forget to install the oil pan mounting bolts
on the bottom side when installing the gear case.
Apply sealant (code No.977770-01212) and install
the gear case by matching the two dowel pints.
Summary of Contents for 3TNV Series
Page 1: ...4TNV106 4TNV106T 4TNV94L 4TNV98 4TNV98T 3TNV82A 3TNV84 T 4TNV84 T 3TNV88 4TNV88 ...
Page 31: ...1 General 1 4 Engine External Views 16 ...
Page 32: ...1 General 1 5 Structural Description 17 ...
Page 156: ...9 Starting Motor 9 1 2 Components 141 ...
Page 157: ...9 Starting Motor 9 1 3 Troubleshooting 142 ...
Page 172: ...9 Starting Motor 9 2 3 Troubleshooting 157 ...
Page 175: ...9 Starting Motor 2 Removal of magnetic switch Remove the M6 bolts 10mm 2 160 ...
Page 185: ...9 Starting Motor 3 Brush 1 Check wear of the brush and the brush spring force 170 ...
Page 194: ...10 Alternator 179 10 1 6 Troubleshooting ...
Page 195: ...11 Electric Wiring 180 11 ELECTRIC WIRING 11 1 Electric Wiring Diagram ...
Page 213: ......


