4. Disassembly, Inspection and Reassembly of Engines
93
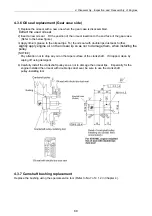
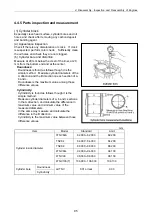
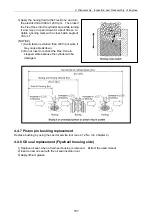
[Disassemble]
Remove the bearing caps, cap side bearings, and
thrust metals. Place each thrust metal with
identification of the position and direction.
The position number of reassembling is punched
on a metal cap (except for both ends) and a
cylinder block.
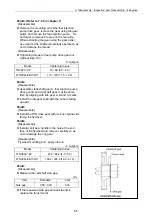
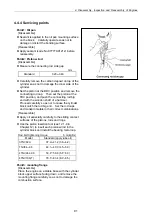
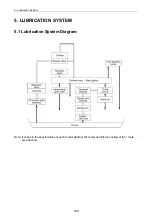
[Reassemble]
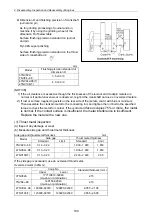
Carefully install each thrust metal so that the
grooved one is positioned away from the cap.
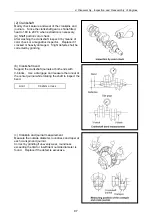
Do not confuse the upper and lower main bearing
metals. The upper main bearing metal (block
side) has an oil hole, and the lower one does not.
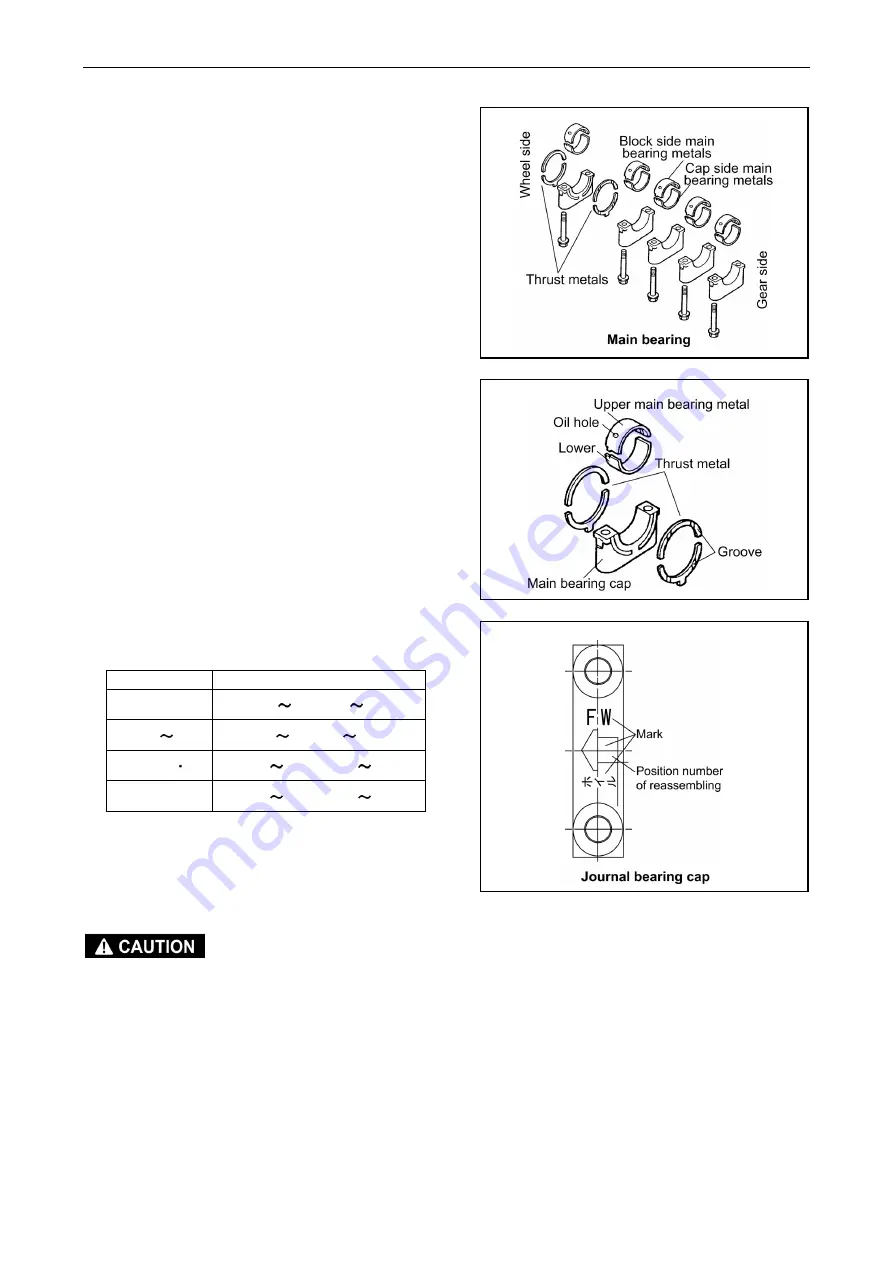
The “arrow” marks on the cap shall face the
flywheel. Tighten main bearing cap bolts.
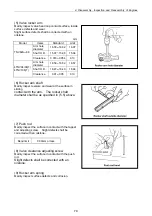
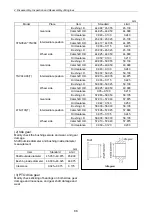
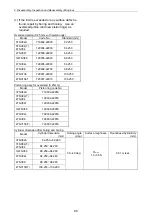
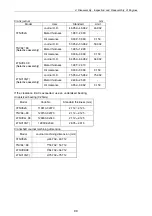
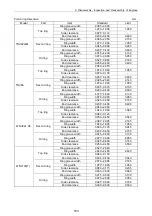
Main bearing cap bolt tightening torque
(apply lube oil)
Nm(kgf
・
m)
Model Standard
3TNV82A 76.4 80.4 (7.8 8.2)
TNV84 88 93.2 98.1(9.5 10.5)
4TNV94L 98 108.1 117.9 (11.0 12.0)
4TNV106(T) 186.2 205.8 (19.0 21.0)
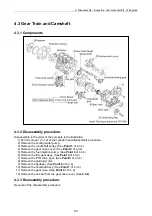
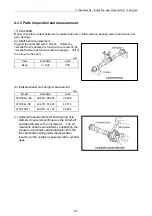
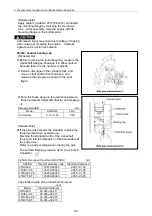
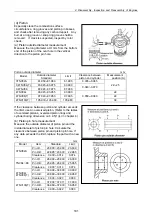
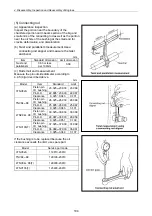
Point5: Crankshaft
[Disassemble]
Remove the crankshaft. Remove each main
bearing metal upper (block side) and pair it with
the metal cap side lower metal.
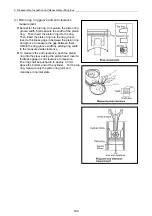
Carefully prevent damage to the bearing or finger
injury when removing the crankshaft because it is
heavy.
Summary of Contents for 3TNV Series
Page 1: ...4TNV106 4TNV106T 4TNV94L 4TNV98 4TNV98T 3TNV82A 3TNV84 T 4TNV84 T 3TNV88 4TNV88 ...
Page 31: ...1 General 1 4 Engine External Views 16 ...
Page 32: ...1 General 1 5 Structural Description 17 ...
Page 156: ...9 Starting Motor 9 1 2 Components 141 ...
Page 157: ...9 Starting Motor 9 1 3 Troubleshooting 142 ...
Page 172: ...9 Starting Motor 9 2 3 Troubleshooting 157 ...
Page 175: ...9 Starting Motor 2 Removal of magnetic switch Remove the M6 bolts 10mm 2 160 ...
Page 185: ...9 Starting Motor 3 Brush 1 Check wear of the brush and the brush spring force 170 ...
Page 194: ...10 Alternator 179 10 1 6 Troubleshooting ...
Page 195: ...11 Electric Wiring 180 11 ELECTRIC WIRING 11 1 Electric Wiring Diagram ...
Page 213: ......


