
4. Disassembly, Inspection and Reassembly of Engines
105
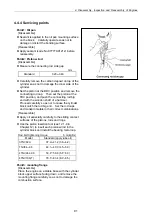
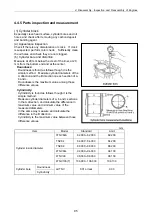
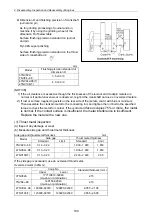
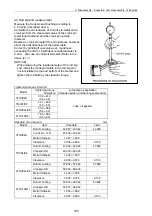
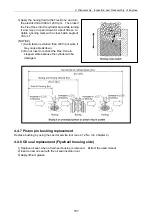
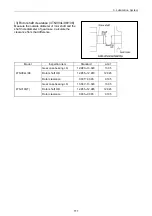
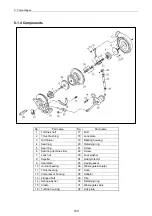
(d) Rod big end measurement
Measure the crankpin and bushing according to
4.4.5.(2)(c) described above.
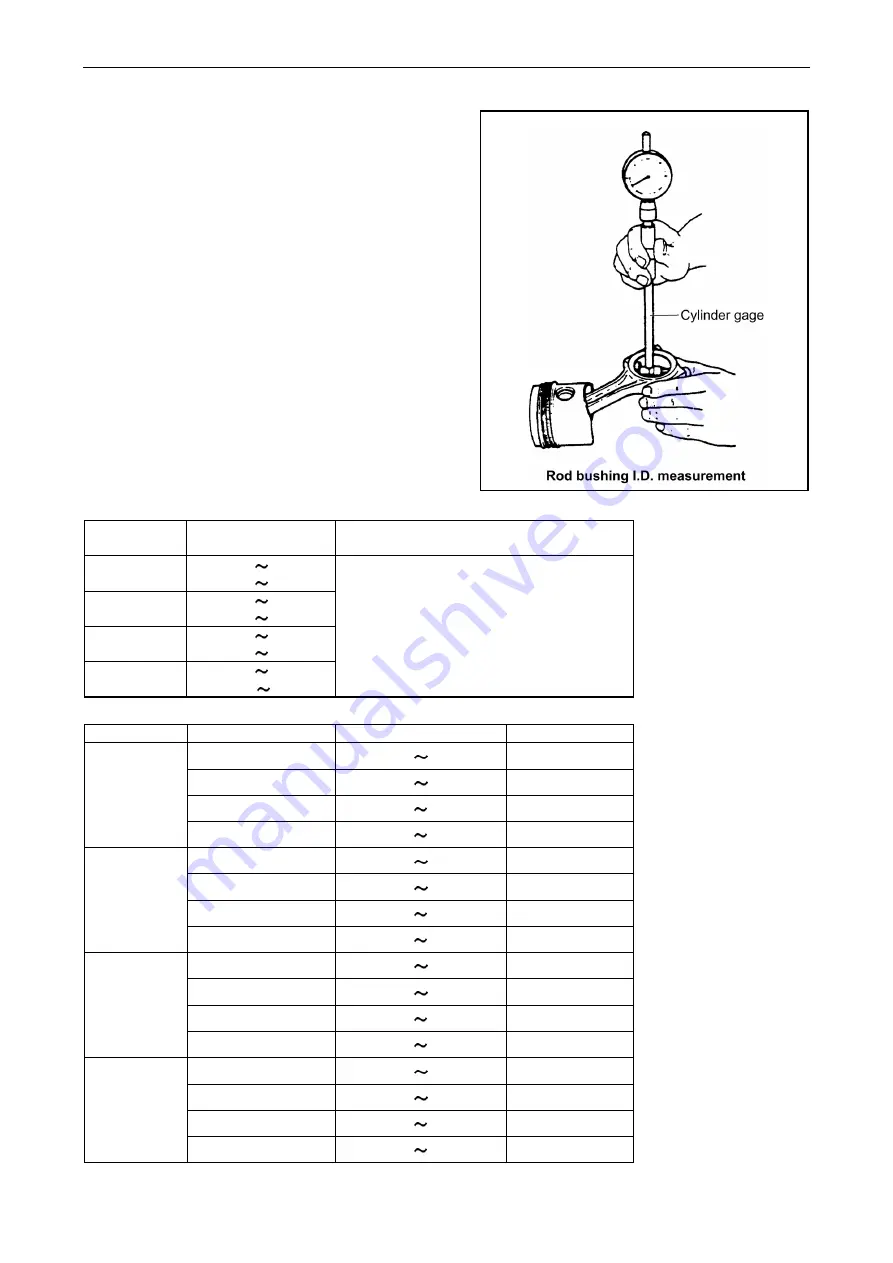
Calculate the oil clearance of a crank pin metal and a
crank pin from the measured values of the crank pin
metal inner diameter and the crank pin outside
diameter.
Replace a crank pin metal if the oil clearance becomes
about the limit dimension of the below table.
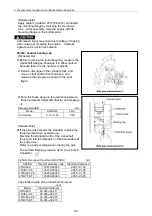
Correct by grinding if unevenly wear, roundness
exceeding the limit or insufficient outside diameter is
found. Also use an undersized metal. (Refer to the
above (2) c.)
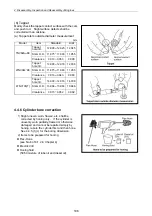
[NOTICE]
When measuring the inside diameter of the rod big
end, install the crankpin metals in the rod big end
not to mistake the top and bottom of the metals and
tighten the rod bolts by the standard torque.
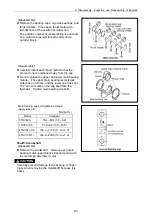
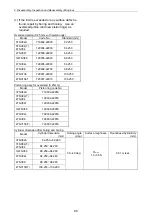
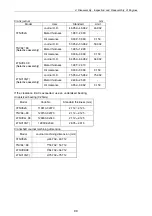
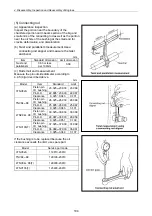
Tightening torque of rod bolt
Model
Tightening torque
Nm(kgf-m)
Lubricating oil application
(threaded portion, and bearing seat surface)
3TNV82A
37.2 41.2
(3.8 4.2)
TNV84/88
44.1 49.0
(4.5 5.0)
4TNV94L/98
53.9 58.8
(5.5 6.0)
4TNV106(T)
78.5 83.4
(8..0 8.5)
Lube. oil applied
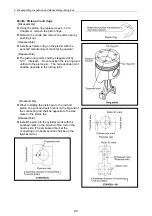
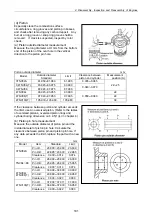
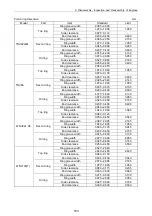
Standard of rod big end mm
Model Item
Standard Limit
Rod I.D. bushing
42.952 42.962 42.902
Crankpin O.D.
43.000 43.042 -
Metal thickness
1.487 1.500 -
3TNV82A
Clearance 0.038 0.090 0.150
Rod I.D. bushing
47.952 47.962 47.902
Crankpin O.D.
48.000 48.026 -
Metal thickness
1.492 1.500 -
TNV84/88
Clearance 0.038 0.074 0.150
Rod I.D. bushing
57.952 57.962 57.902
Crankpin O.D.
58.000 58.026 -
Metal thickness
1.492 1.500 -
4TNV94L/98
Clearance 0.038 0.074 0.150
Rod I.D. bushing
63.952 63.962 63.902
Crankpin O.D.
64.016 64.042 -
Metal thickness
1.984 1.992 -
4TNV106(T)
Clearance 0.054 0.090 0.150
Summary of Contents for 3TNV Series
Page 1: ...4TNV106 4TNV106T 4TNV94L 4TNV98 4TNV98T 3TNV82A 3TNV84 T 4TNV84 T 3TNV88 4TNV88 ...
Page 31: ...1 General 1 4 Engine External Views 16 ...
Page 32: ...1 General 1 5 Structural Description 17 ...
Page 156: ...9 Starting Motor 9 1 2 Components 141 ...
Page 157: ...9 Starting Motor 9 1 3 Troubleshooting 142 ...
Page 172: ...9 Starting Motor 9 2 3 Troubleshooting 157 ...
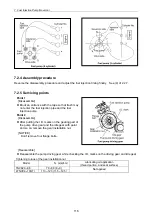
Page 175: ...9 Starting Motor 2 Removal of magnetic switch Remove the M6 bolts 10mm 2 160 ...
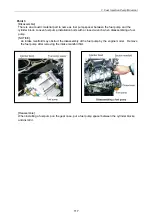
Page 185: ...9 Starting Motor 3 Brush 1 Check wear of the brush and the brush spring force 170 ...
Page 194: ...10 Alternator 179 10 1 6 Troubleshooting ...
Page 195: ...11 Electric Wiring 180 11 ELECTRIC WIRING 11 1 Electric Wiring Diagram ...
Page 213: ......


