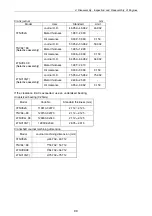
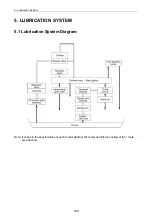
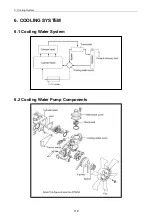
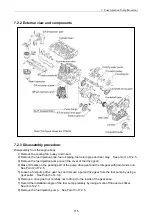

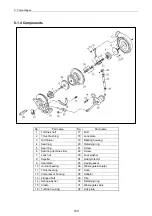
6. Cooling System
113
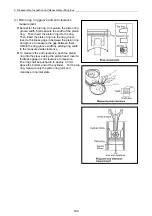
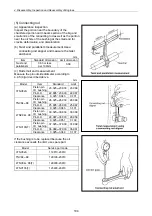
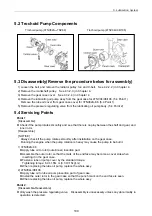
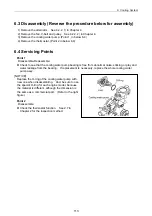
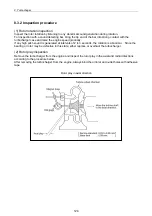
6.3 Disassembly (Reverse the procedure below for assembly)
1) Remove the alternator. See 4.2.2. 1) in Chapter 4.
2) Remove the fan, V-belt and pulley. See 4.2.2. 2) in Chapter 4.
3) Remove the cooling water pump. (Point 1, in below 6.4)
4) Remove the thermostat. (Point 2 in below 6.4)
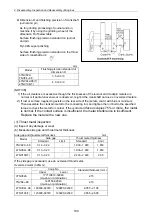
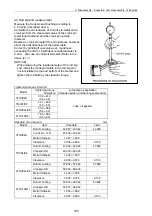
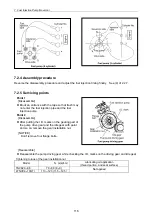
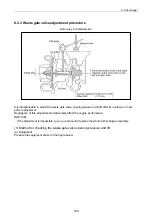
6.4 Servicing Points
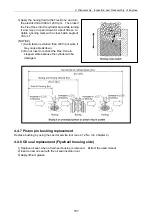
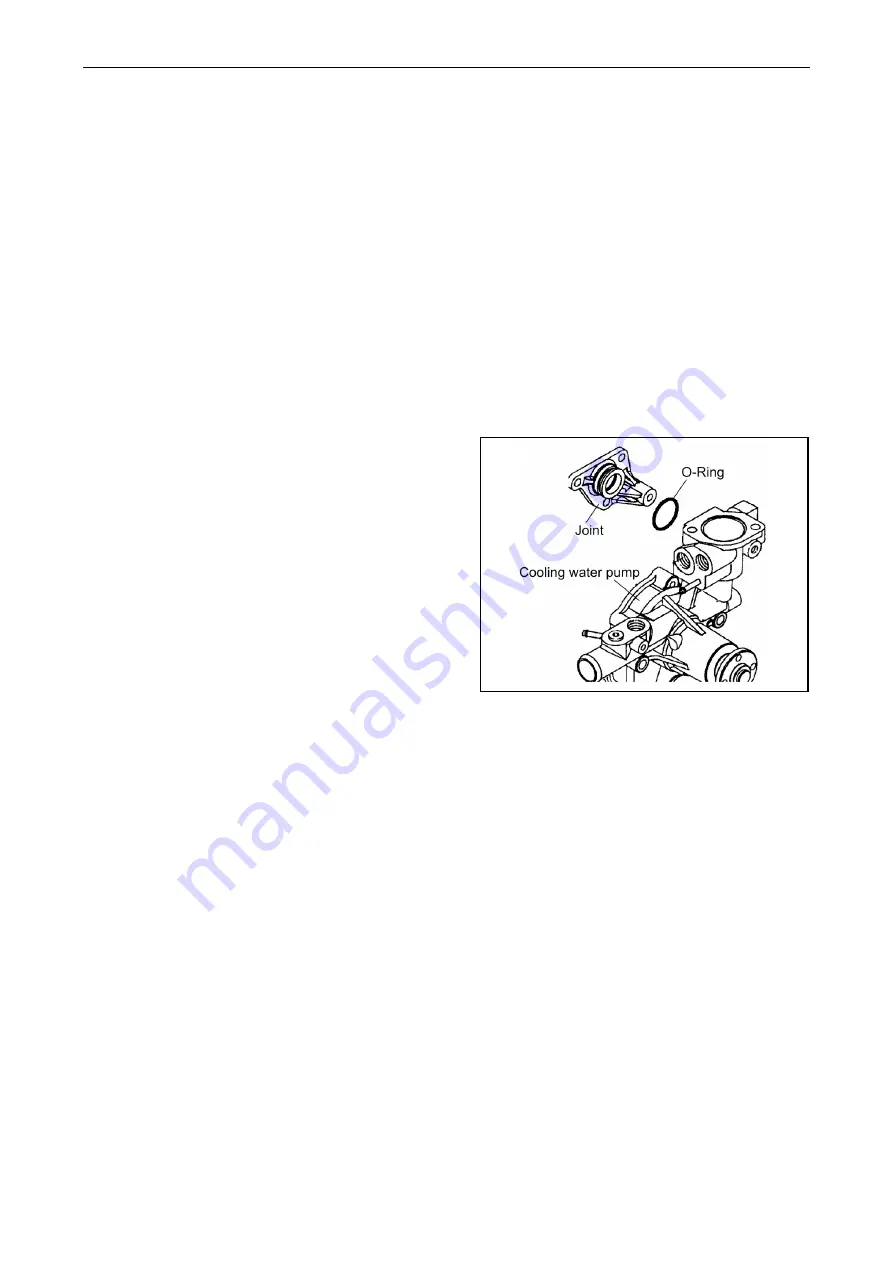
Point 1
Disassemble-Reassemble:
Check to see that the cooling water pump bearing is free from abnormal noise, sticking or play and
water leakage from the bearing. If replacement is necessary, replace the whole cooling water
pump assy.
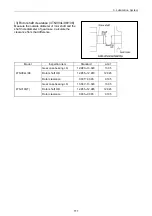
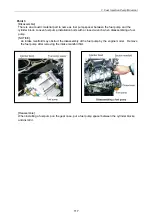
[NOTICE]
Replace the O-ring of the cooling water pump with
new one when disassembling. And, be sure to use
the special O-ring for each engine model, because
the material is different, although the dimension is
the same as a commercial part. (Refer to the right
figure.)
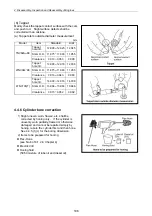
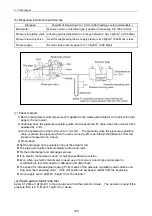
Point 2
Disassemble:
Check the thermostat function. See 2.7 in
Chapter 2 for the inspection method.
Summary of Contents for 3TNV Series
Page 1: ...4TNV106 4TNV106T 4TNV94L 4TNV98 4TNV98T 3TNV82A 3TNV84 T 4TNV84 T 3TNV88 4TNV88 ...
Page 31: ...1 General 1 4 Engine External Views 16 ...
Page 32: ...1 General 1 5 Structural Description 17 ...
Page 156: ...9 Starting Motor 9 1 2 Components 141 ...
Page 157: ...9 Starting Motor 9 1 3 Troubleshooting 142 ...
Page 172: ...9 Starting Motor 9 2 3 Troubleshooting 157 ...
Page 175: ...9 Starting Motor 2 Removal of magnetic switch Remove the M6 bolts 10mm 2 160 ...
Page 185: ...9 Starting Motor 3 Brush 1 Check wear of the brush and the brush spring force 170 ...
Page 194: ...10 Alternator 179 10 1 6 Troubleshooting ...
Page 195: ...11 Electric Wiring 180 11 ELECTRIC WIRING 11 1 Electric Wiring Diagram ...
Page 213: ......


