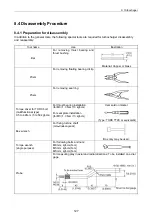
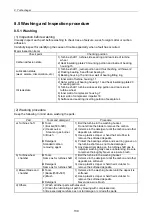


8. Turbochager
8.7 Handling after Disassembly and Reassembly
When installing the turbocharger on the engine or handling the turbocharger after installation, strictly
observe the instructions given below.
Especially pay careful attention for preventing foreign matter entrance into the turbocharger.
8.7.1 Instructions for turbocharger installation
Lubrication system
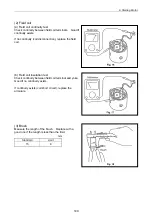
1) Pour new lubricating oil through the oil filler port before installation on the engine, and manually
turn the turbine shaft to lubricate the floating and thrust bearings.
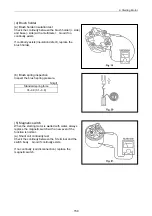
2) Flush the oil inlet pipe from the engine and outlet pipe, and check no crushed pipe nor dirt or
foreign matter remaining in the pipes.
3) Connect the pipes securely so as to ensure no oil leak from joints.
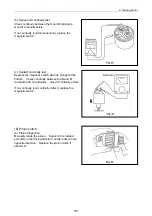
Intake system
1) Check no foreign matter or dirt in the intake line.
2) Connect securely to prevent any air leak from joints with the intake duct and air cleaner.
Exhaust system
1) Check no dirt or foreign matter in the exhaust system.
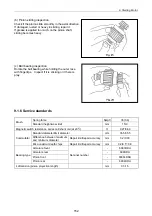
2) Since heat resistant steel is used for the bolts and nuts, do not use general bolts and nuts for
installation. Always apply anti-seizure agent on fastening bolts and nuts to be tightened.
(Use heat-resistant hexagon bolts for the turbine housing.)
3) Connect exhaust pipes securely to prevent gas leak from each pipe joint.
137
Summary of Contents for 3TNV Series
Page 1: ...4TNV106 4TNV106T 4TNV94L 4TNV98 4TNV98T 3TNV82A 3TNV84 T 4TNV84 T 3TNV88 4TNV88 ...
Page 31: ...1 General 1 4 Engine External Views 16 ...
Page 32: ...1 General 1 5 Structural Description 17 ...
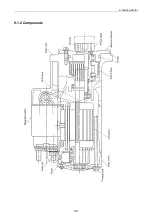
Page 156: ...9 Starting Motor 9 1 2 Components 141 ...
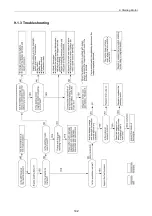
Page 157: ...9 Starting Motor 9 1 3 Troubleshooting 142 ...
Page 172: ...9 Starting Motor 9 2 3 Troubleshooting 157 ...
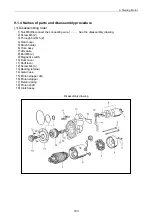
Page 175: ...9 Starting Motor 2 Removal of magnetic switch Remove the M6 bolts 10mm 2 160 ...
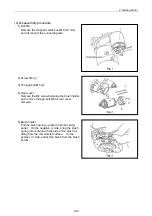
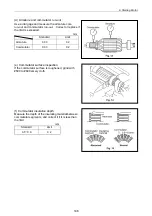
Page 185: ...9 Starting Motor 3 Brush 1 Check wear of the brush and the brush spring force 170 ...
Page 194: ...10 Alternator 179 10 1 6 Troubleshooting ...
Page 195: ...11 Electric Wiring 180 11 ELECTRIC WIRING 11 1 Electric Wiring Diagram ...
Page 213: ......


