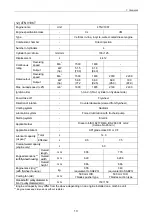

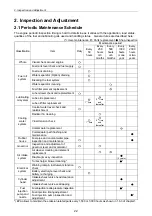

2. Inspection and Adjustment
2.2 Periodic Inspection and Maintenance Procedure
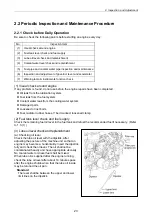
2.2.1 Check before Daily Operation
Be sure to check the following points before starting an engine every day.
No. Inspection
Item
(1)
Visual check around engine
(2)
Fuel tank level check and fuel supply
(3)
Lube oil level check and replenishment
(4)
Coolant water level check and replenishment
(5)
Fuel pipe and coolant water pipe inspection and maintenance
(6)
Inspection and adjustment of governor lever and accelerator
(7)
Warning lamp & instruments function check
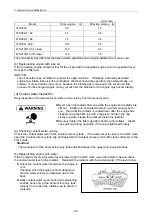
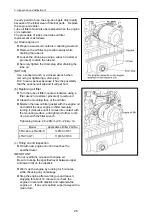
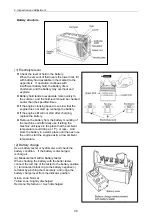
(1) Visual check around engine
If any problem is found, do not use before the engine repairs have been completed.
Oil leak from the lubrication system
Fuel leak from the fuel system
Coolant water leak from the cooling water system
Damaged parts
Loosened or lost bolts
Fuel, radiator rubber hoses, V belt cracked, loosened clamp
(2) Fuel tank level check and fuel supply
Check the remaining fuel oil level in the fuel tank and refuel the recommended fuel if necessary. (Refer
to 1.3.(1) )
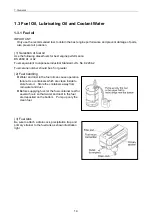
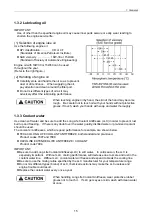
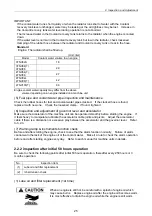
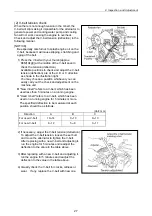
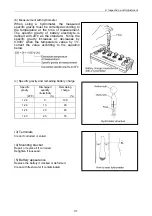
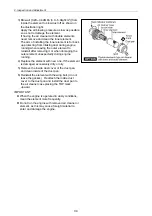
(3) Lube oil level check and replenishment
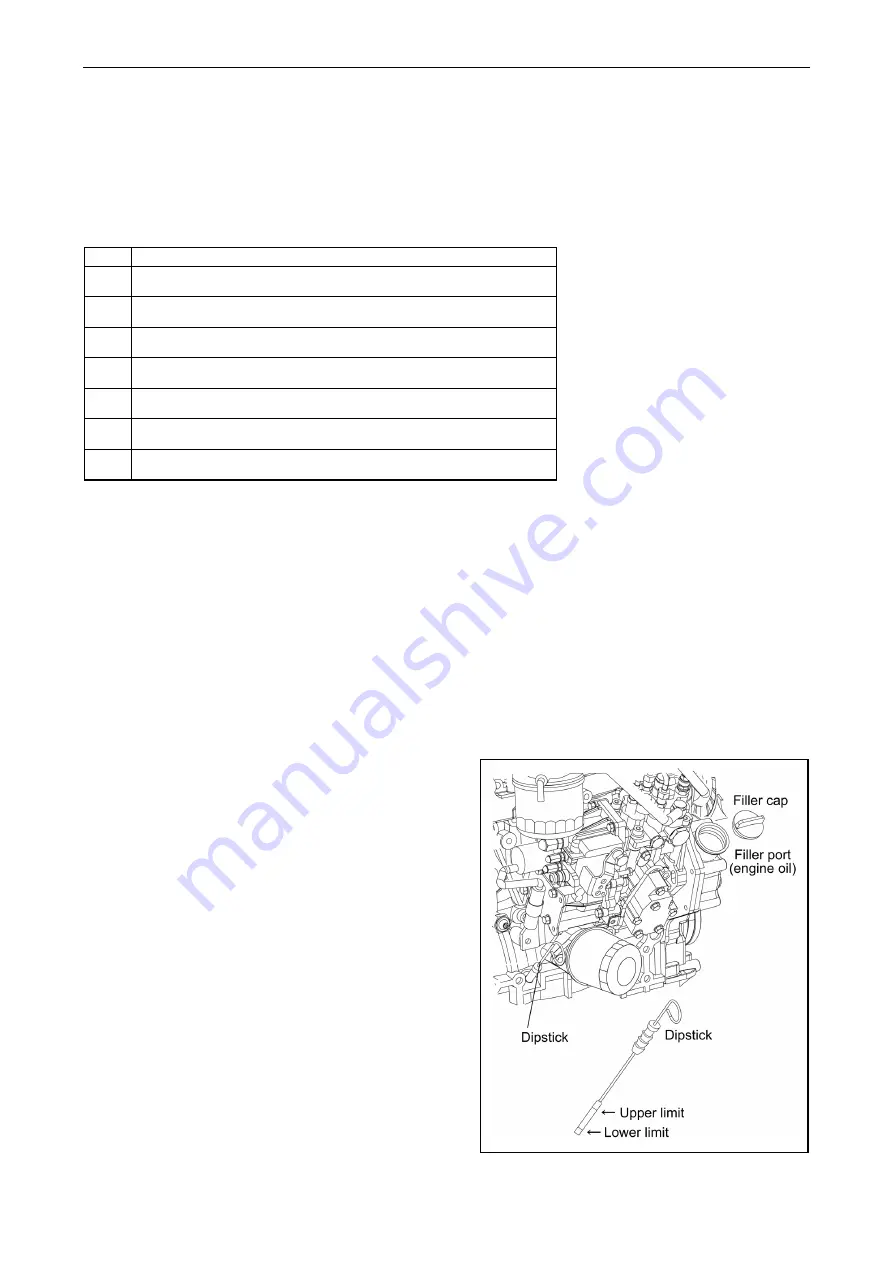
(a) Checking oil level
Check the lube oil level with the dipstick, after
adjusting the posture of the machine unit so that an
engine may become a horizontality. Insert the dipstick
fully and check the oil level. The oil shall not be
contaminated heavily and have appropriate viscosity.
No coolant water or diesel fuel shall be mixed.
When lube oil is supplied after the engine running,
check the lube oil level after about 10 minutes pass
after the engine shutdown so that the lube oil inside
may be retuned the oil pan.
Standard
The level shall be between the upper and lower
limit lines on the dipstick.
23
Summary of Contents for 3TNV Series
Page 1: ...4TNV106 4TNV106T 4TNV94L 4TNV98 4TNV98T 3TNV82A 3TNV84 T 4TNV84 T 3TNV88 4TNV88 ...
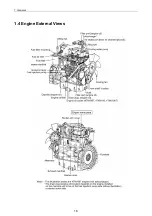
Page 31: ...1 General 1 4 Engine External Views 16 ...
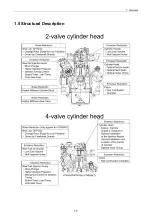
Page 32: ...1 General 1 5 Structural Description 17 ...
Page 156: ...9 Starting Motor 9 1 2 Components 141 ...
Page 157: ...9 Starting Motor 9 1 3 Troubleshooting 142 ...
Page 172: ...9 Starting Motor 9 2 3 Troubleshooting 157 ...
Page 175: ...9 Starting Motor 2 Removal of magnetic switch Remove the M6 bolts 10mm 2 160 ...
Page 185: ...9 Starting Motor 3 Brush 1 Check wear of the brush and the brush spring force 170 ...
Page 194: ...10 Alternator 179 10 1 6 Troubleshooting ...
Page 195: ...11 Electric Wiring 180 11 ELECTRIC WIRING 11 1 Electric Wiring Diagram ...
Page 213: ......


